You can define an Imposition to assign it to a Printess Template or Document. You can test it on the Template level at the Print Dialog.
Learn more about the Print Dialog
On a Document level you can overwrite the Template Imposition at the Document Tab of the Features Panel.
Learn how to overwrite a Template Imposition for a particular Document.
Press the button Add Imposition to open the dialog for defining a new Imposition.
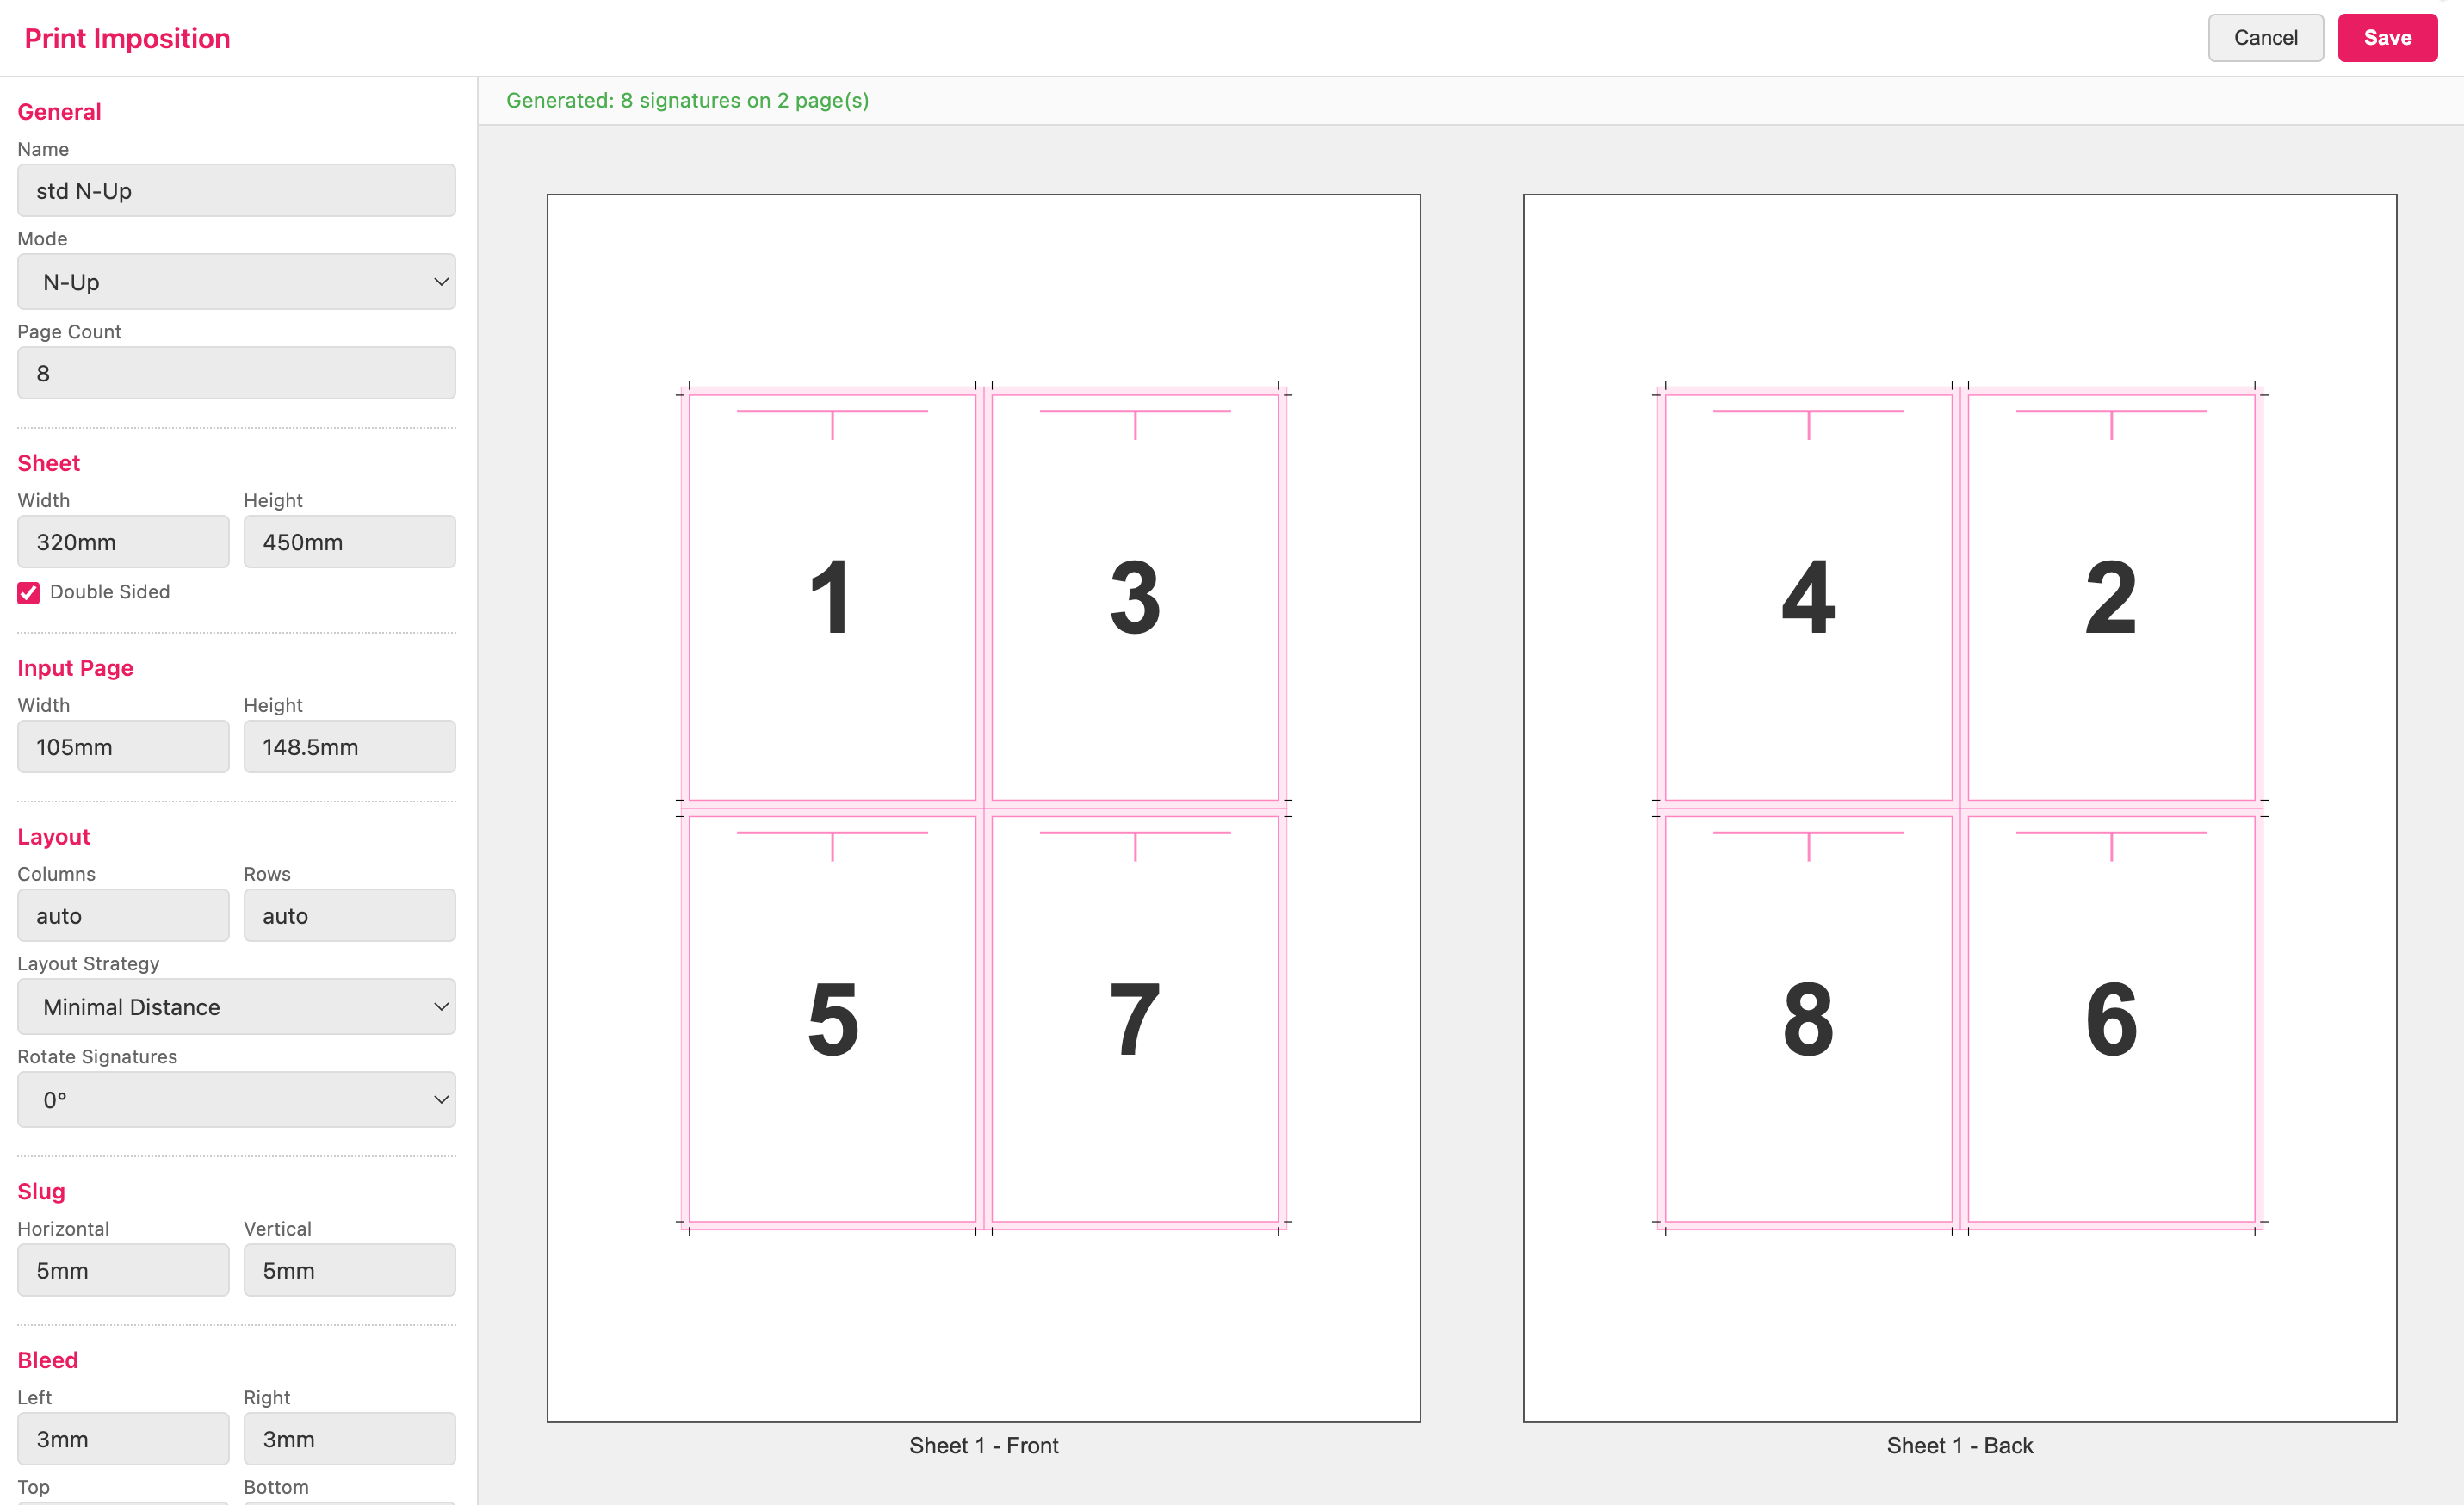
By default an example Imposition will be displayed - “N-up”.
Name
Type in a name for your Imposition.
Mode
Choose the Imposition mode matching your finishing method.
Page Count
Define the number of pages of your print file.
Width & Height
Define the size of your print sheet.
Double Sided
Activate this option if you would like to print on the front and the backside of the sheet.
Define the page size of your Printess Document - without bleed!
Columns & Rows
By default both values are set to “auto” to get as many pages on the sheet as possible. But you can also define the columns and rows manually. Just type in a number.
Layout Strategy
By default it is set to Minimal Distance. If you set it to Gutter you can define the distance of the pages manually.
Rotate Signatures
Rotate the pages on the sheet.
Define the area outside the page’s trim. The cropping marks are taking the entire slug minus the Distance to the document’s edge you are defining.
Define the Bleed for the four edges of the page.
You can define a Gripper area on the left, right, top and bottom of your sheet.
Define the cropping marks.
Distance
Define the Distance of the cropping marks to the edges of the pages.
Thickness
Define the Thickness of the cropping marks.
Color
Define the Color of the cropping marks. By default it is set to “cmyk 0 0 0 1” which equals 100% K. You can also use RGB values: “rgb x x x”.
Strategy
You can print “All Marks” or “Outside Only”.