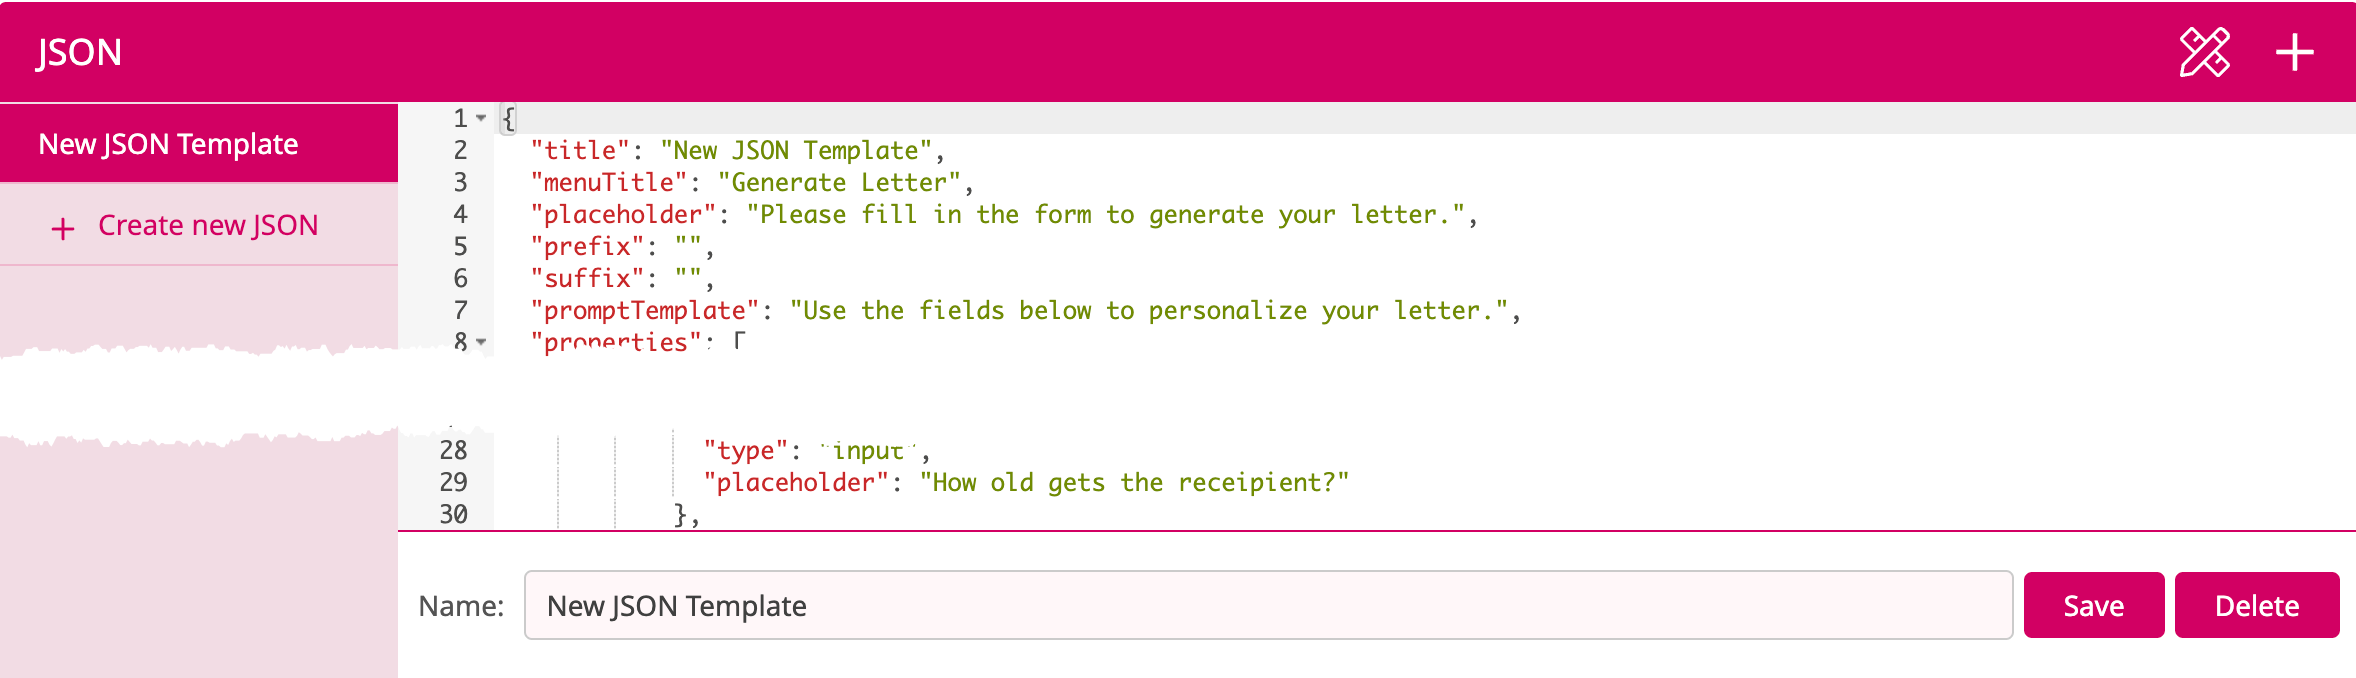
Here you can define JSONs to be used by the AI Letter Generator. For each Printess Template you can assign one JSON File.
Learn more about the AI Letter Generator
If you have saved a JSON File you can assign it at the Text Settings Tab of the Buyer View Appearance Settings in the Printess Editor.
Where to select the JSON for the AI Letter Generator
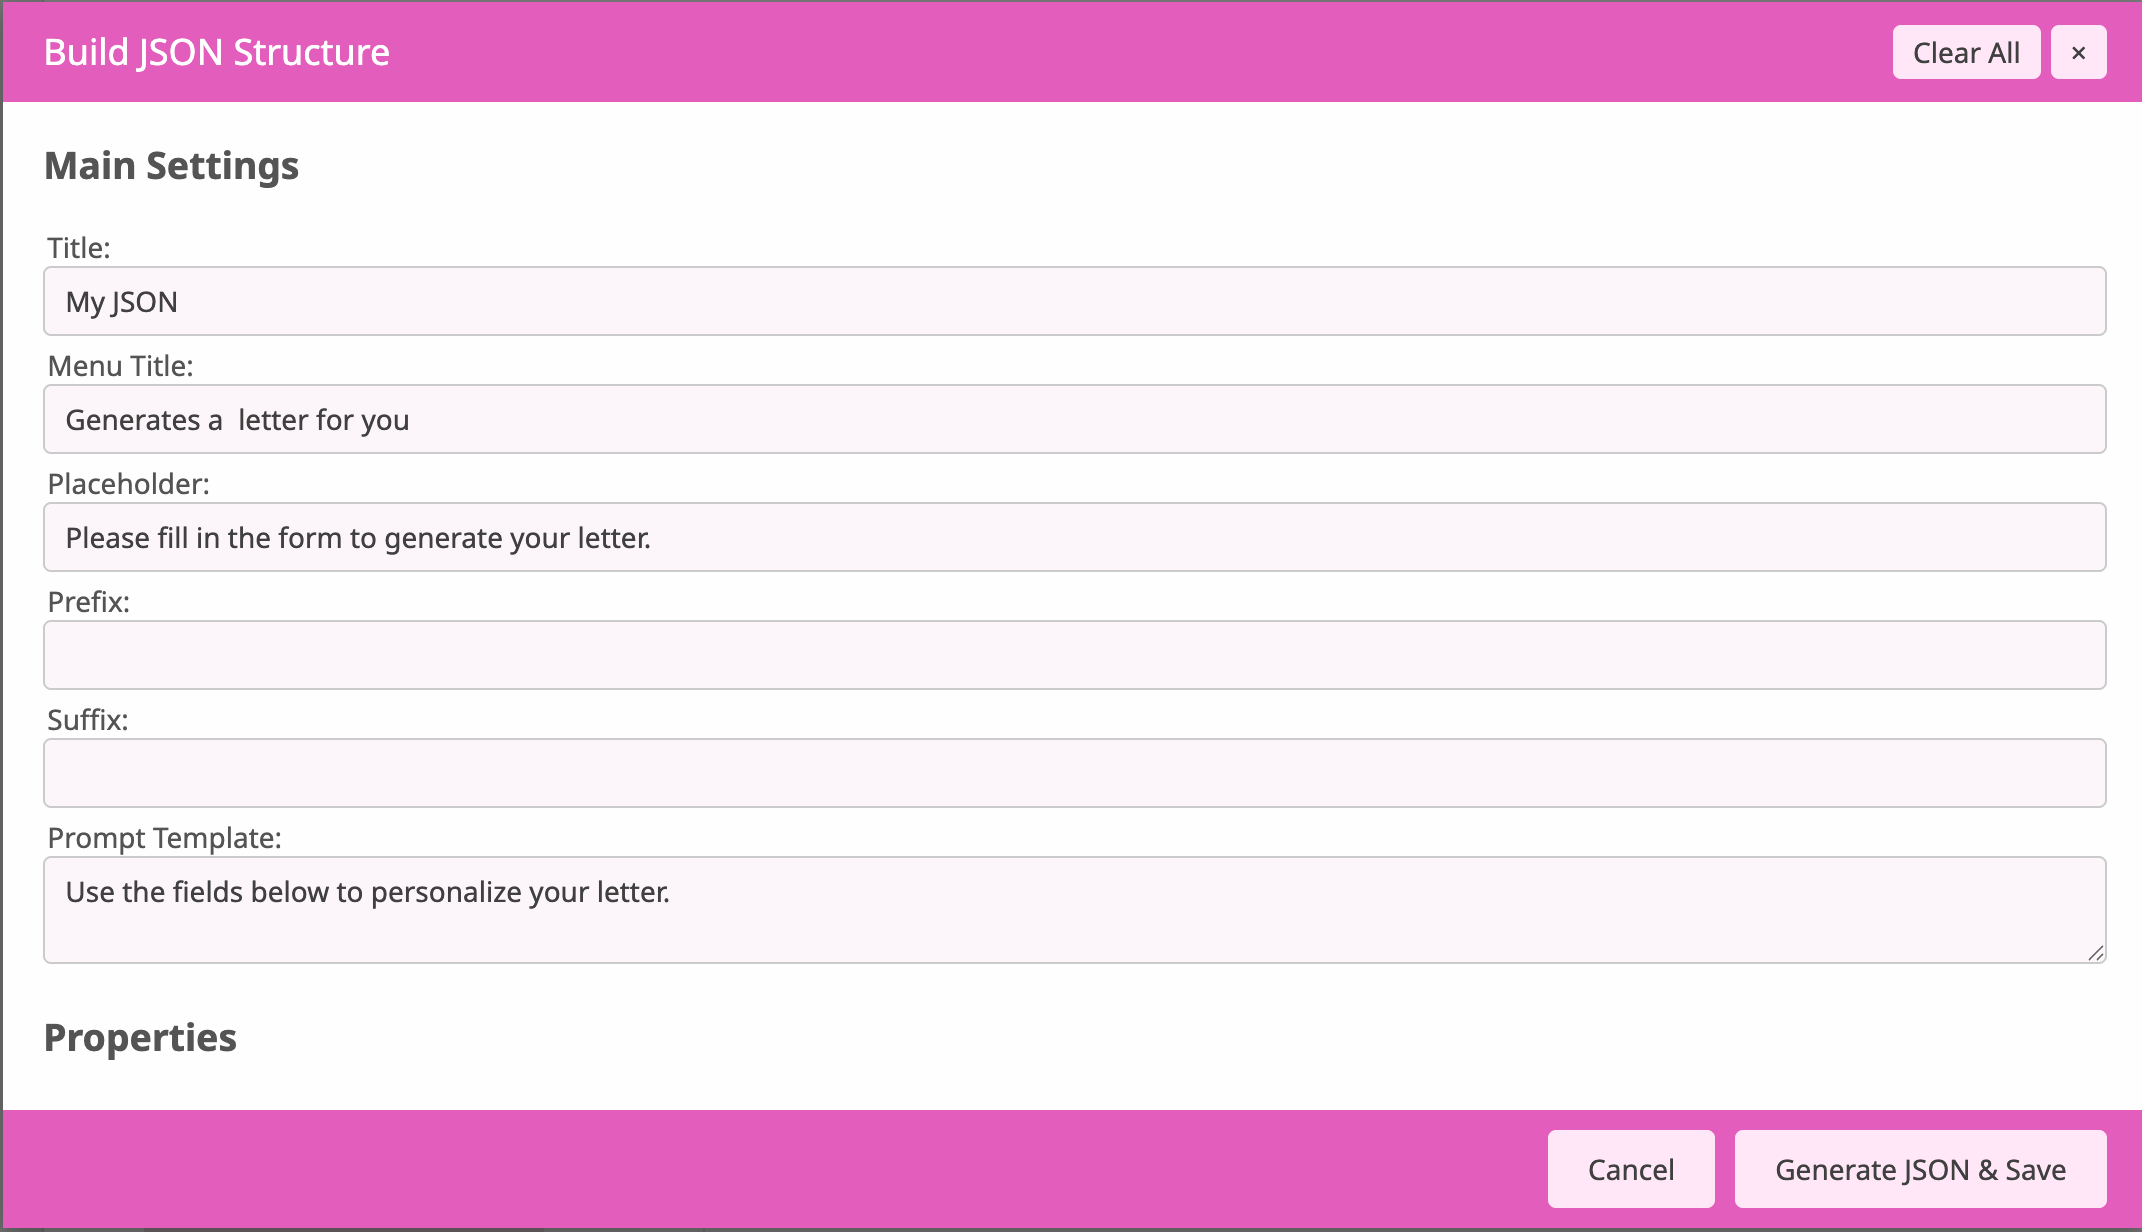
Each JSON needs a defined:
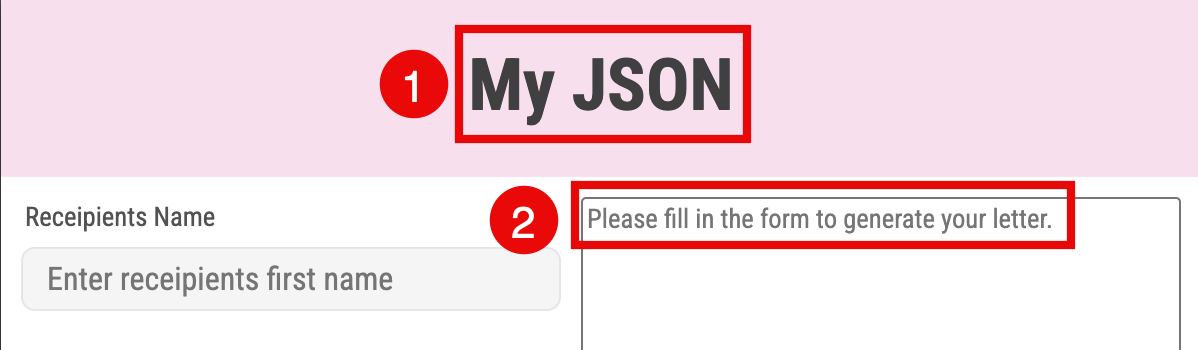
Title
It will be the name of the JSON File displayed here in the JSON List. And it is the headline of the **AI Letter Generator at the Buyer Side. (1.)
Placeholder
Is a hint for the Buyer. It explains what exactly should be entered into the input field. (2.)
Prompt Template
The instruction text passed to the AI after form input.
Properties
Fields shown step-by-step to Buyer to lead him through the configuration.
You’ve got two different ways to add a JSON File to the list.
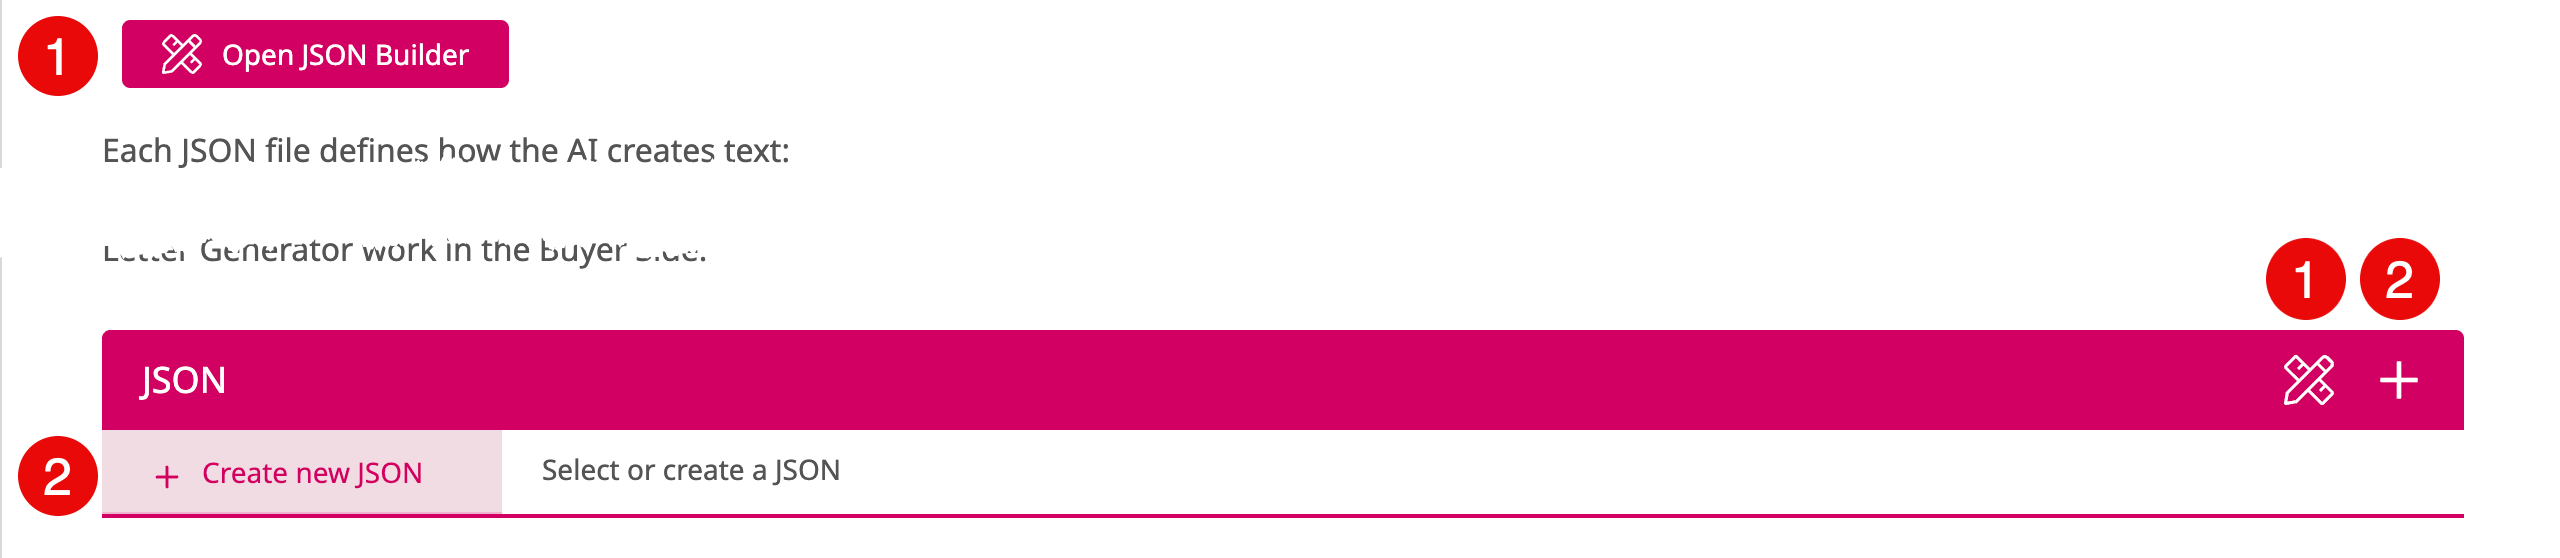
If you click on one of the two JSON Builder icons a separate dialog will open to lead you set by step through the creation of a JSON files - which is a great help for non coders.
If the JSON list below is empty, the JSON Builder will be empty two. As soon as an existing JSON File is selected in the list, the JSON Builder will load it. You can then edit the loaded JSON or press Clear All at the upper right to start from scratch to define a new JSON.
If you click on one of the two Plus icons the Printess default JSON will be copied into the list.
You can now directly edit the code of that JSON or you can open the JSON Builder to edit it.