Amazon Custom lets Buyers personalize your listings directly on Amazon, using Amazon’s own customizer widget instead of the Printess Editor. When such an order comes in, Amazon hands you a customization ZIP file containing the Buyer’s inputs and uploaded images. Printess can read that ZIP file directly and turn it into a ready-to-produce design, so you never have to parse Amazon’s customization JSON yourself.
The integration is a single backend call. You point Printess at your template and at the URL of the Amazon customization ZIP file, and Printess returns a Save Token that already carries the Buyer’s personalization:
production/savetoken/create with the template name and one applyAmazonCustomizationData action.saveToken plus a thumbnailUrl.templateName to the produce call.The result is a normal Printess Save Token. It shows up in the Save Tokens list of the account portal, can be opened in the designer view for inspection, and carries the ZIP file URL in its buyer log so you can always trace which Amazon order it came from.
Your Printess template has to mirror the structure of the Amazon customizer, because everything is matched by name.
The document must have a size of 400 x 400 in any supported unit. Amazon reports all positions, dimensions and scales of the customizer in its own 400 x 400 coordinate space, and Printess applies those numbers using the document’s own unit. If the document has a different size, images and texts will land in the wrong place.
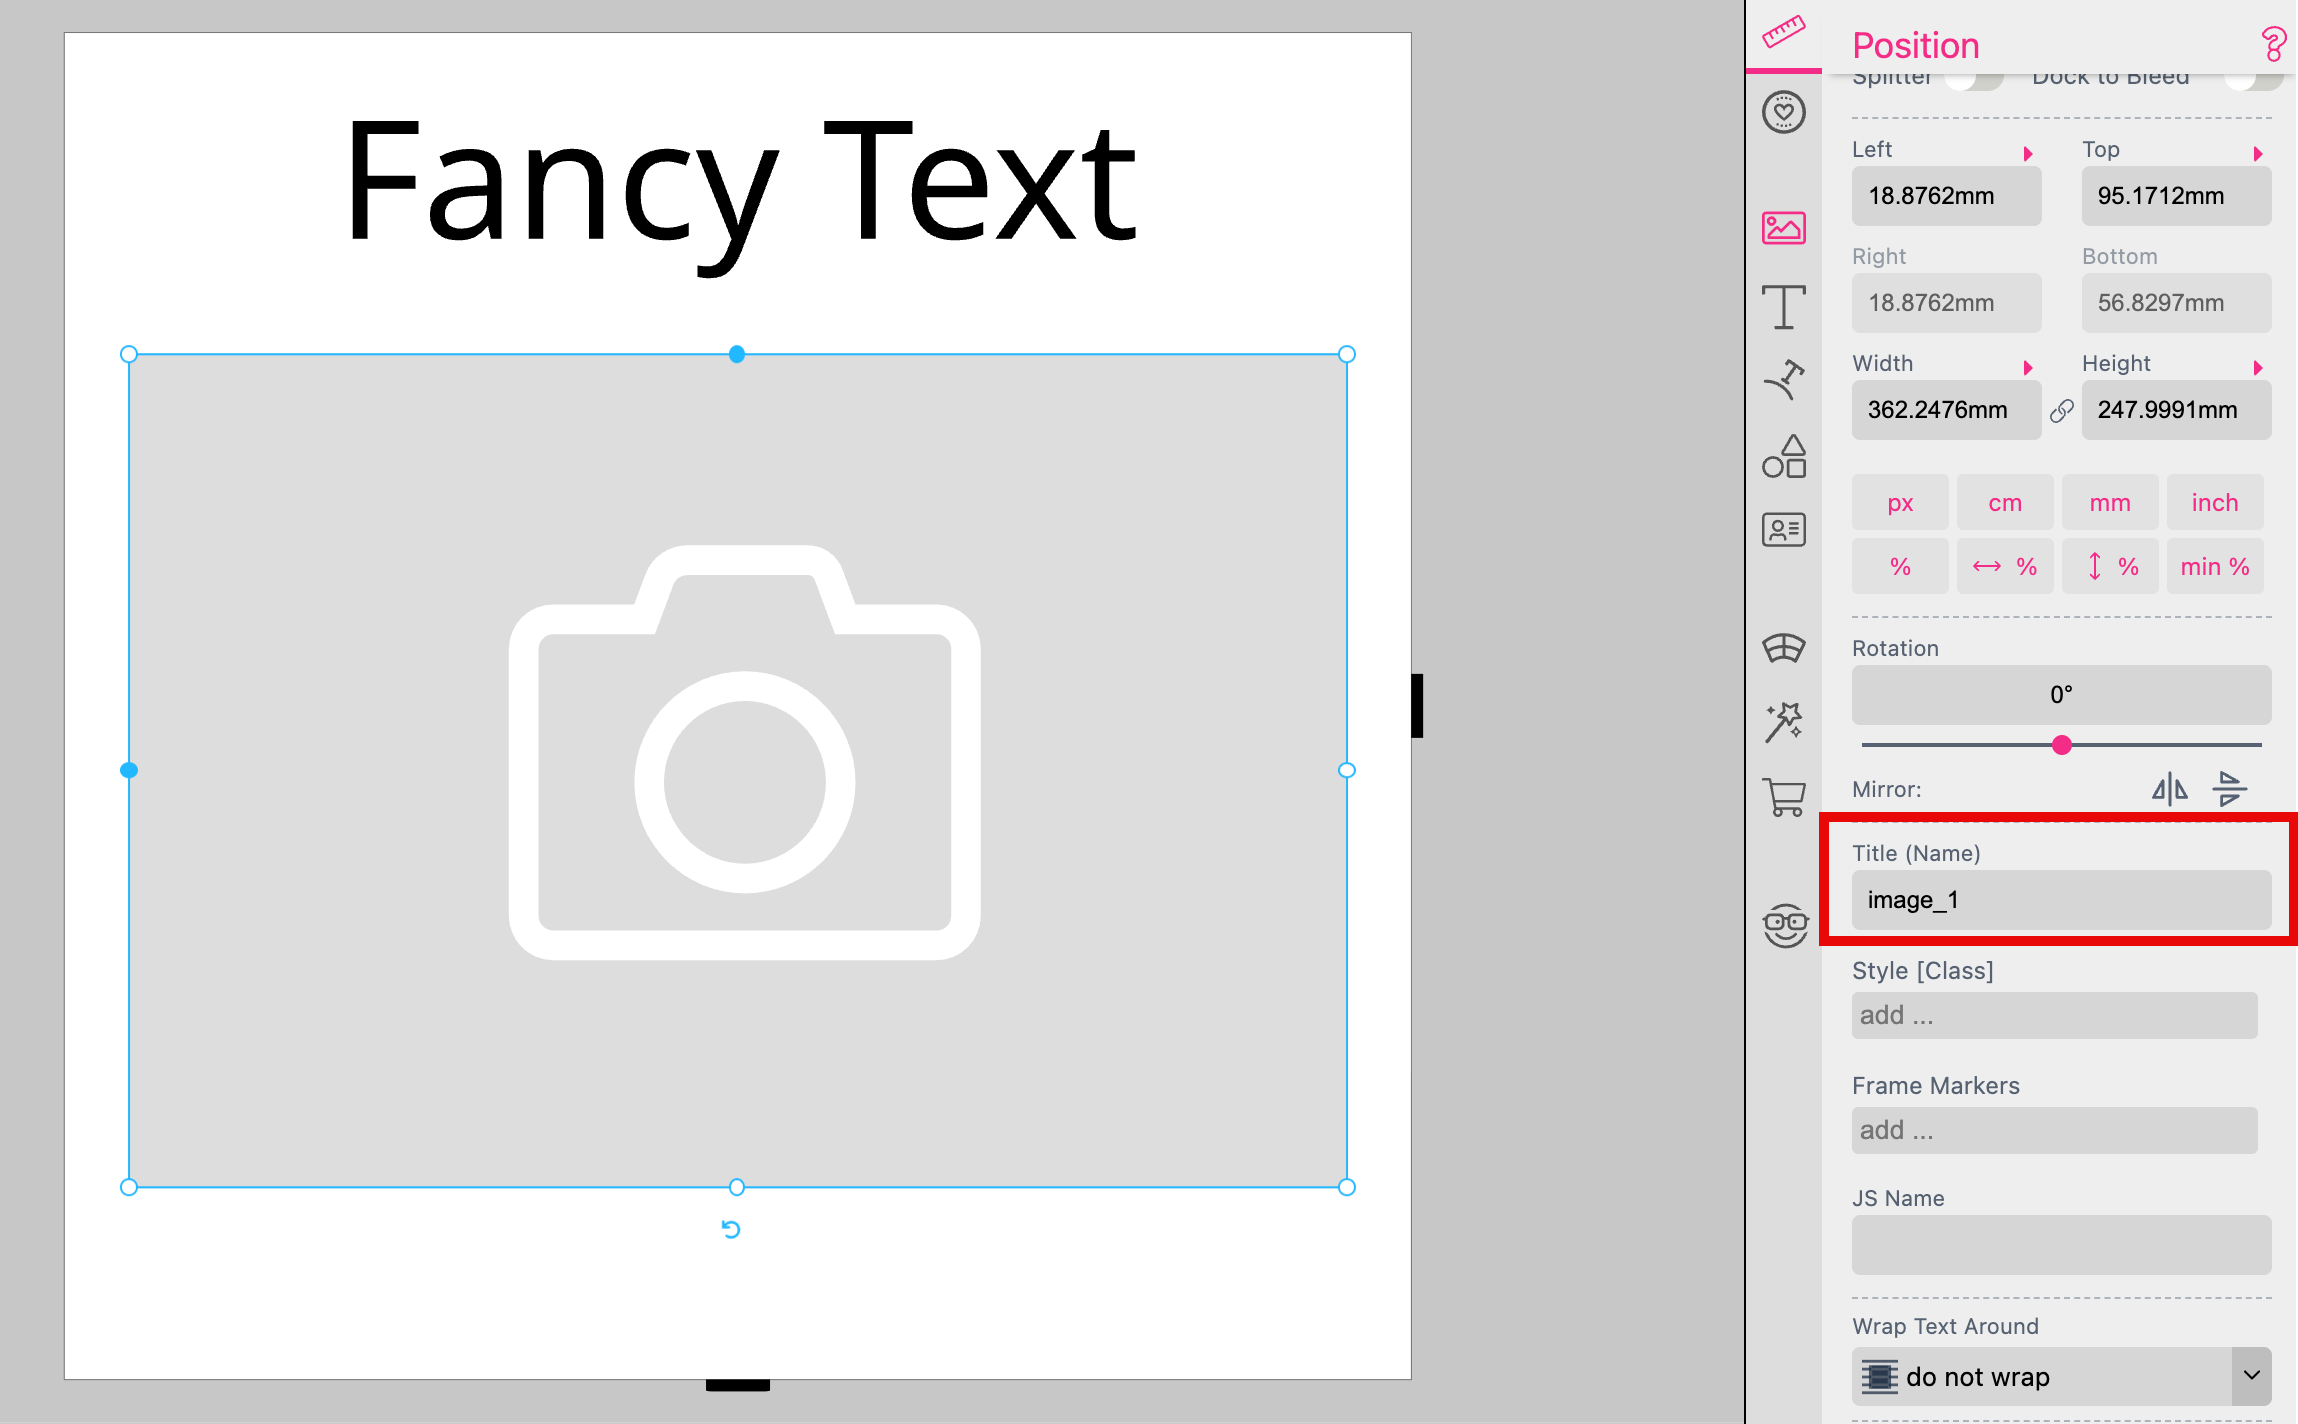
image_1, the frame title must be image_1.
text_1.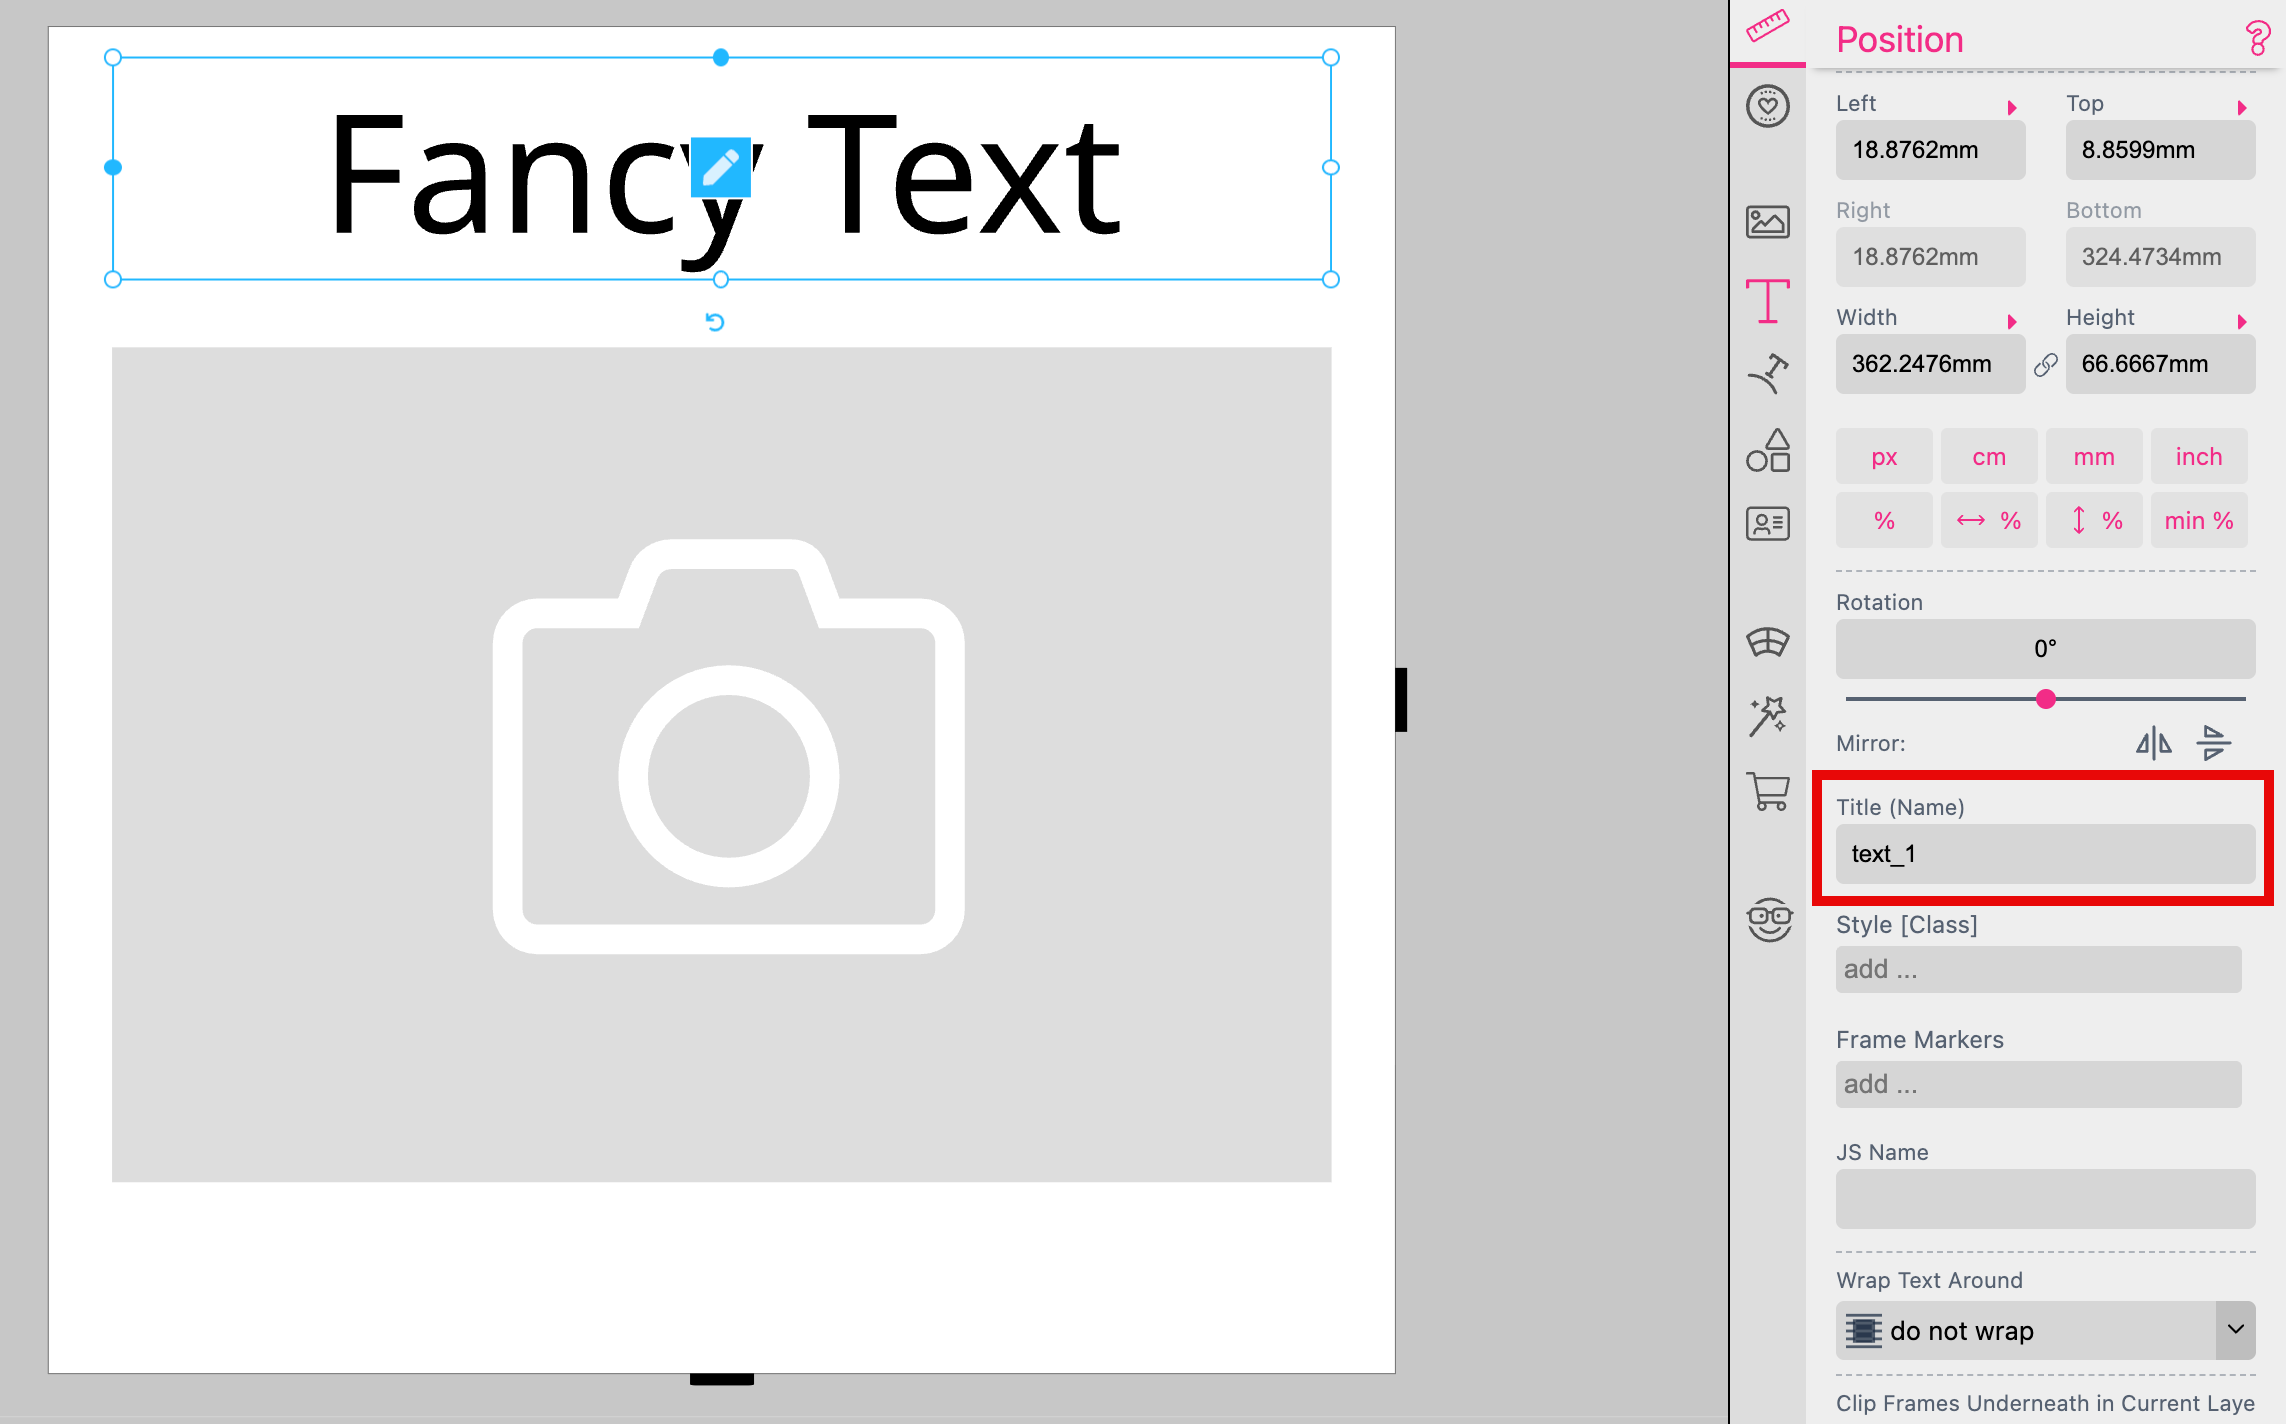
Buyer-uploaded images are imported into the Printess account and replace the content of the frame whose title matches the customizer name. Printess then adjusts the frame to the placement from the customizer: position, width and height (dimension multiplied by scale) and rotation, anchored at the top left corner of the frame.
Nothing else is needed for images. No Form Field, no Style Class.
Text customizations are applied through Form Fields, not by writing into the frame. Printess sets the Form Field whose name matches the customizer name to the text the Buyer entered, so the frame picks up the value the same way it would in the Buyer Side Editor.
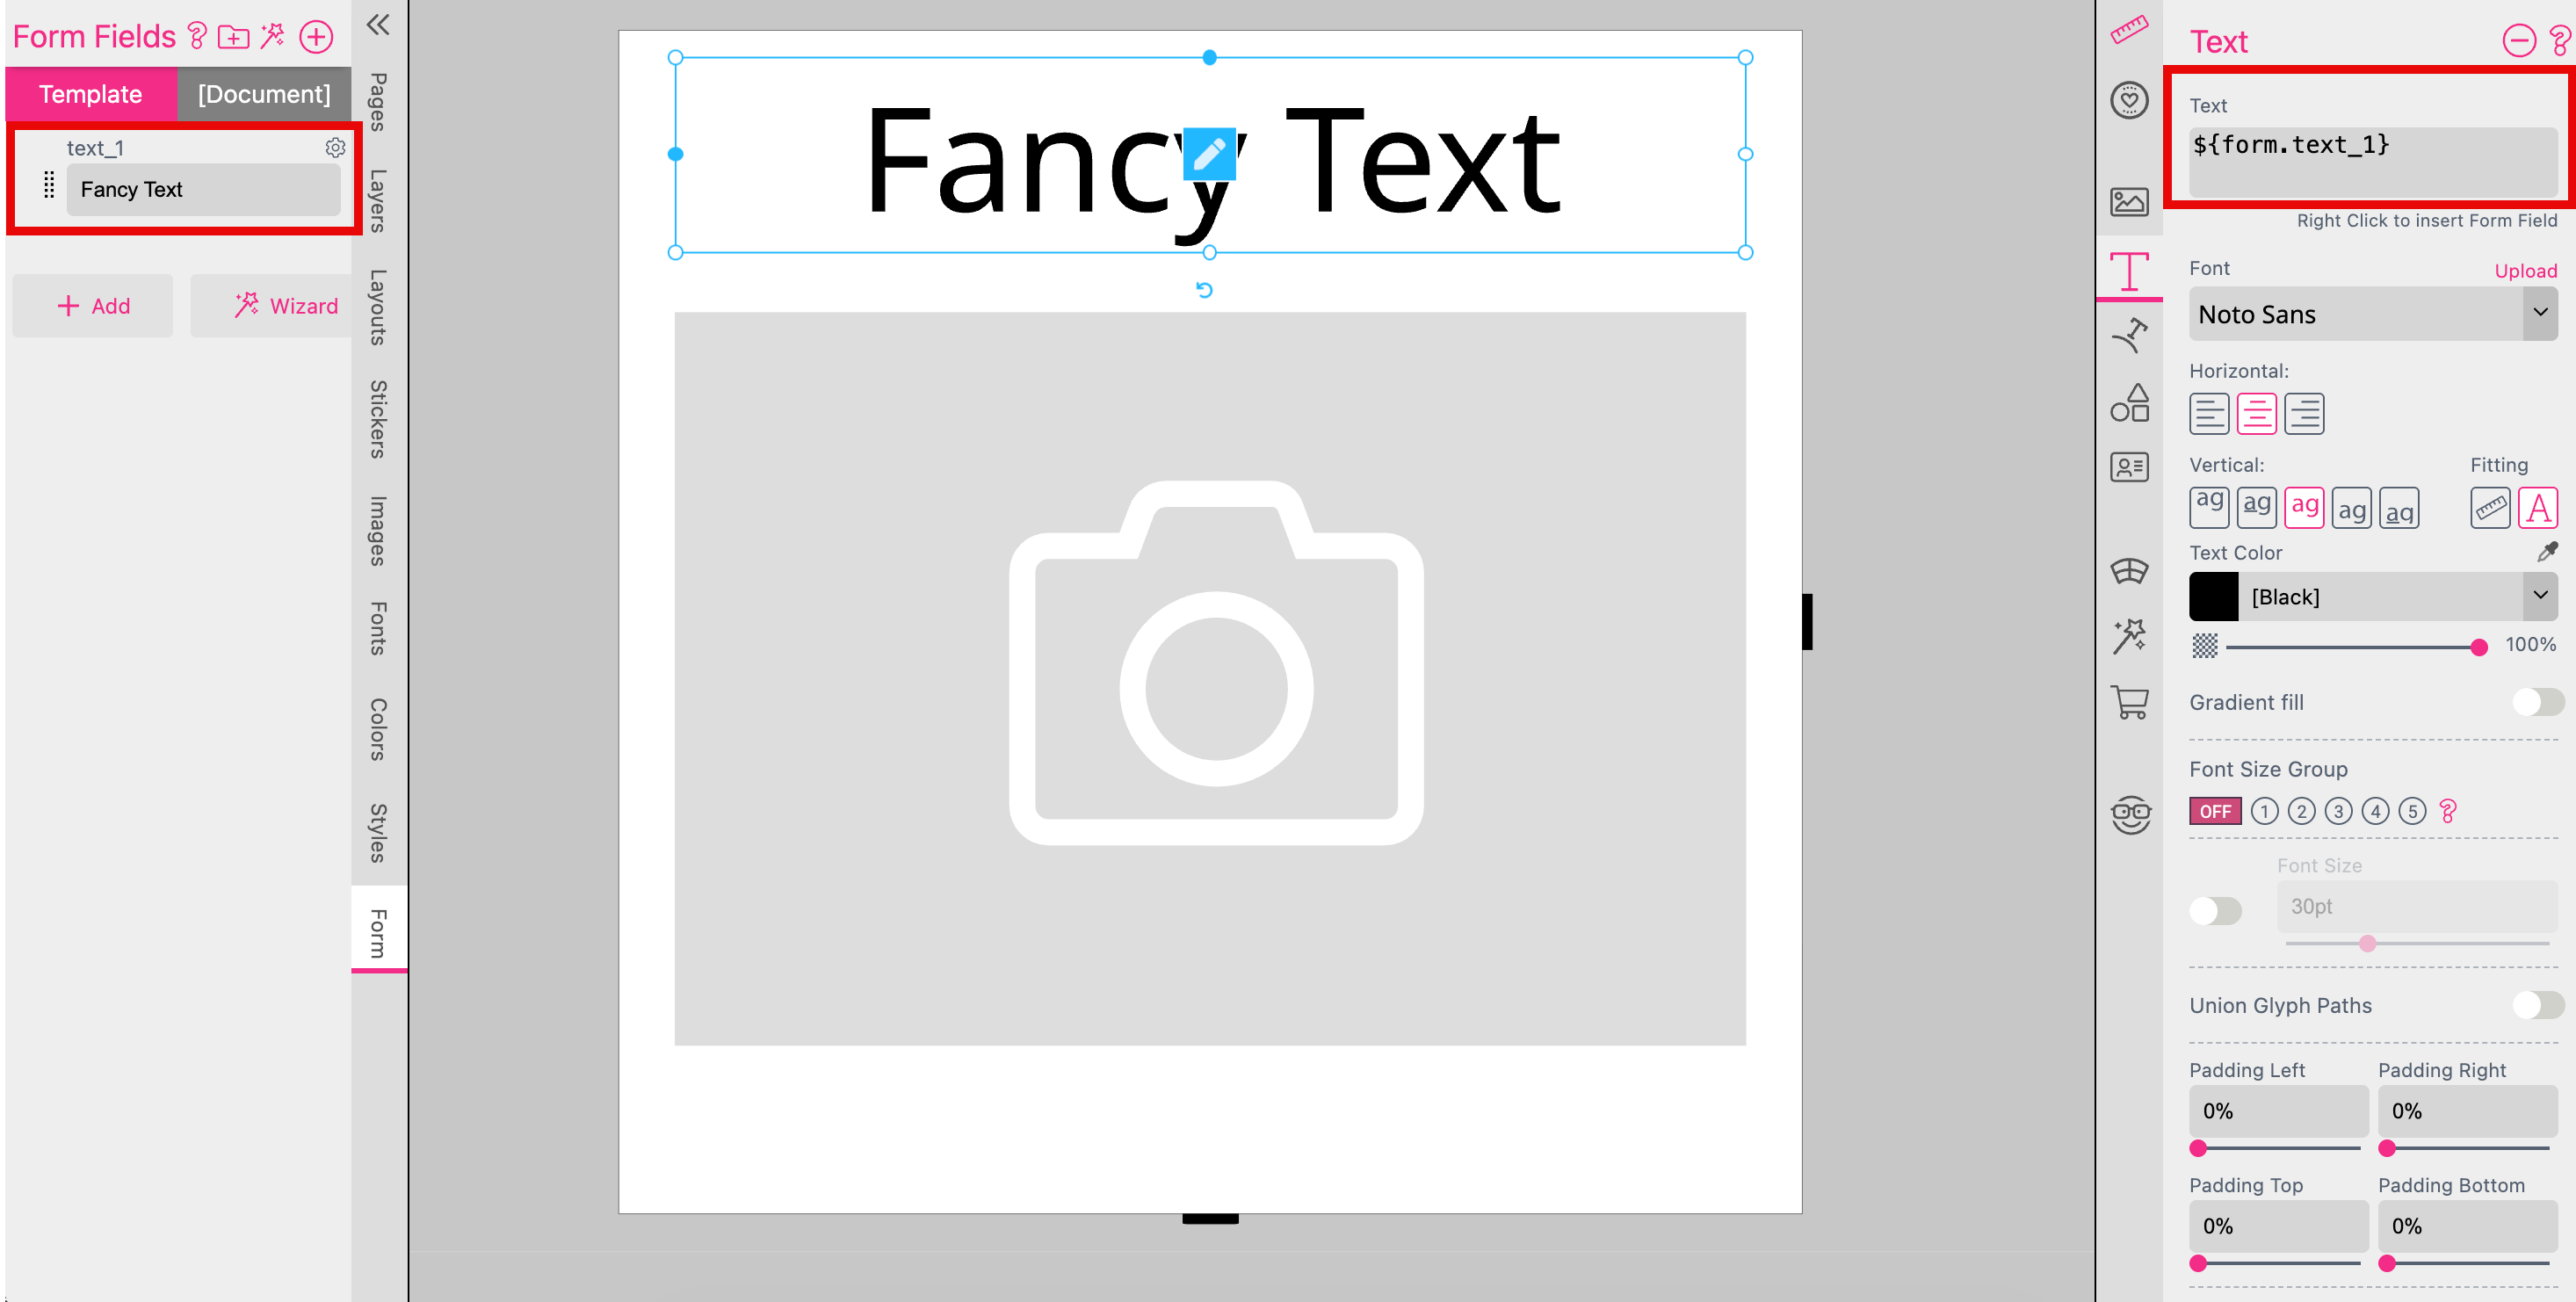
If the customizer also reports a placement for the text container, the text frame is repositioned and rotated just like an image frame. If it only carries a fixed default position, that one is used instead.
Font and color choices from the customizer are applied through two additional form fields per text, following a fixed naming rule:
| Customizer field | Printess form field | Value Printess writes |
|---|---|---|
text_1 |
text_1 |
the text the buyer entered |
font of text_1 |
text_1_font |
Amazon’s font family name |
color of text_1 |
text_1_color |
Amazon’s color name |
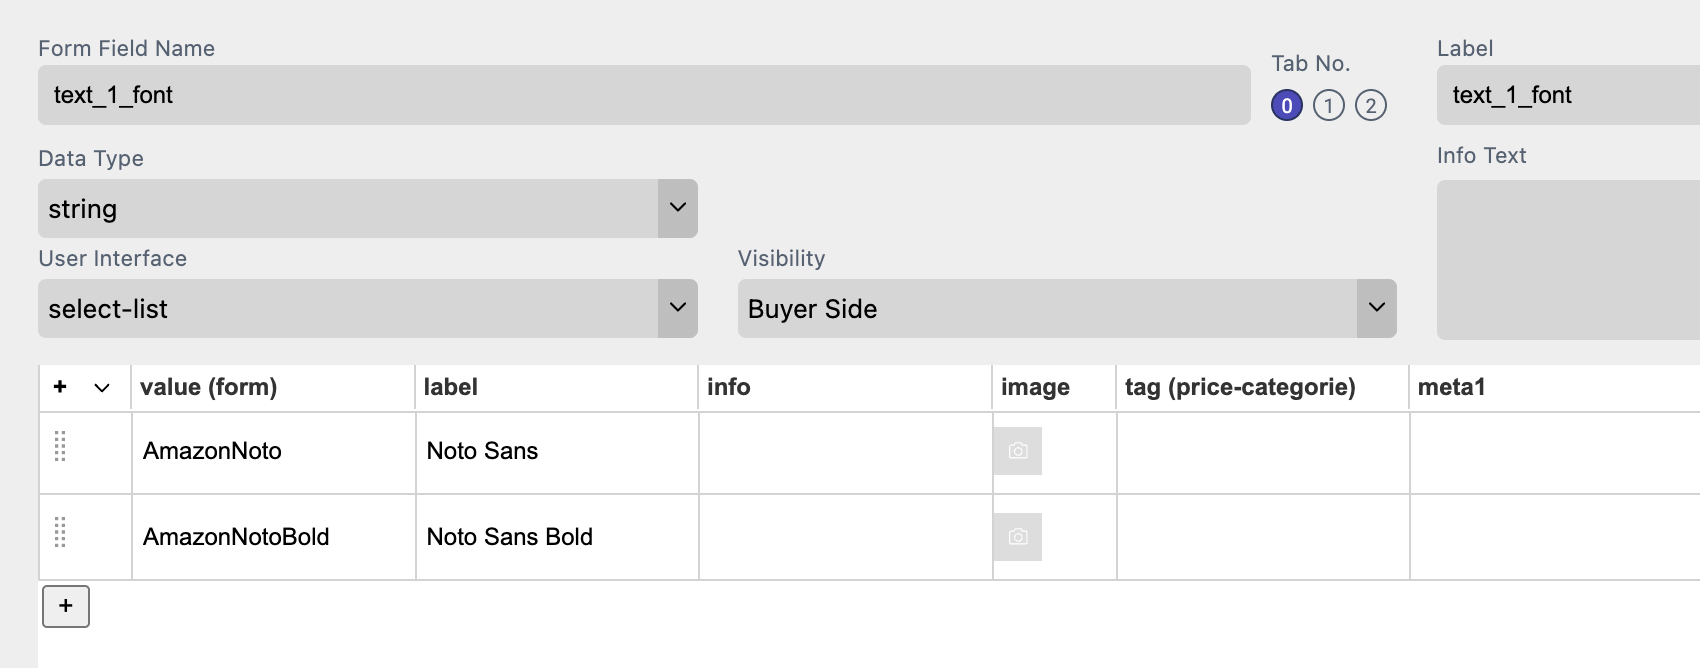
Amazon’s names are Amazon’s own. They will rarely match a Printess font name or a hex color, so use select lists for these two form fields. Printess matches the incoming value against the entry keys first and, if there is no match, against the entry labels - so you can either key the list by Amazon’s names, or key it by your own values and put Amazon’s names in the labels.
The recommended setup is to key the list by Amazon’s name and keep your own value in an alternate column: the label for fonts, meta1 for colors.
The Fonts Form Field example:
The Colors Form Field example:
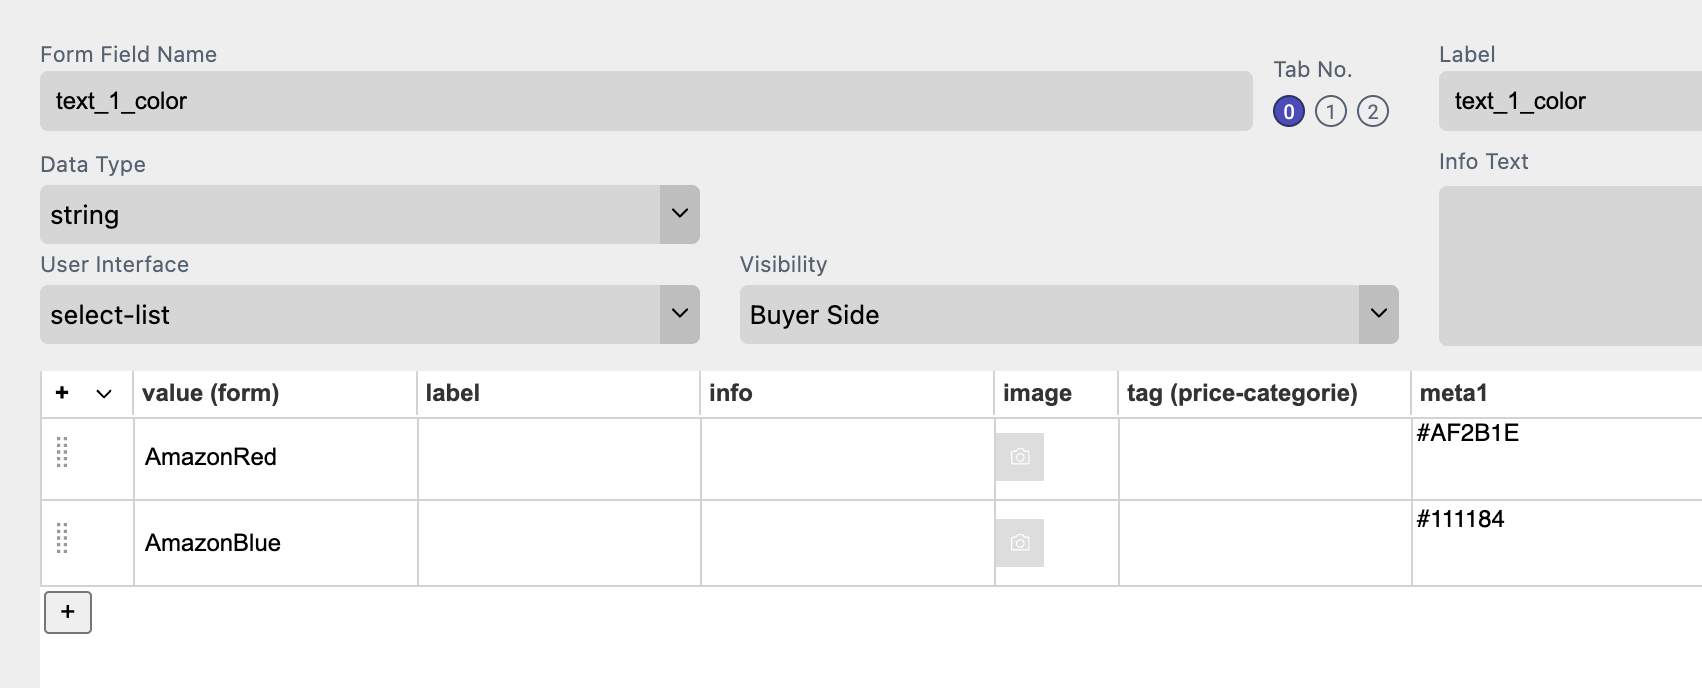
Then assign a style to the frame that reads the alternate value if it exists and falls back to the raw form field value:
.text_1 {
  font: ${label.text_1_font ? label.text_1_font : form.text_1_font};
  fontColor: ${meta1.text_1_color ? meta1.text_1_color : form.text_1_color};
}
Add the style class (text_1 in this example) to the text frame so the style applies.
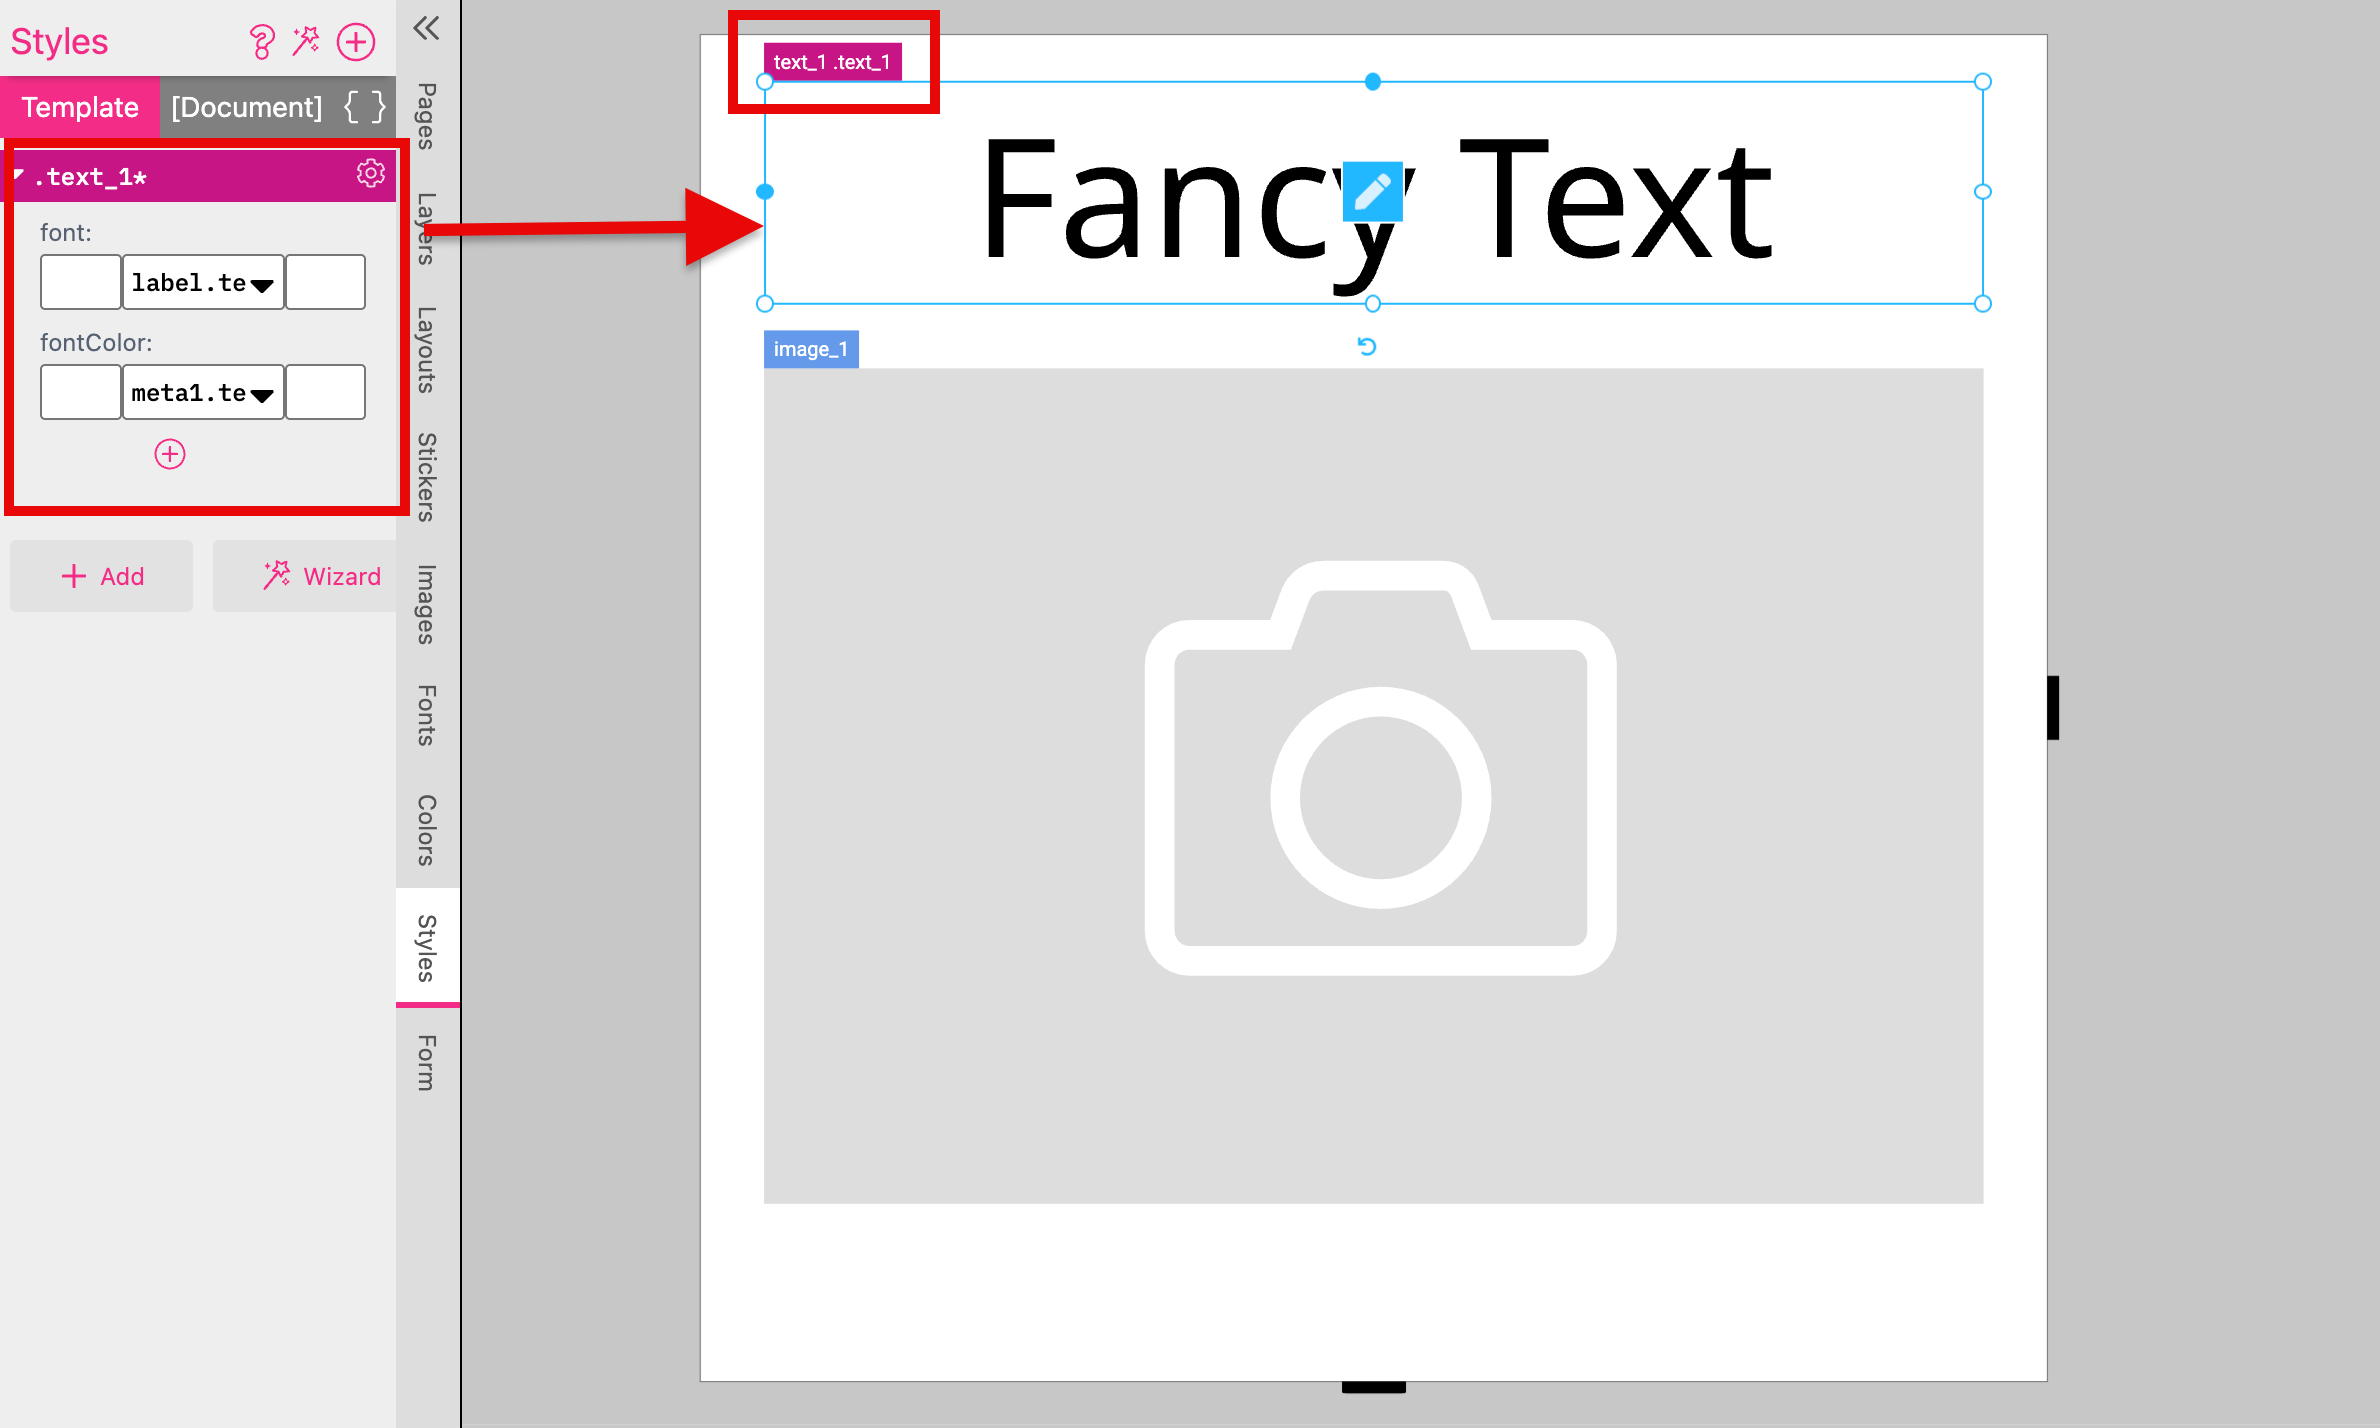
How to assign a Style to a Frame
Non-visual customizations - Amazon’s Options type, used for dropdowns such as size or finish - are written into a form field named after the option. Two details are worth knowing:
group#value. Printess splits at the # and uses the second segment, so a value of Size#Large sets the form field to Large.As with fonts and colors, matching against a select list falls back from entry keys to entry labels.
Call production/savetoken/create with your Printess token as Bearer in the Authorization header. Use the service token - this is a backend call and must never run in a browser.
POST https://api.printess.com/production/savetoken/create
{
  "templateName": "name of the template",
  "actions": [
    {
      "type": "applyAmazonCustomizationData",
      "amazonOrderZipFileUrl": "url to amazon customizer zip file"
    }
  ]
}
amazonOrderZipFileUrl must be an absolute URL that the Printess backend can download without authentication (a pre-signed S3 URL works well), or a data: URI carrying the ZIP file itself.
The response contains the save token and a thumbnail of the personalized design:
{
  "saveToken": "st:...",
  "thumbnailUrl": "https://..."
}
By default the call uses the published version of your template. Set "usePublishedVersion": false while you are still developing the template and want the draft to be used.
The returned save token is a normal Printess design. Pass it as templateName to production/produce exactly as you would for a design created in the buyer side editor:
{
  "templateName": "st:...",
  "externalOrderId": "your Amazon order id",
  "origin": "Amazon Custom",
  "callbackUrl": "https://your.site.example.com/callback_route",
  "outputSettings": {
    "dpi": 300
  }
}
See The Produce Call for the full round trip including status polling and callbacks.
Because the save token is a regular one, the fastest way to check a mapping is to look at the design itself.
meta1 pattern shown above.