Shopware Plugin
This guide covers everything you need to do after downloading the
PrintessShopwareIntegration-1.2.0.zip file: installing it, connecting it to
your Printess account, and turning on personalization for your first product.
The file can be downloaded from here: PrintessShopwareIntegration-1.2.0.zip
Our Github Repository containing the complete source files for this plugin can be found here: GitHub
What you’ll need before you start
A shop running Shopware 6.7 — this plugin requires Shopware 6.7.x. For older
Shopware 6.6 shops, only the deprecated “Printess Editor” plugin is available.
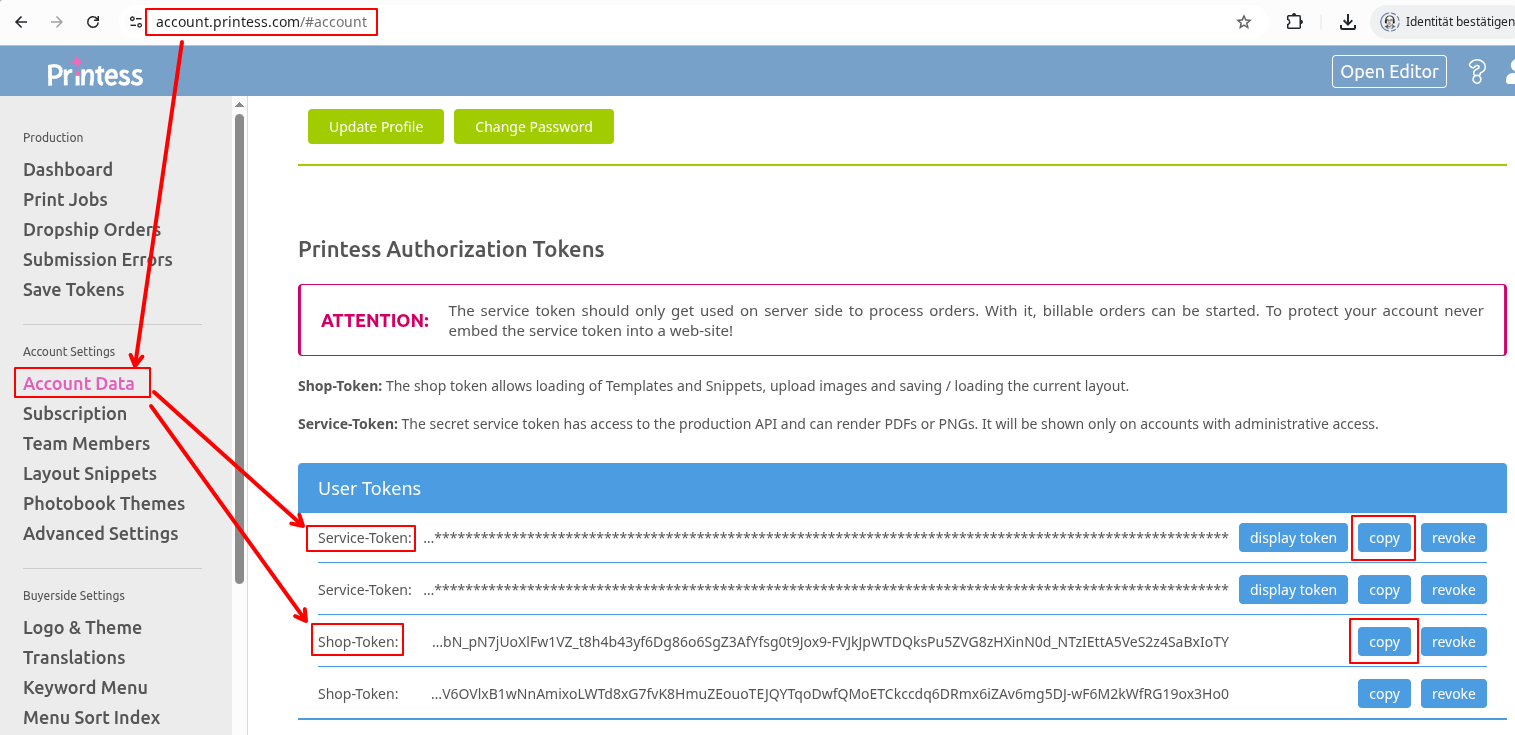
Get these from the Printess Account portal if you don’t already have them:
-
Service Token — used for server-to-server calls (order production).
-
Shop Token — used by the personalization editor in your storefront.
-
Your Editor domain and API domain, if Printess gave you custom ones
(otherwise the defaults, editor.printess.com and api.printess.com, are fine).
1. Upload the extension
-
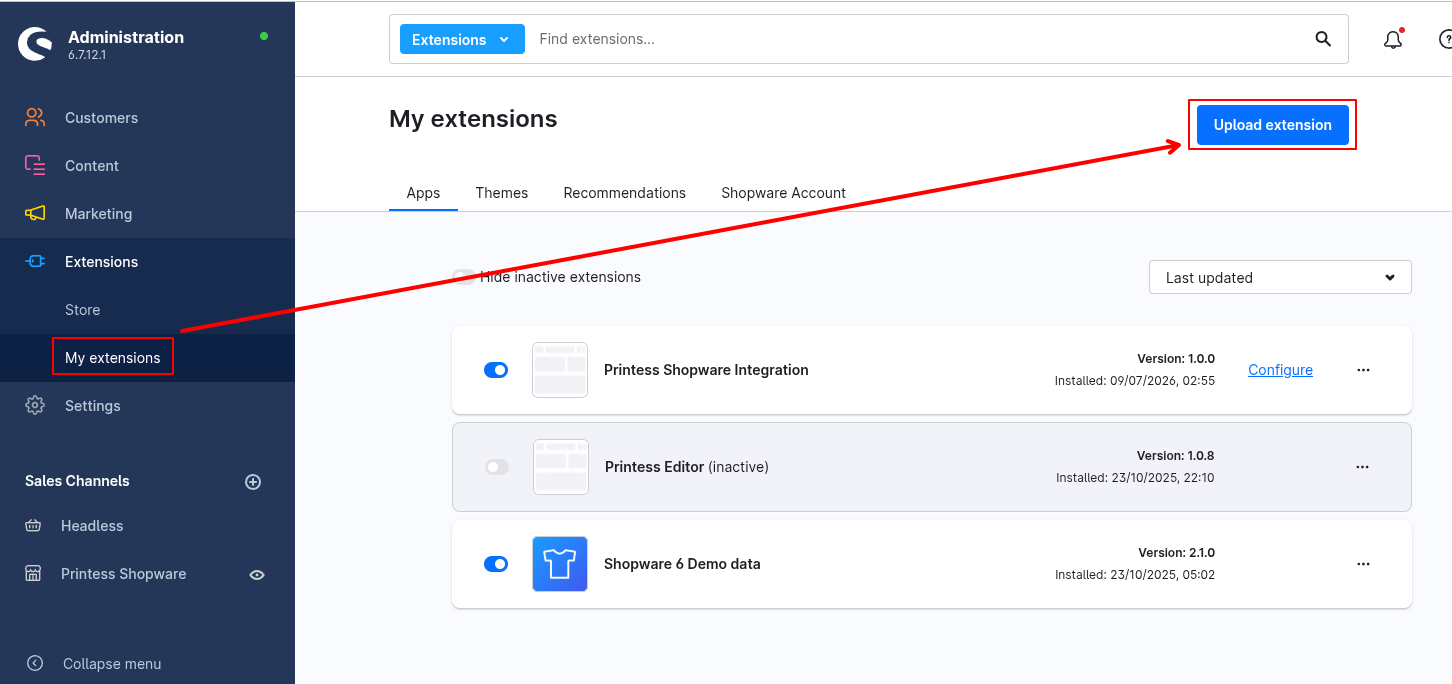
In the Shopware admin, go to Extensions > My extensions.
-
Click Upload extension (usually a button near the top of the page) and
select the PrintessShopwareIntegration-<version>.zip file.
-
The extension now appears in your extensions list as “Printess Shopware
Integration”, not yet installed.
2. Install and activate it
-
Find “Printess Shopware Integration” in the My extensions list.
-
Open its context menu (the “…” icon) and choose Install.
-
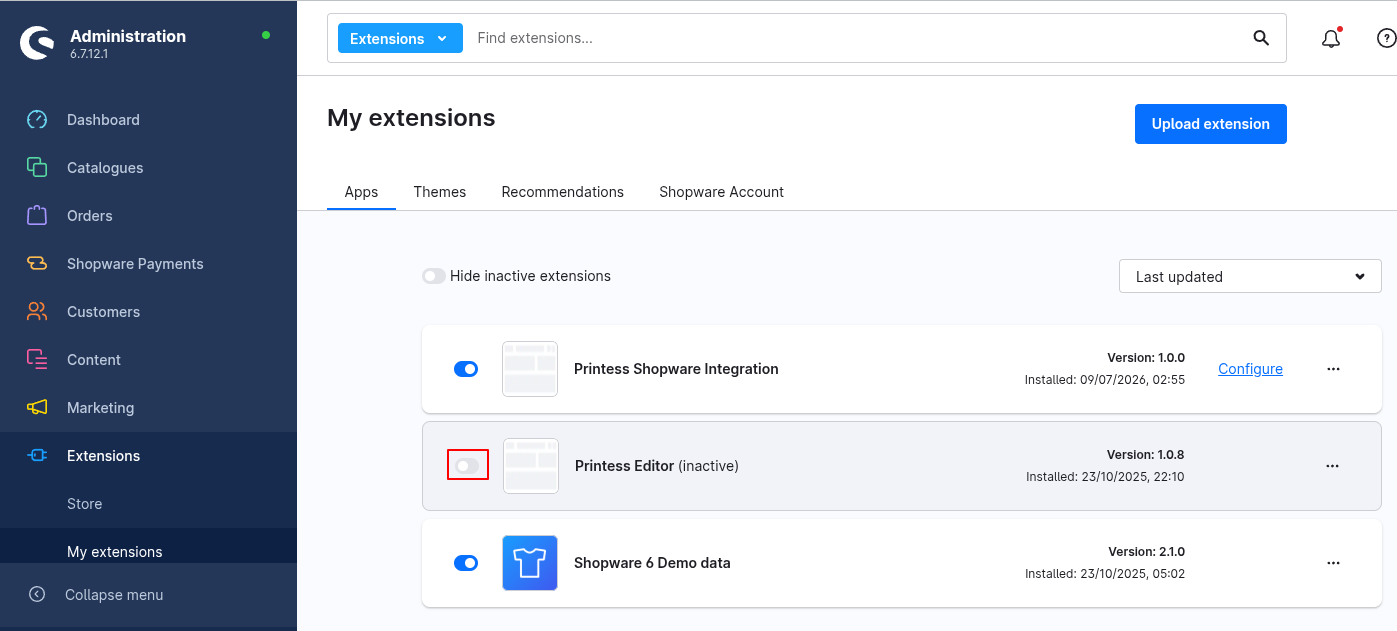
Once installed, switch on its toggle to activate it (or tick “Activate
after installation” during the install dialog, if offered).
If you already have the original integration plugin, Printess Editor, please deactivate it before using the new integration.
Shopware handles everything technical at this point on its own — database
changes, registering the new product fields, and rebuilding the storefront
theme. This can take a short moment; you don’t need to do anything else here.
-
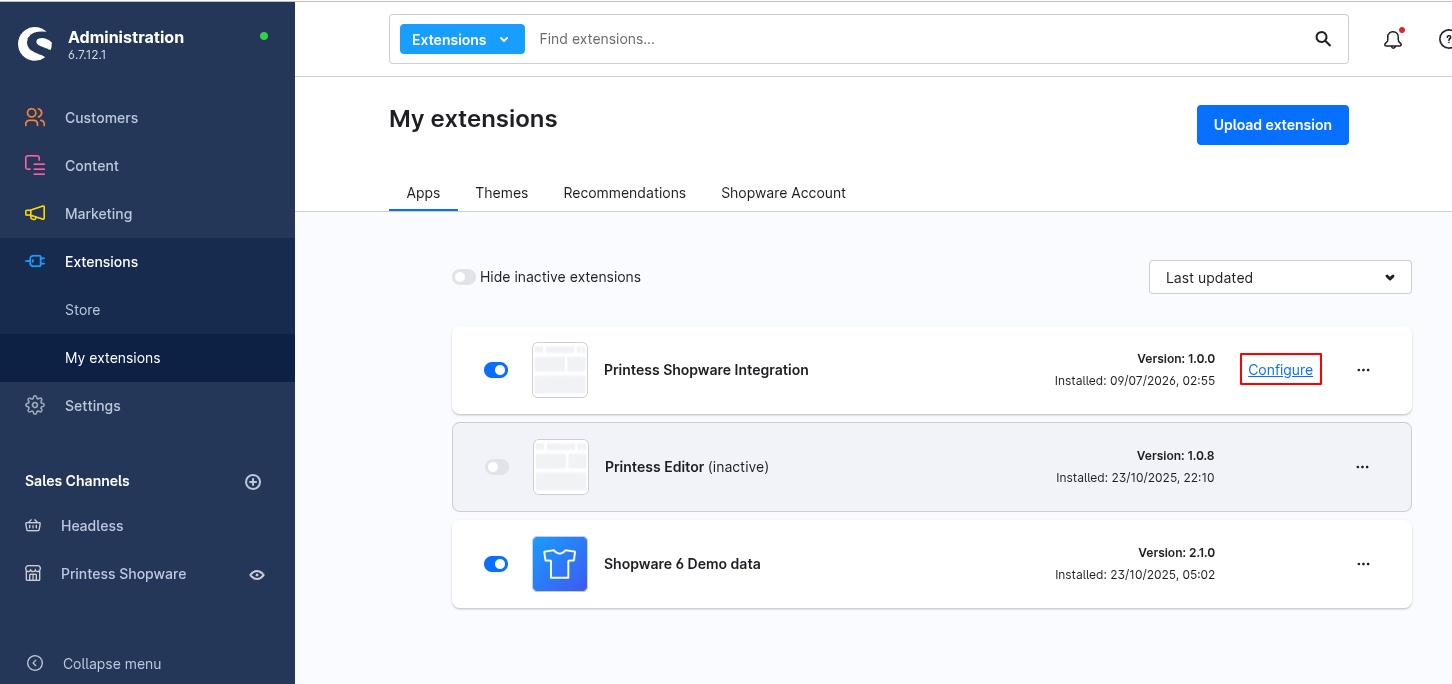
Still in Extensions > My extensions, find “Printess Shopware
Integration” and click the gear/settings icon to open its configuration.
-
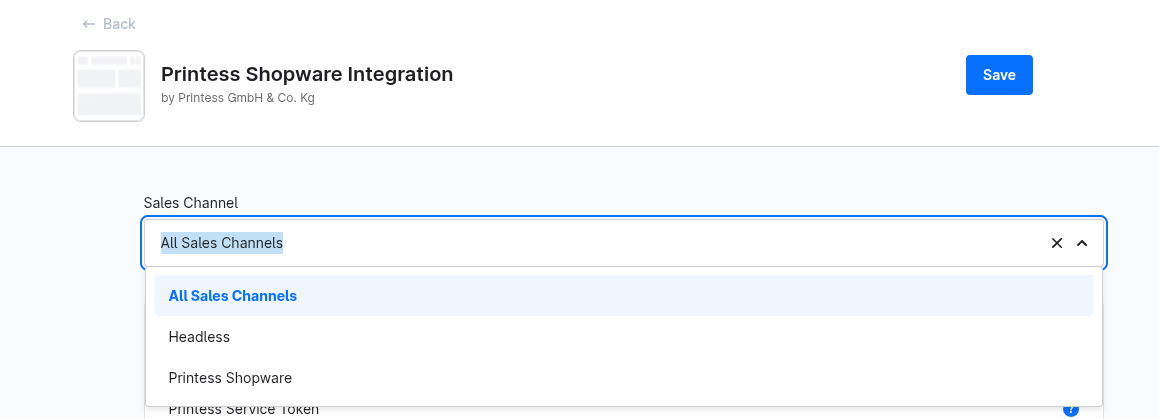
If you run more than one sales channel, pick the right one from the sales
channel selector at the top of the config page — these settings can differ
per sales channel, so repeat this section for each one that should offer
personalization.
-
Fill in:
- Authentication → Printess Service Token and Printess Shop Token
(from the credentials you gathered above).
- Editor → confirm the Editor domain (leave as default unless Printess
told you otherwise), and optionally set a default editor theme/language
and basket thumbnail size.
- API → confirm the Printess API domain (again, default is usually fine).
- Production → optionally set a default print setting and/or dropshipping
configuration (these can also be set individually per product later). Here
you can also switch on Approve designs before production if designs
should be approved manually before print files are produced.
- Saved designs → turn on “Allow customers to save designs to their
account” if you want customers to be able to save an in-progress design
and finish it later from their account (adds a “My saved designs” page to
the customer account menu).
- Order confirmation email and Product settings cards can usually be
left at their defaults (by default, order-related emails show the
personalized design instead of the regular product image).
-
Click Save.
4. Turn on personalization for a product
The extension does nothing on a product until you tell it which Printess
template that product should use:
-
Open a product in Catalogues > Products.
-
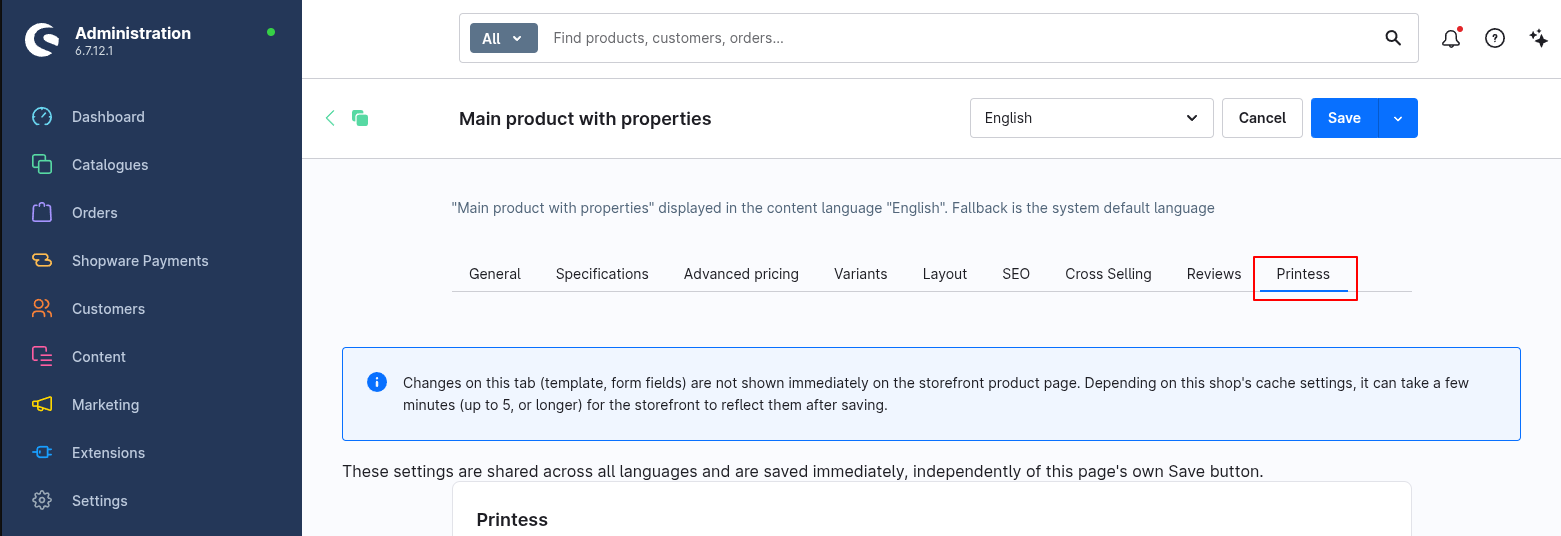
Go to the Printess tab on the product detail page.
-
In the Template field, click Choose template and pick the Printess
template this product should open in the editor from the search dialog;
Remove clears the selection again (this is the one required setting —
without it, no “Design now” button appears on that product’s page).
-
Optionally: preselect form field values, merge templates, book/photobook
settings, a print setting, or a dropshipping configuration specific to this
product. You can also activate the SlimUi editor for inline
personalization directly on the product page (requires the SlimUi plan; not
compatible with merge templates or books), or add Custom pricing rules —
surcharges based on the book’s page count or on specific form field value
combinations.
-
Save the product.
5. Verify it on the storefront
- Open the product’s page on your storefront.
- You should see a “Design now” button in place of the
regular “Add to basket” button.
- Click it, make a small change in the editor, and confirm the design can be added to the basket.
- If you turned on saved designs in step 3, log in as a customer, save a
design from the editor, then check My account > My saved designs to
confirm it shows up there.
Troubleshooting
- Nothing shows up / looks stale: go to Settings > System > Cache &
Index management and click Clear cache.
- Something behaves unexpectedly on the product page: turn on
“Enable storefront debug logging” under the Debugging card in the
extension’s settings, reload the product page, and check your browser’s
developer console (F12) for
[Printess]-prefixed log lines. Turn it back
off once you’re done — it’s for troubleshooting only.
- Still stuck? Contact Printess support with what you saw in the console.