In the Layers tab you can create new layers, define their visibility for Print and Buyer Side, move frames between layers, define the order of layers, and control the locking and/or frame visibility of layers.
The Layer tab is a versatile tool when used for creating Templates. It is synchronized with the page you are currently editing and while it shows all layers in the document, it only shows frames from the current page.
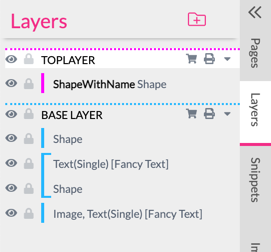
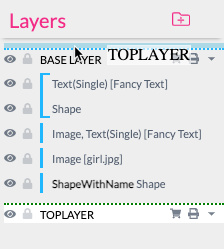
Layers are the same across a document. They always contain at least one, non-deletable layer, known as the Base Layer. This layer is the layer Buyers will eventually add their frames onto while editing.
This opens up the option to create various layers both above and below the Buyer’s design.
The Frame Title will also be displayed here. This helps to maintain a clear overview of the content across all pages.
Layers are very useful to control the visibility of items for the Buyer Side as well as for differentiating between print and edit time of the document. See the section on Layer Visibility below.
The Layers tab visualizes groups with a bracket:

One can select frames directly in the Layers tab and change their settings by clicking on the frame. Multiple visibility and frame lock layer settings can also be changed by clicking on an eye or lock icon and sliding over the icons of the other layers you wish to change:
This also works in groups, so there is no need to ungroup frames to change a setting.
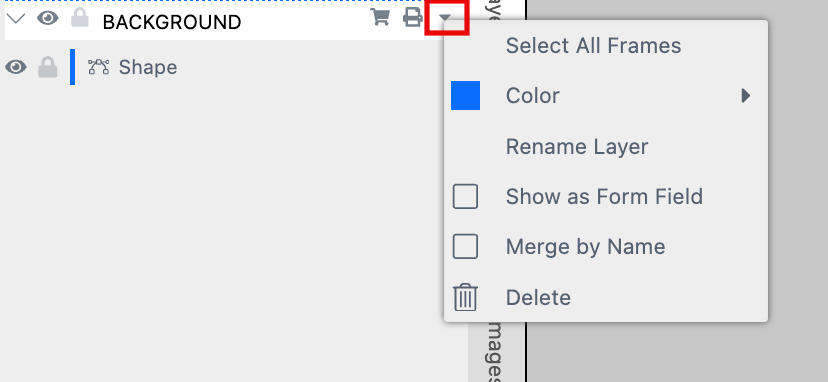
Right-clicking on the row with the layer name or clicking the triangle within it will open up the Layer Context Menu.
Select all Frames: You can select all frames within this layer at once.
Rename the Layer: You can change the name of the Layer.
Color: Change the color of the Layer. This will also change the color of the frames and the Frame Bar in the Editor and at the Buyer Side.
Show as Form Field: This will automatically adda Form Field on Document Level so that the Buyer can turn on and off the visibility of the Layer. This feature is not supported for the Basic Layer.
Merge by Name: If you merge a Base Template with a Design Template or if you assigning Layout Snippets to a Template you can merge the Layers with the same name to one Layer. So all frames from both resources will be placed on one Layer.
Layers, including their associated frames on all pages, can be reordered by drag-dropping the row on top of or below other layers. Please note that this will also reorder all frames in the z-order.

To lock a layer or frame and protect it from changes, just click the Lock icon. This will not harm the print output file. Also locked Layers will be part of the output file.
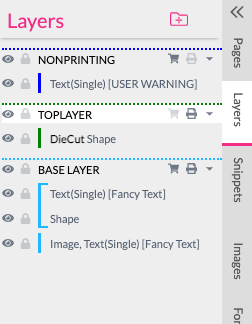
A layer can have the property of being always visible, visible only at print time or Buyer Side, or visible based on a Form Field value. By default, the content of a layer is always visible.

To control the general visibility of a layer, or a frame within a layer, you can use the Eye symbol to temporarily or permanently disable a layer or frame.

If you would like to show a layer only when a Buyer configures the document (e.g., to show areas that need to be free of content) use the Printer icon in the row with the layer name to switch off the visibility for print.

If you would like to show a layer only at print time (e.g., to add a die-cut line that should not be visible during editing) use the Shopping Basket icon in the row with the layer name to switch off the visibility during edit time.
If you would like to show a layer based on the value of a Form Field, this is done in the Context menu. Once Form Field is switched on in the Context menu, a Form Field that switches visibility will be auto-generated in the Form section of the document.
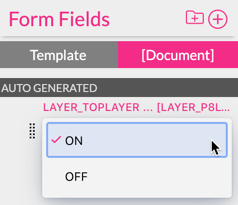
As with every other Form Field you can change the label, appearance, and type of editing. Click here for more details on Form Fields.