Printess clearly tries to be as low code as possible and most of the time you can do what you want without a single line of script. However, sometimes a little bit of script can make your day.
So, where and how can you use the power of scripts?
First of all, one can use our so-called JavaScript Embedded Expression in Single Line Text and Multi Line Text. Another powerful way to use them is in Styles.
A JavaScript embedded expression is simply inserted into the text with ${… your code here}. Inside can be any JavaScript code which returns a (String) value.
Printess exposes some special properties and functions in scripts:
When these additional properties are incorporated into Form Fields, one can do some cool tricks! Here are some examples:
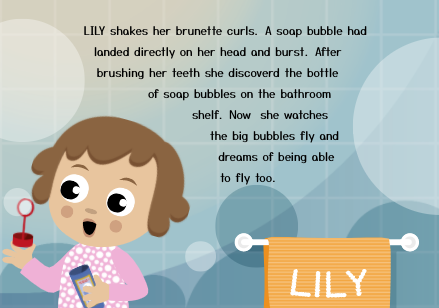
In our example children’s book - we used the additional values from the ‘pajama aka girl or boy?’, ‘HairStyle’ and ‘HairColor’ Image-List Form Fields to build the variable text on the second page. Whenever you change the gender, hair color or hairstyle the text will magically change as well. (Please try it for yourself here!)
So how was this built?
Let’s have a look at the Form Fields first: This is the Pajama Form Field Name defining the gender (sorry for the simplification):
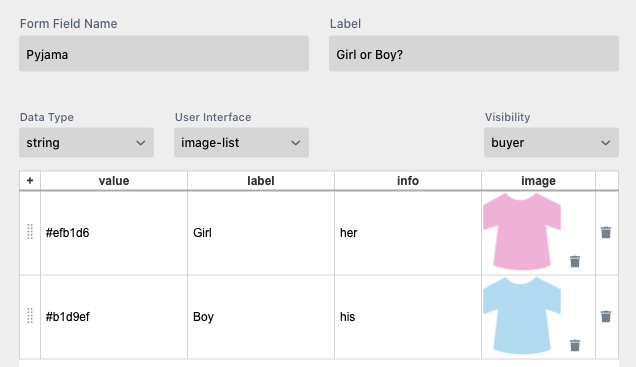
The value of ‘Pajama’ is simply a color value used in a Style that defines all pajama colors across the document. But as one can see we also used the Info field here to define the possessive adjective (her, his) for the text.
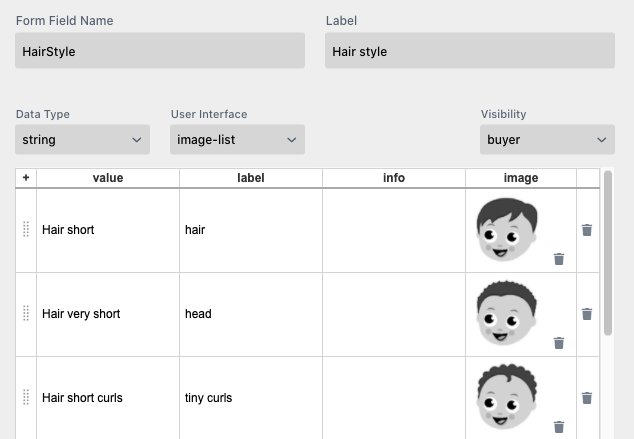
Now have a look into the ‘HairStyle’ Form Field Name where we added the right name for the hairstyle in the text:
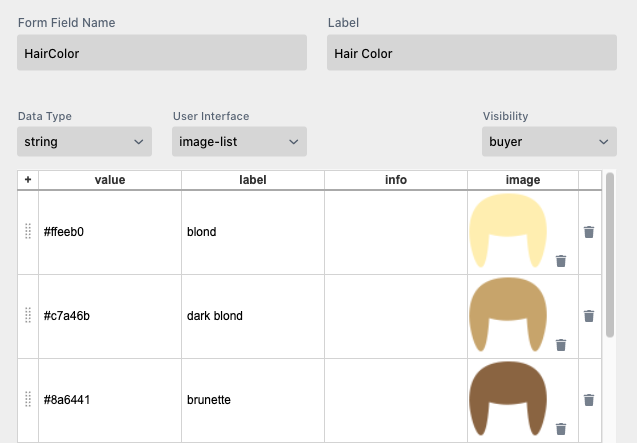
… and finally, we put the hair color in the Label field of the HairColor Form Field Name:
Let’s have a look into the Multi Line text, which looks quite different from its output in edit mode now …
Tip: If the text in a Multi Line text is longer than the visible area one is still able to copy the complete text by pressing Ctrl-A, Ctrl-C and paste it into any other text editor.
This is the complete text content:
${form.Name.toUpperCase()} shakes ${info.Pyjama} ${label.HairColor} ${label.HairStyle}. A soap bubble had landed directly on ${info.Pyjama} head and burst. After brushing ${info.Pyjama} teeth ${label.Pyjama === "Girl" ? "she" : "he"} discoverd the bottle of soap bubbles on the bathroom shelf. Now${label.Pyjama === "Girl" ? "she" : "he"} watches the big bubbles fly and dreams of being able to fly too.
… and we can analyze its contents:
${form.Name.toUpperCase()} - Takes the entered name and makes it uppercase with the Javascript String function to UpperCase()
${info.Pyjama} - Contains either ‘her’ or ‘his’ (s.a.)
${label.HairColor} - The hair color from above
${label.HairStyle} - The hair style from above
So therefore, the beginning of the text reads: LILY shakes her brunette curls.
And it clearly reacts to all changes of the name, gender, hair style and/or the hair color.
So the only thing left to explain is this conditional expression: ${label.Pyjama === “Girl” ? “she” : “he”}
Here we needed she/he instead of a his/her. So we used this standard JavaScript ternary operator. This operator takes three operands: a condition followed by a question mark (?), then an expression to execute if the condition is true followed by a colon (:), and finally the expression for when the condition is false.
So essentially if the label of the ‘Pajama’ form field equals ‘Girl’ this expression will output ‘she’, otherwise it will output ‘he’.
Note: Never name a Style and a Form Field the same within a Script. Then the Script will not work.
" <w:additives>" + d.allergens +d.additives " will NOT work " <w:additivesstyle>" + d.allergens +d.additives " will work
In the same children’s book example one finds another very small but powerful use of scripting, this time in the Styles of the document.
Switch to the Styles tab - these are the styles used to let all the color and hair changes work:
.skin {
 	fillColor:${form.SkinColor};
}
.hair {
 	fillColor: ${form.HairColor};
 	spreadName:${form.HairStyle};
}
.Pyjama {

 	fillColor: ${form.Pyjama};
}
.name {
 	text: ${form.Name};
}
Have a look at the .skin Style. The fillColor of every Frame this Style is applied to will be set to the value of the form field SkinColor ${form.SkinColor} - looking into the Form Fields settings above, one can see that the value column contains the color value for each selected skin tone.
Let’s also have a look at the interesting .name style above. Here the text property of any Frame the Style gets applied to will be filled with the name entered in the ‘Name’ form field. This is used across the complete document to conveniently apply the child’s name to several items.
This is a good example of how powerful form fields with a little dose of scripting can be and if one adds Styles then nearly every aspect of a Frame can be controlled. Take a look into the Style Reference for all controllable Frame aspects..
Besides text one can also control the image URL in an image. This is done in the T-Shirt example document, which can also be opened from the Create New Template screen in Printess.
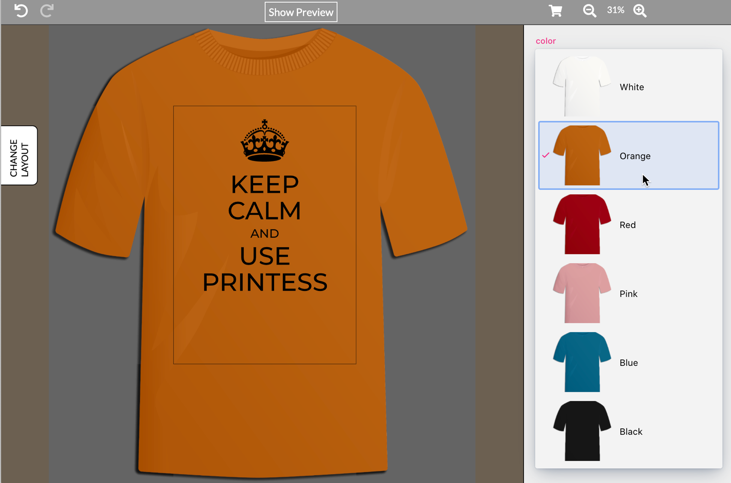
In this example the T-Shirt image simply comes from the form field itself. In this Select-List form field, uploaded images of all used t-shirts have been used.
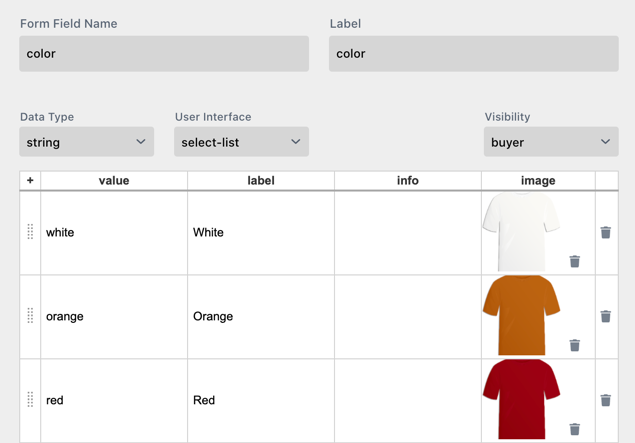
Combine this with a Style setting the image-URL and the Frame containing the background t-shirt image will show. One can now select a different t-shirt color in the drop-down and by this change the image.
.color {
 	image: ${image.color}
}
Another useful application of scripting in Styles is the Conditional Style.
Conditional Styles are useful in cases where one would like to create Styles which only come into effect at the moment a specific condition is met.
A Conditional Style contains an if: statement followed by a Boolean statement in the first line of the Style:
.inside-image {
 	if: ${1 === 1};
	property1: value;
	propertyx: value;
}
Read more about conditional Styles in the Styles & Form Fields chapter.
One of the more advanced template examples is the Grid Calendar.
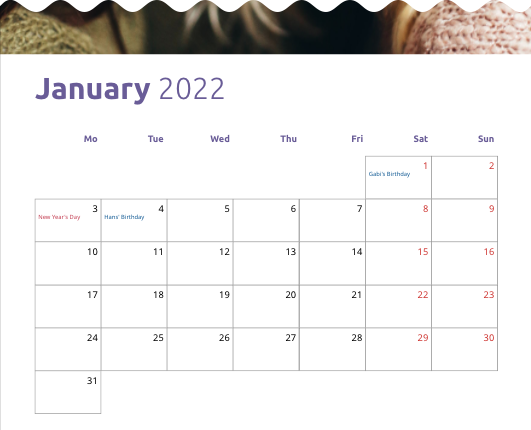
It features an automated calendar with variable start year, start month and events that a Buyer can enter to be displayed on the respective dates.
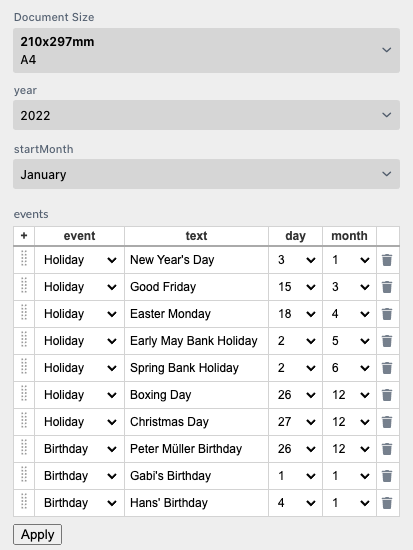
So how is this achieved?
The calendar is created in the Sub Document ‘Month’ of this Template by creating a grid of days (7 columns x6 rows). Every day has a Multi Line text frame containing the date and eventually events that will exist on that specific day. In each of the Multi Line frames the special calendar function cal() is called to do the heavy lifting:
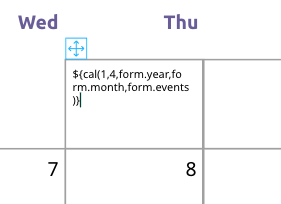
The Multi Line text just contains: ${cal(1,4,form.year,form.month,form.events)}
Or to explain the parameters in a more generic way ${cal(Row,Column,Year,Month,Events[])}
This special function calculates the day in a specific month of a year based on row and column within the calendar grid. The grid has 1-6 rows and 7 columns.
The parameters are as follows:
Read more about Table Form Fields here..
If in a given row/col combination is not a day in the actual month this function will return an empty string.
Hence we can also control the gray border around days by making it visible or invisible with a document style.
Switch to the Document Style in the ‘Month’ document and look at these switches:
.r1c1 {
visible: ${cal(1,1,form.year,form.month,[])!==""};
}
...
These are clearly not necessary for all days just for the days which may not exist in the current month.
If a day exists, a Multi Line text containing the day and optional additional lines for the events of this day will be created by the function.
The interesting concept is that along with the pure text, Styles will be inserted giving us the ability to control the Style of a weekday vs a weekend and the styles of the different event types.
.weekday {
	font:Noto Sans;
	fontSize: 16pt;
	fontColor: [Black];
	horizontalTextAlign:right;
	spaceAfterParagraph: 0pt;
}
.weekend {
font:Noto Sans;
fontSize: 16pt;
fontColor: Brick red;
horizontalTextAlign:right;
spaceAfterParagraph: 0pt;
}
.EventName {
 	font:Noto Sans;
 	fontSize: 10pt;
 	lineHeight: 110%;
fontColor: Raspberry;
spaceAfterParagraph: 3pt;
}
Note that the EventName Styles are directly generated from the table - (in our example calendar this is .Birthday, .Holiday and .Wedding) so whatever event type you have in the column event can be controlled by a style (the event name clearly must be a valid Style name - so no spaces or special characters allowed.)
The last trick to understand in this document is how the variable start month works in the document.
As one can see, in the function there is just the Document form field ‘month’ of this document mentioned:
${cal(1,4,form.year,form.month,form.events)}
Looking into Document form fields this is also the only form field this document exposes as it will be placed several times as a functional block of the calendar and clearly each month must be different.
To understand how this form field is set return to the main calendar document where the ‘Month’ document is placed 12 times - also via a Style to accomplish the two different selectable calendar types, but that is another story you might like to investigate yourself …
Then select the placed month document on any page and then open the Sub-Document Feature tab. This will show the configurable month form field and how it is set.
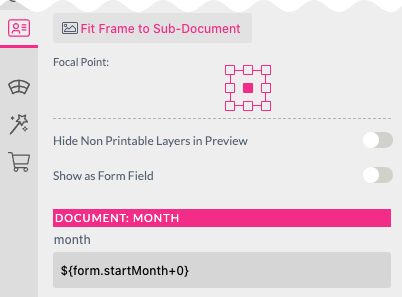
We simply put the configurable “Start Month” (a Template form field) + the current month offset, so for the first month in the calendar this will be +0, and for the last month this will be +11. The rollover will be managed automatically by the ‘month’ form field which has its Number Type set to month.
As this is just one way somebody can build a grid-type calendar with scripting and Styles - have a look at our little coding example (which can get copied directly into a Multi Line text box and this time works with tabulators). In this example, one can also see how to use Styles for the text output, but it is a bit nerdier.
In Printess you can create Template based scripts, which allows the same script to be used in multiple places within the template. Script execution can occur through several triggers:
Learn how to activate On Change Script for a Form Field
You can’t pass parameters to On Change Script. It works with all Template wide Form Fields, the Form Fields from the current Document and all other script-available Properties like data or doc.
When an event is triggered. So you have to choose one of the EVENT functions onKeyDown, onFrameSelect or onValidateBasket. These EVENTS cannot be overwritten or renamed because they are permanently assigned to a specific trigger. They will be executed automatically.
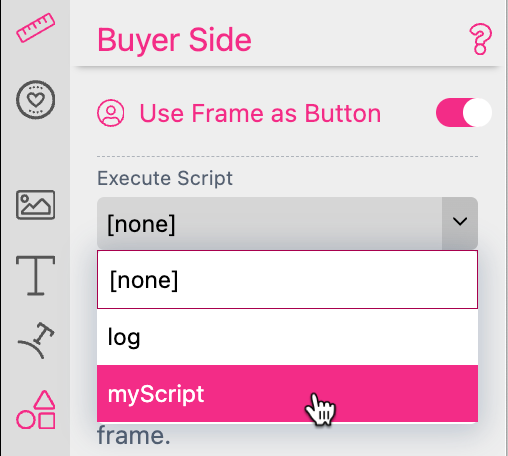
When a script is executed via an action. If you activate Use Frame as Button you can assign a Template Script to a Frame. Just select an existing Template Script.
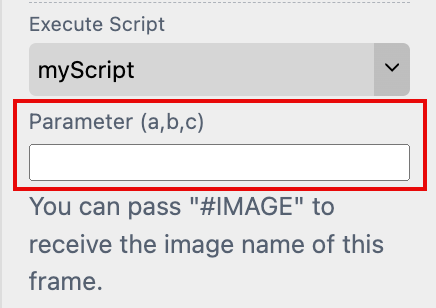
In the input field below you can enter parameters that will be passed during the execution of the script. If it is an image frame you can use “#IMAGE” to transmit the name of the image.
Learn how to Use Frame as Button here.
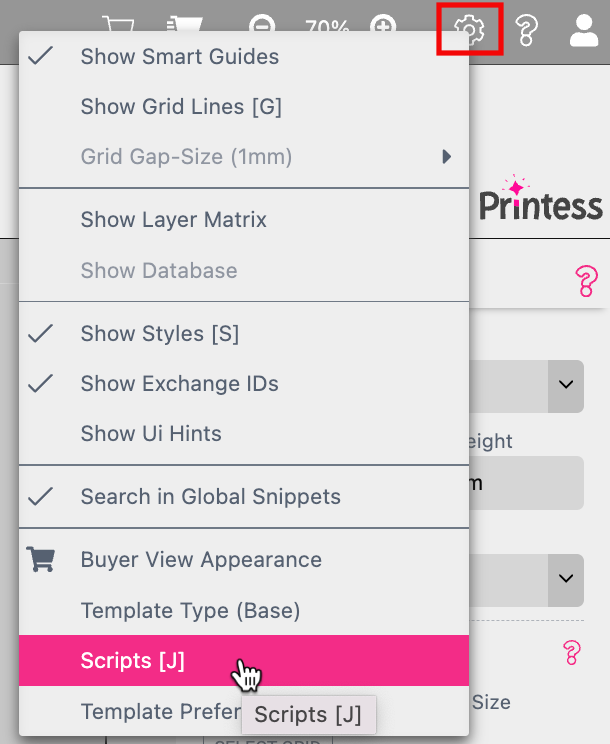
To open the script editor press the gear icon off the Template Settings to choose the option Scripts [J].
A separate view will open where you can add and edit your scripts.
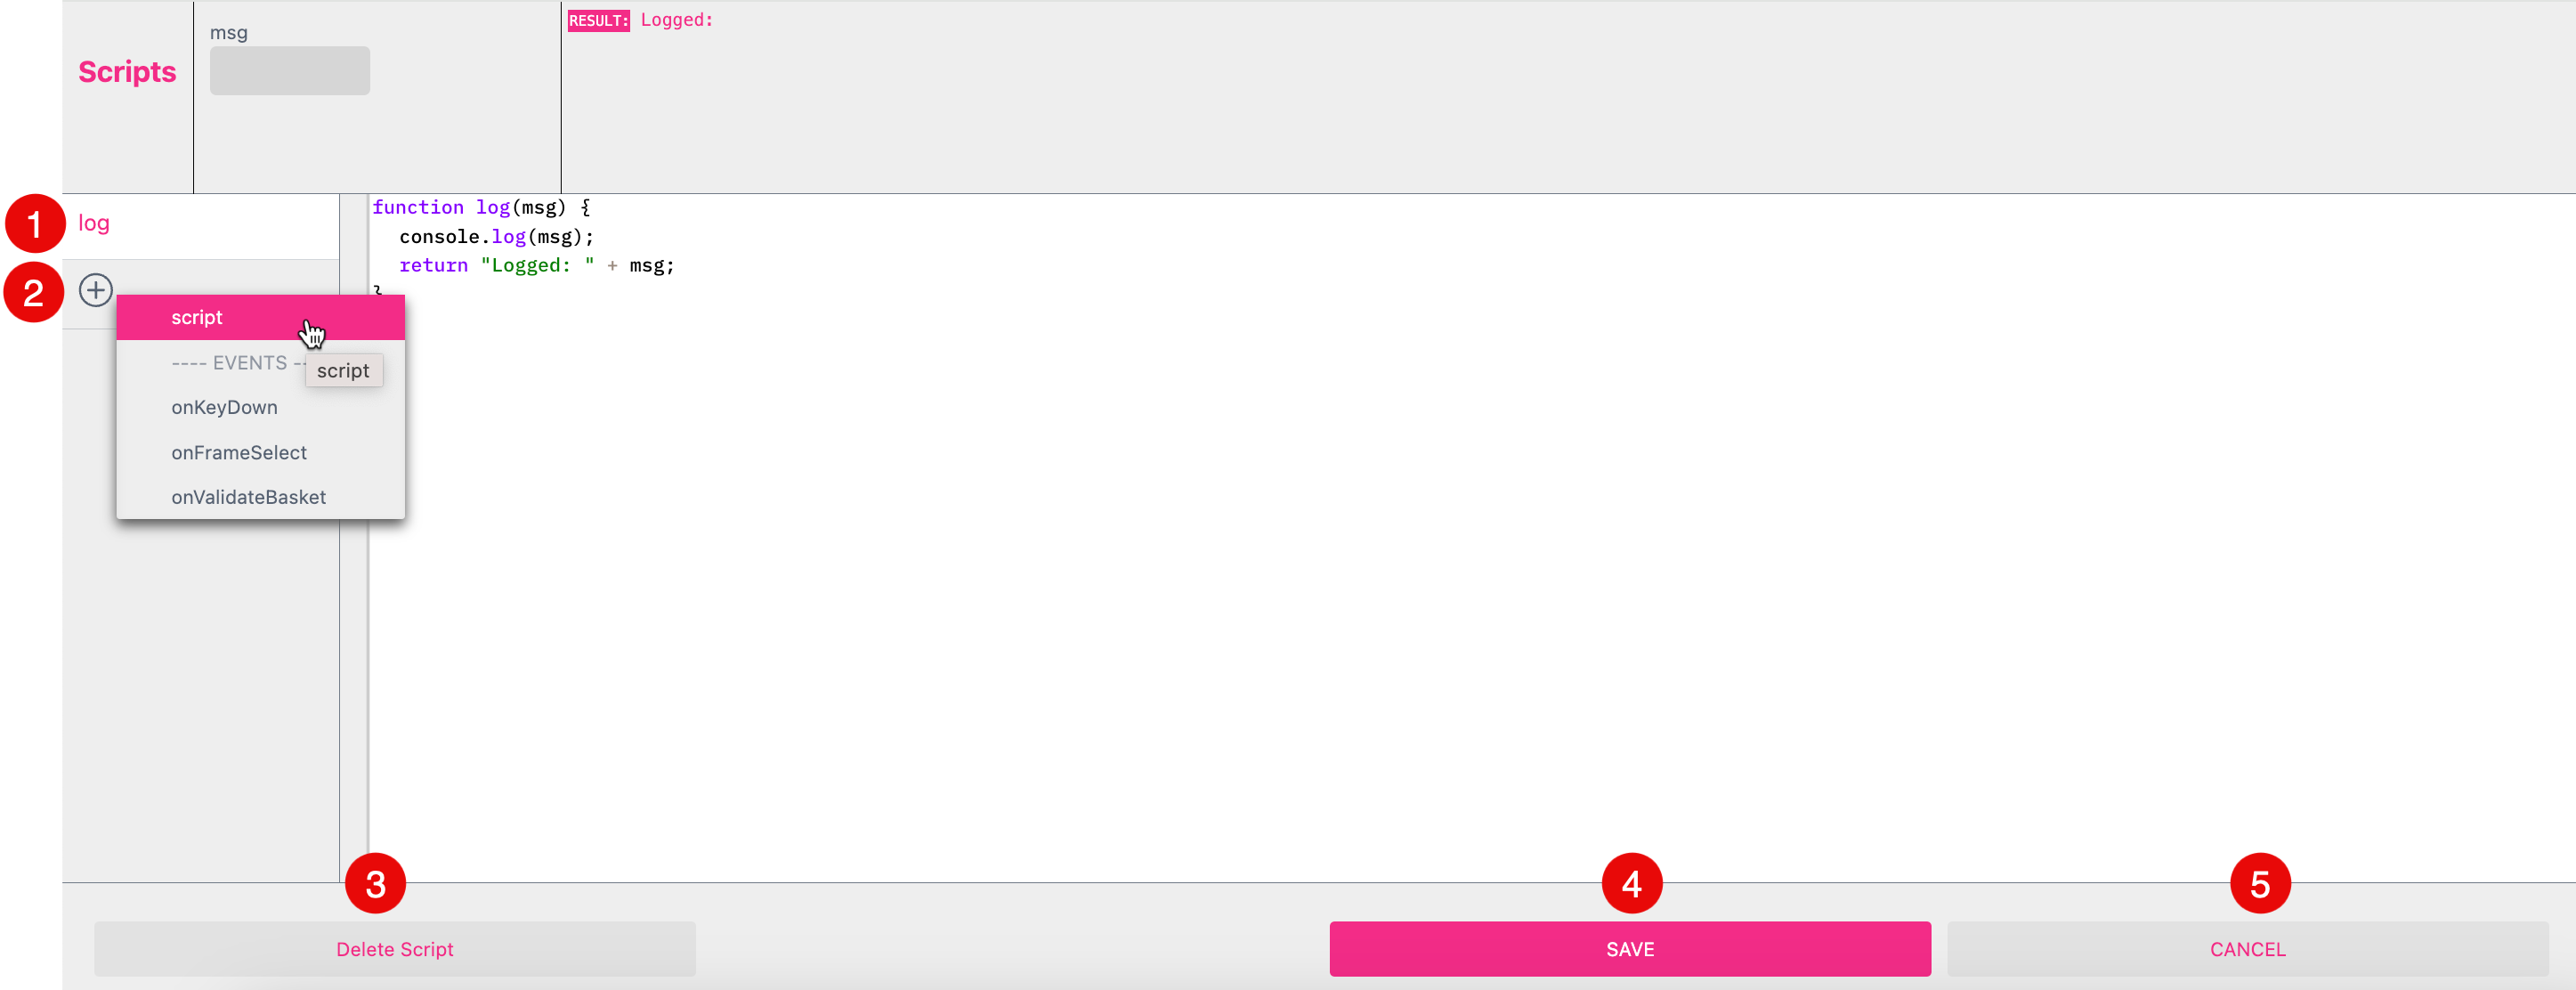

To add a script you can click on the plus icon to select the option script or you can choose from one of the three predefined EVENT functions onKeyDown, onFrameSelect or onValidateBasket.
Select a script to press Delete Script to remove it from the list.
Press the button to Save your changes.
Cancel your input.
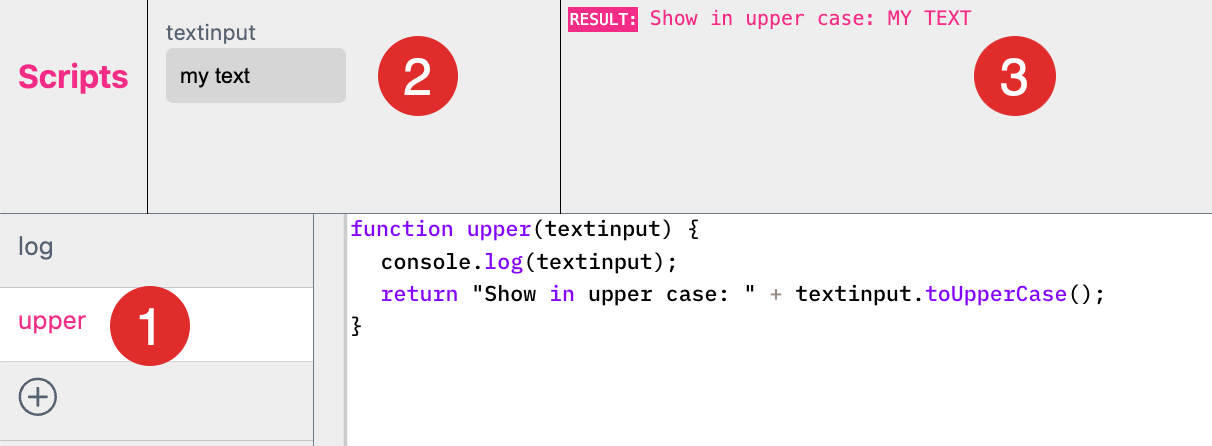
There are some global values that Printess provides for your scripts, such as form.
If you call any variable or script parameter the same, it will overwrite the Printess variable in the scope of your script, thereby making the values from your template unavailable.
These global variables are:
Assign to Single Line Text
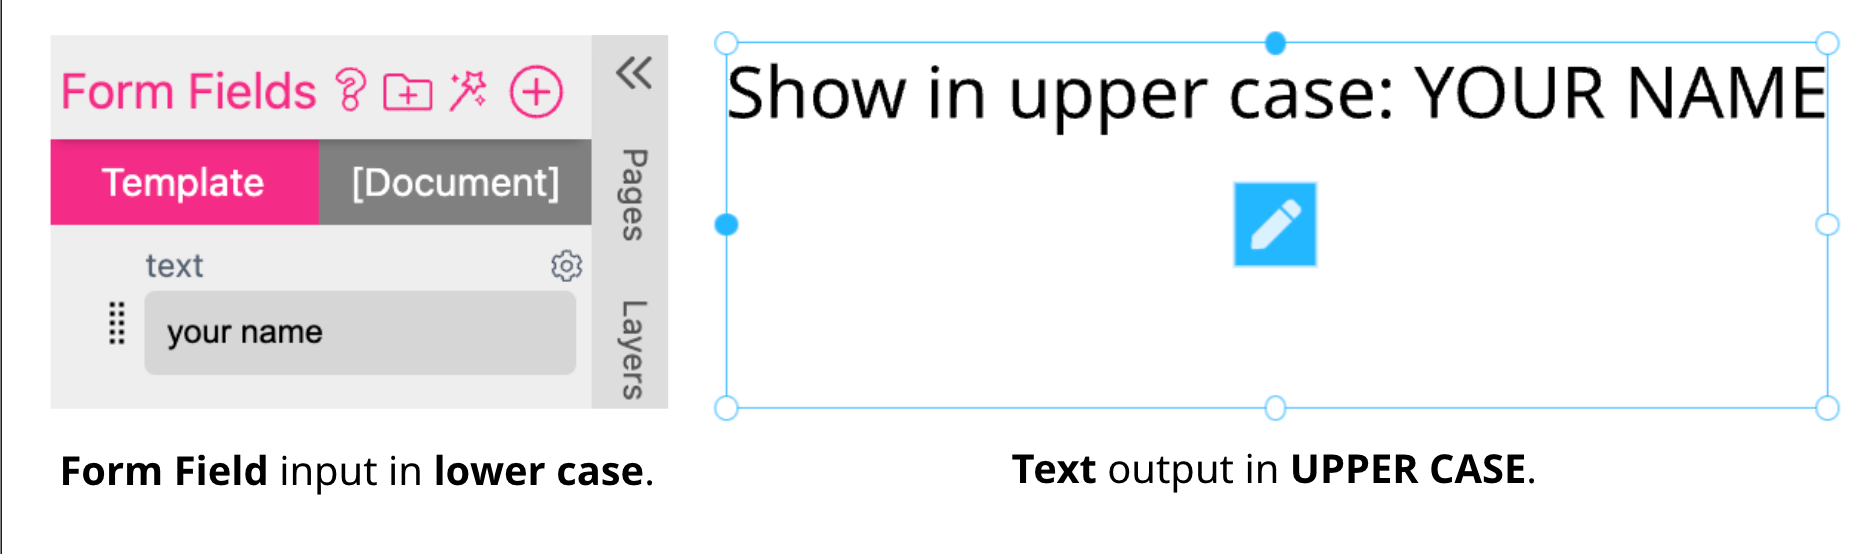
If you like to assign this function now to a Single Line Text Frame just type “${script.upper(form.text)}” into the Text Field of the frame at the Features Tab.
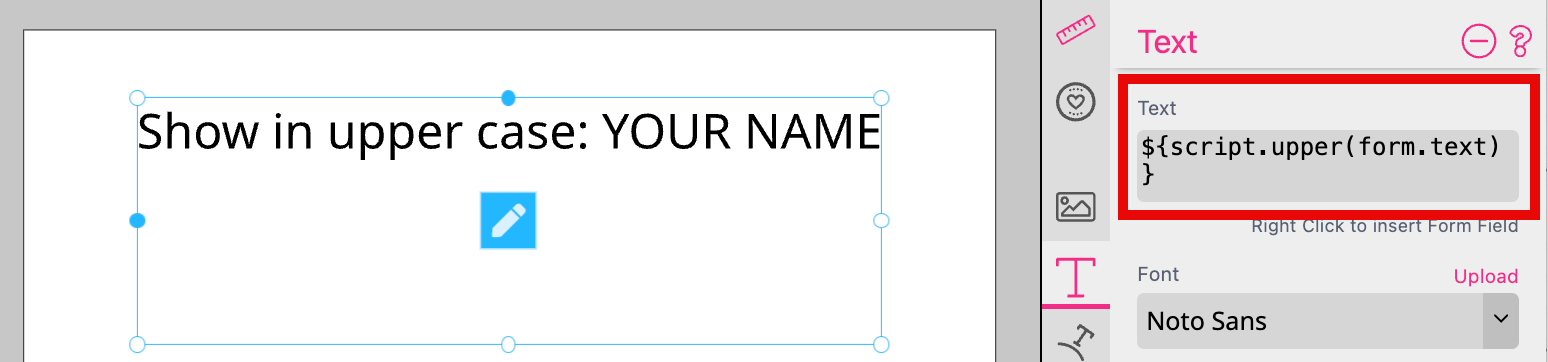
Now the lower case text input of the Form Field will be converted to upper case output in the Text Frame.
Assign to Multi Line Text
If you like to assign your script to a Multi Line Text you have to switch to the Edit Mode to just copy ${script.upper(form.text)} into it.
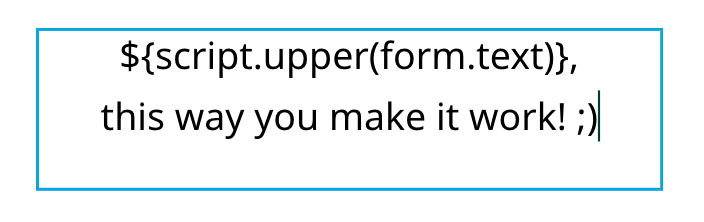
Multi Line Text Frames support the use of Styles. If you like to add a Character Style you have to add <w:stylename> to your script. If you like to use a Paragraph Style you have to add <p:stylename> to your script.
Using a Character Style
So if you want to change the font color using a Character Style you have to define the Style first. In this example we call the Style “color” to set it to “pink”.
The script used:
function upper(textinput) {
	console.log(textinput);
	return "<w:color>" + textinput.toUpperCase() + "<w:>";
}
To close the Style after the Form Field value you use “<w:>”. Otherwise the comma after “NAME” would be pink too.
In result will look like:
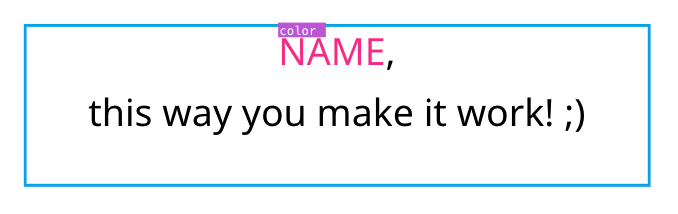
If you enable the Show Styles [S] option in the Template Context Menu you will see in the Editor which parts of the text are using the Style. The corresponding Style name will be displayed in small colored boxes. In our case it shows color.
Using a Paragraph Style
A Paragraph Style works similar to Character Style only that you can not close this Style. It ends automatically where the Paragraph ends.