Note:
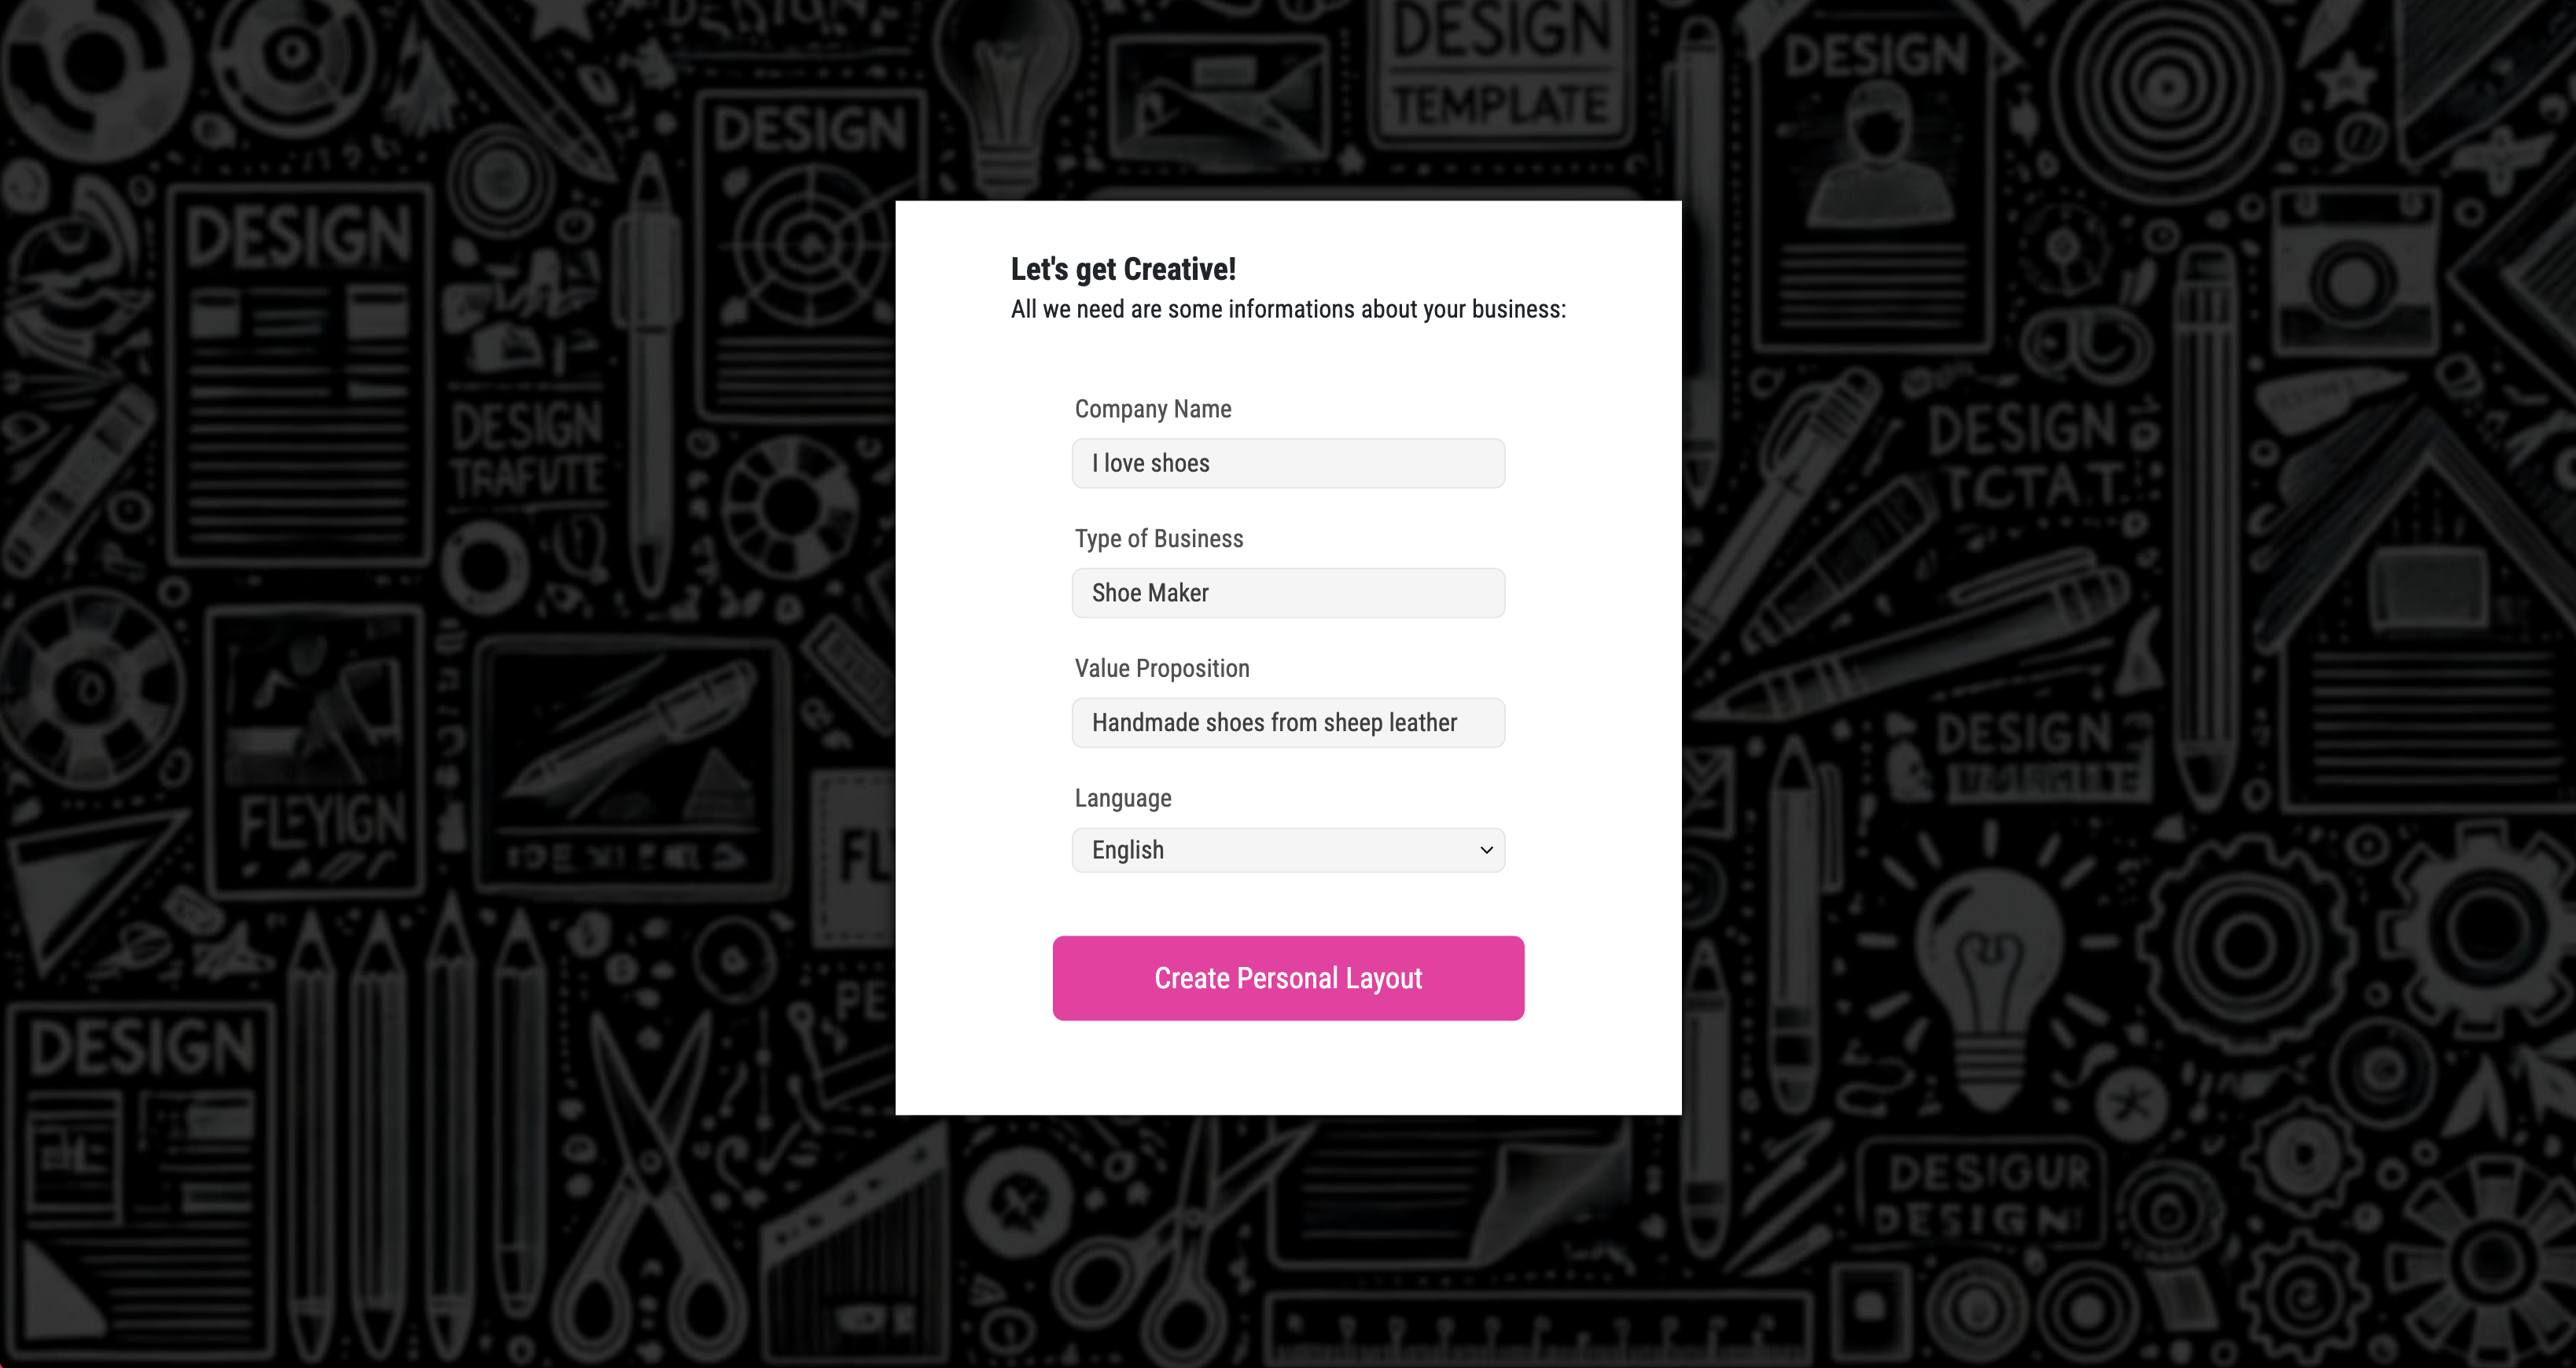
Printess MAKE is built specifically for web-to-print e-commerce businesses, solving a major industry challenge: the need for instant, high-quality, customizable print designs. No more struggling with design software or relying on generic AI-generated visuals — this tool delivers professional, unique variations in seconds.
Try our Printess MAKE exmaples here
To set up your Printess Template for Printess MAKE you have to activate the option Show Printess MAKE Wizard at the Buyer View Appearance Settings on the Tab Other Settings.
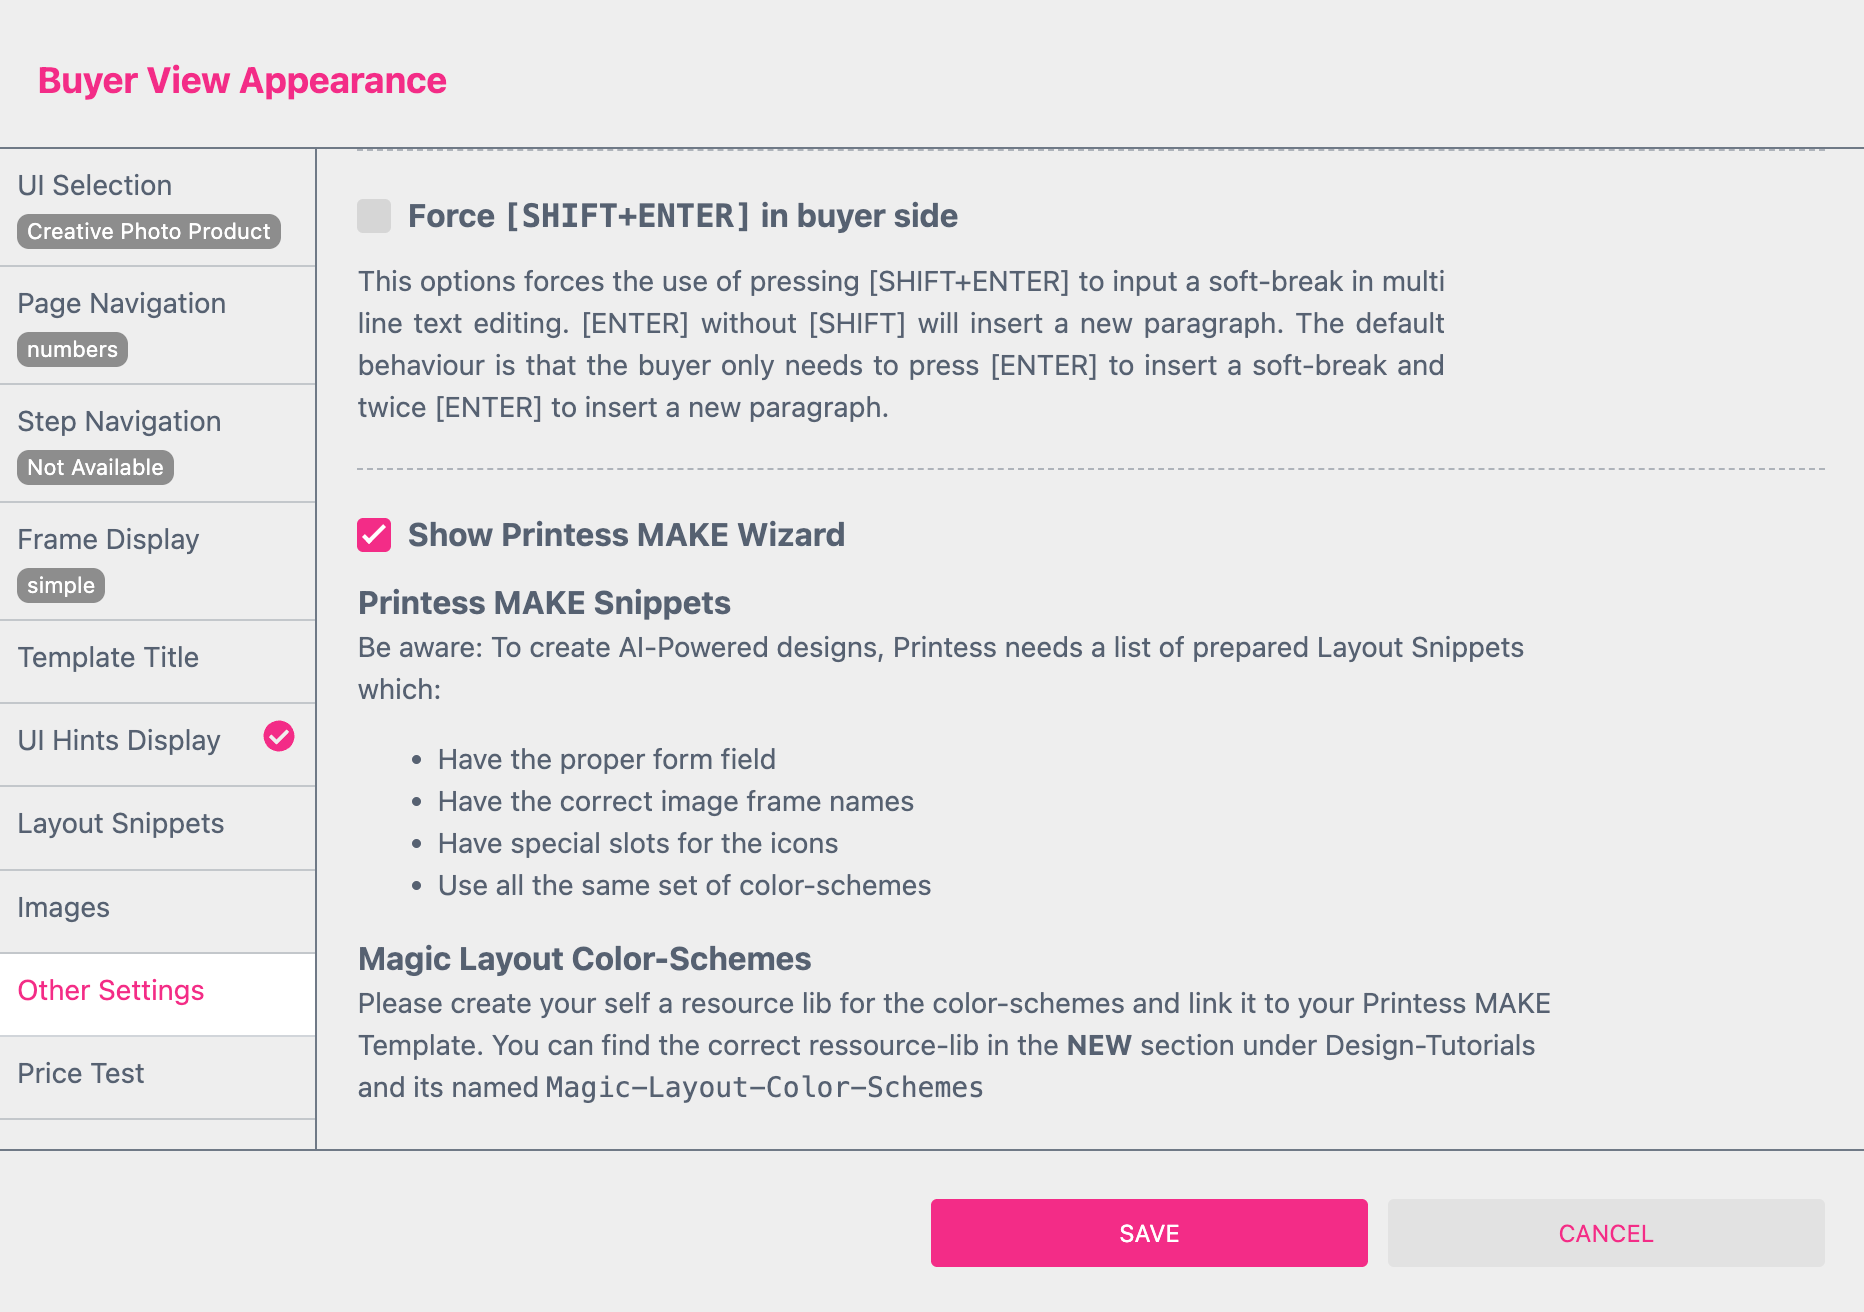
Activate the option Show Printess MAKE Wizard
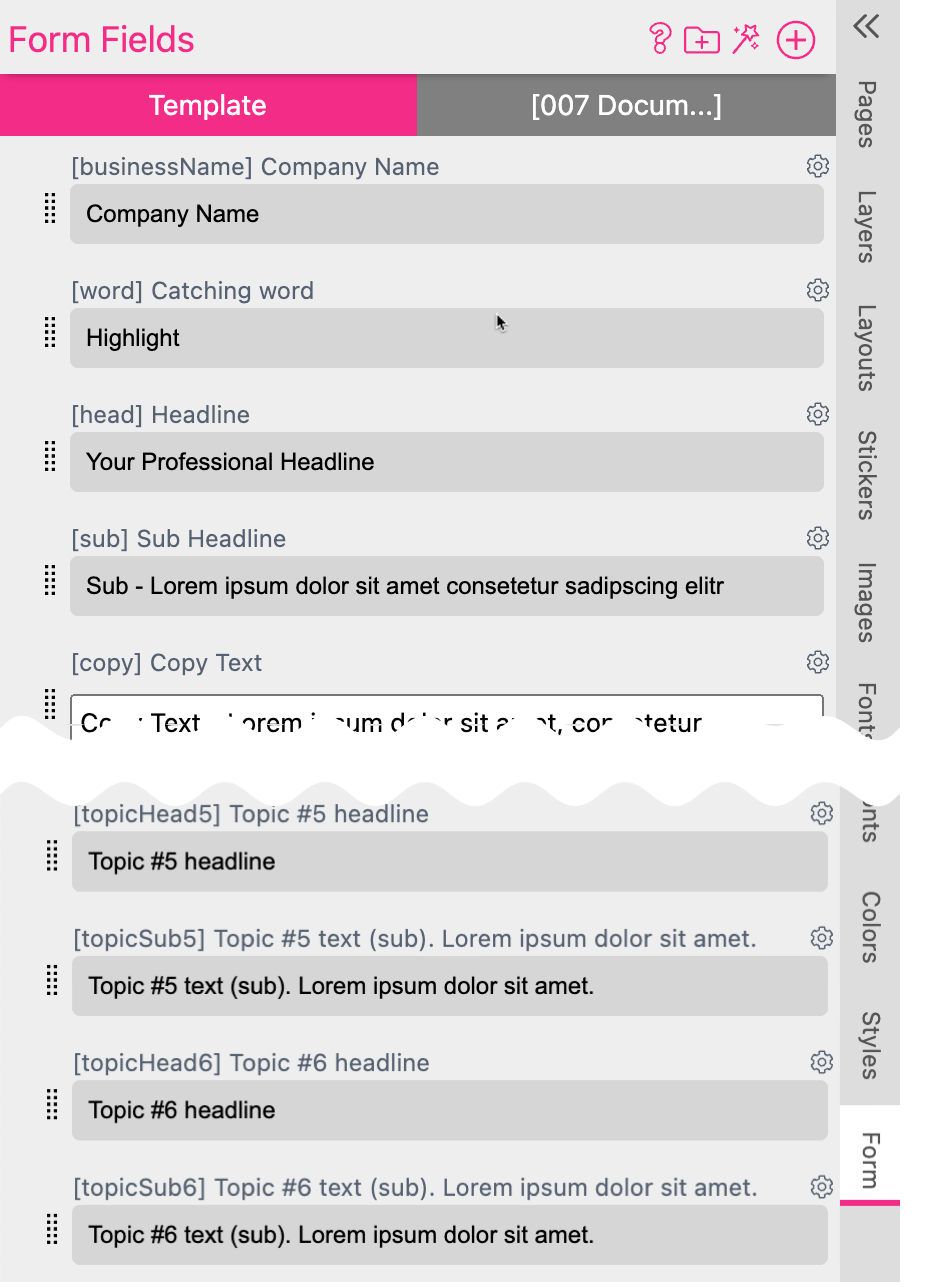
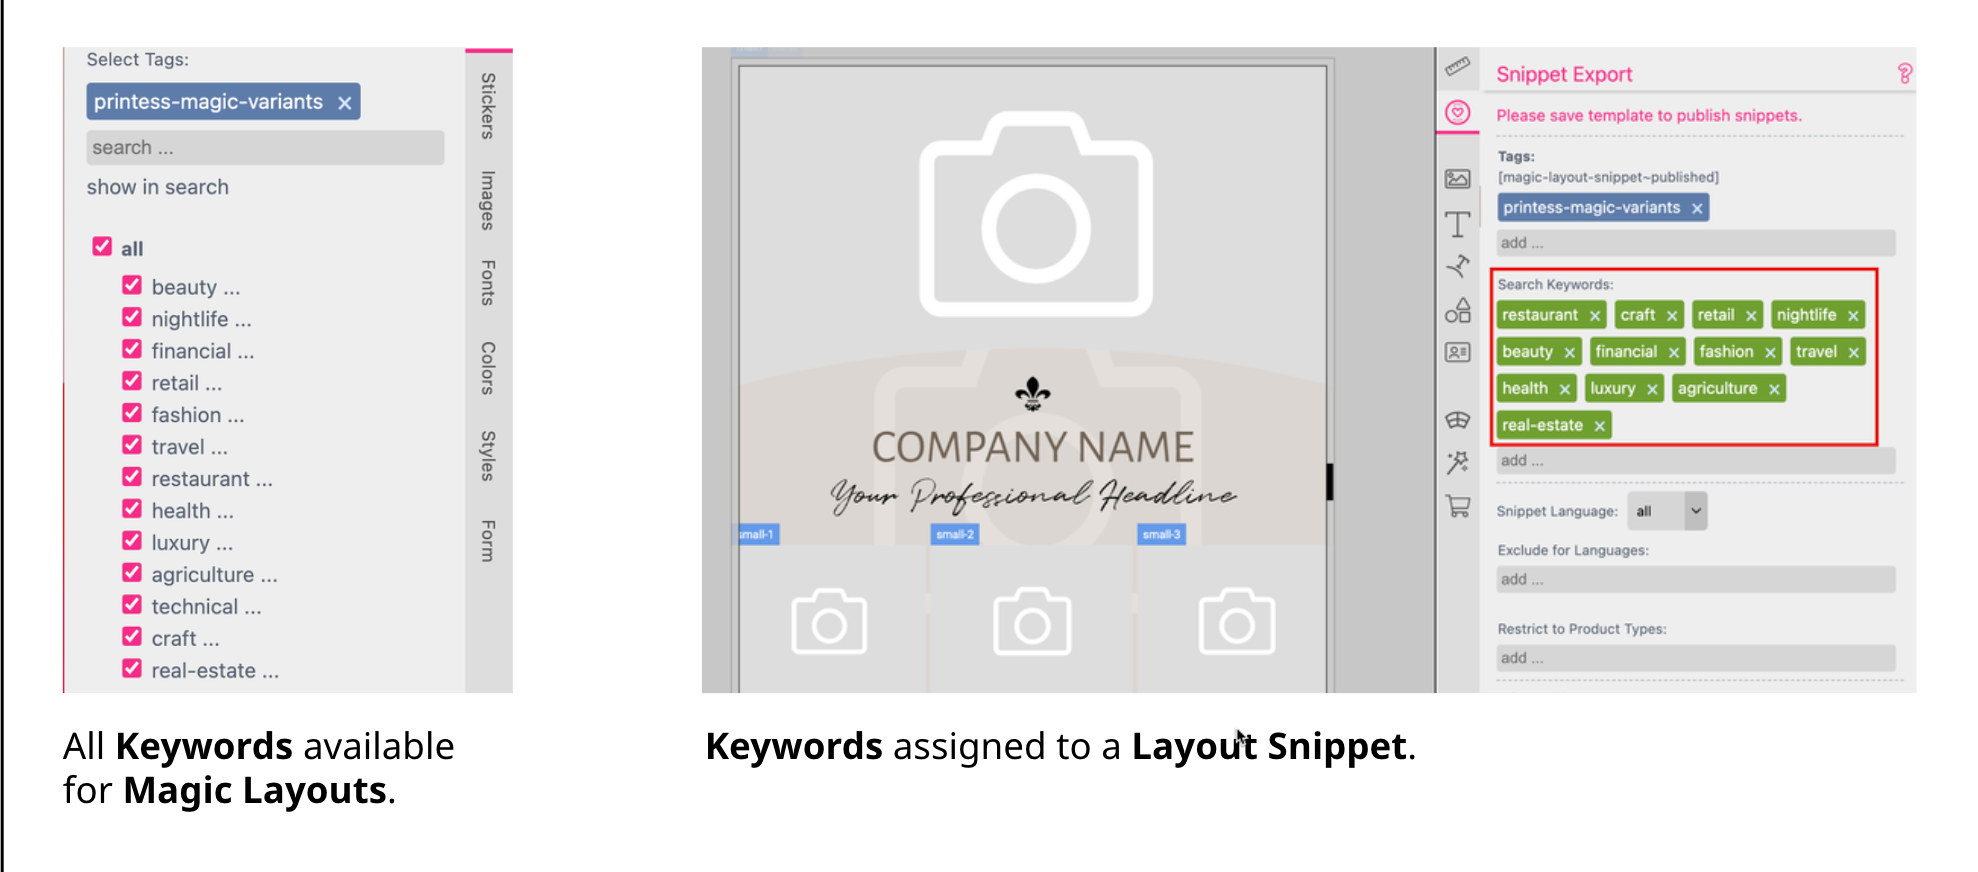
Printess will then automatically copy all necessary Form Fields. It will also assign a default Resources Library and the Layout Snippets Tag “printess-magic-variants” to the Template to save and publish it.
If you click on the Template Type Badge “Standalone” at the Top Menu a dialog will open. Here the default Resource Library “Magic-Layout-Color-Schemes-gid” is automatically assigned to your Template. It includes exactly the same Color Schemes like the assigned Layout Snippets to make Printess MAKE work.
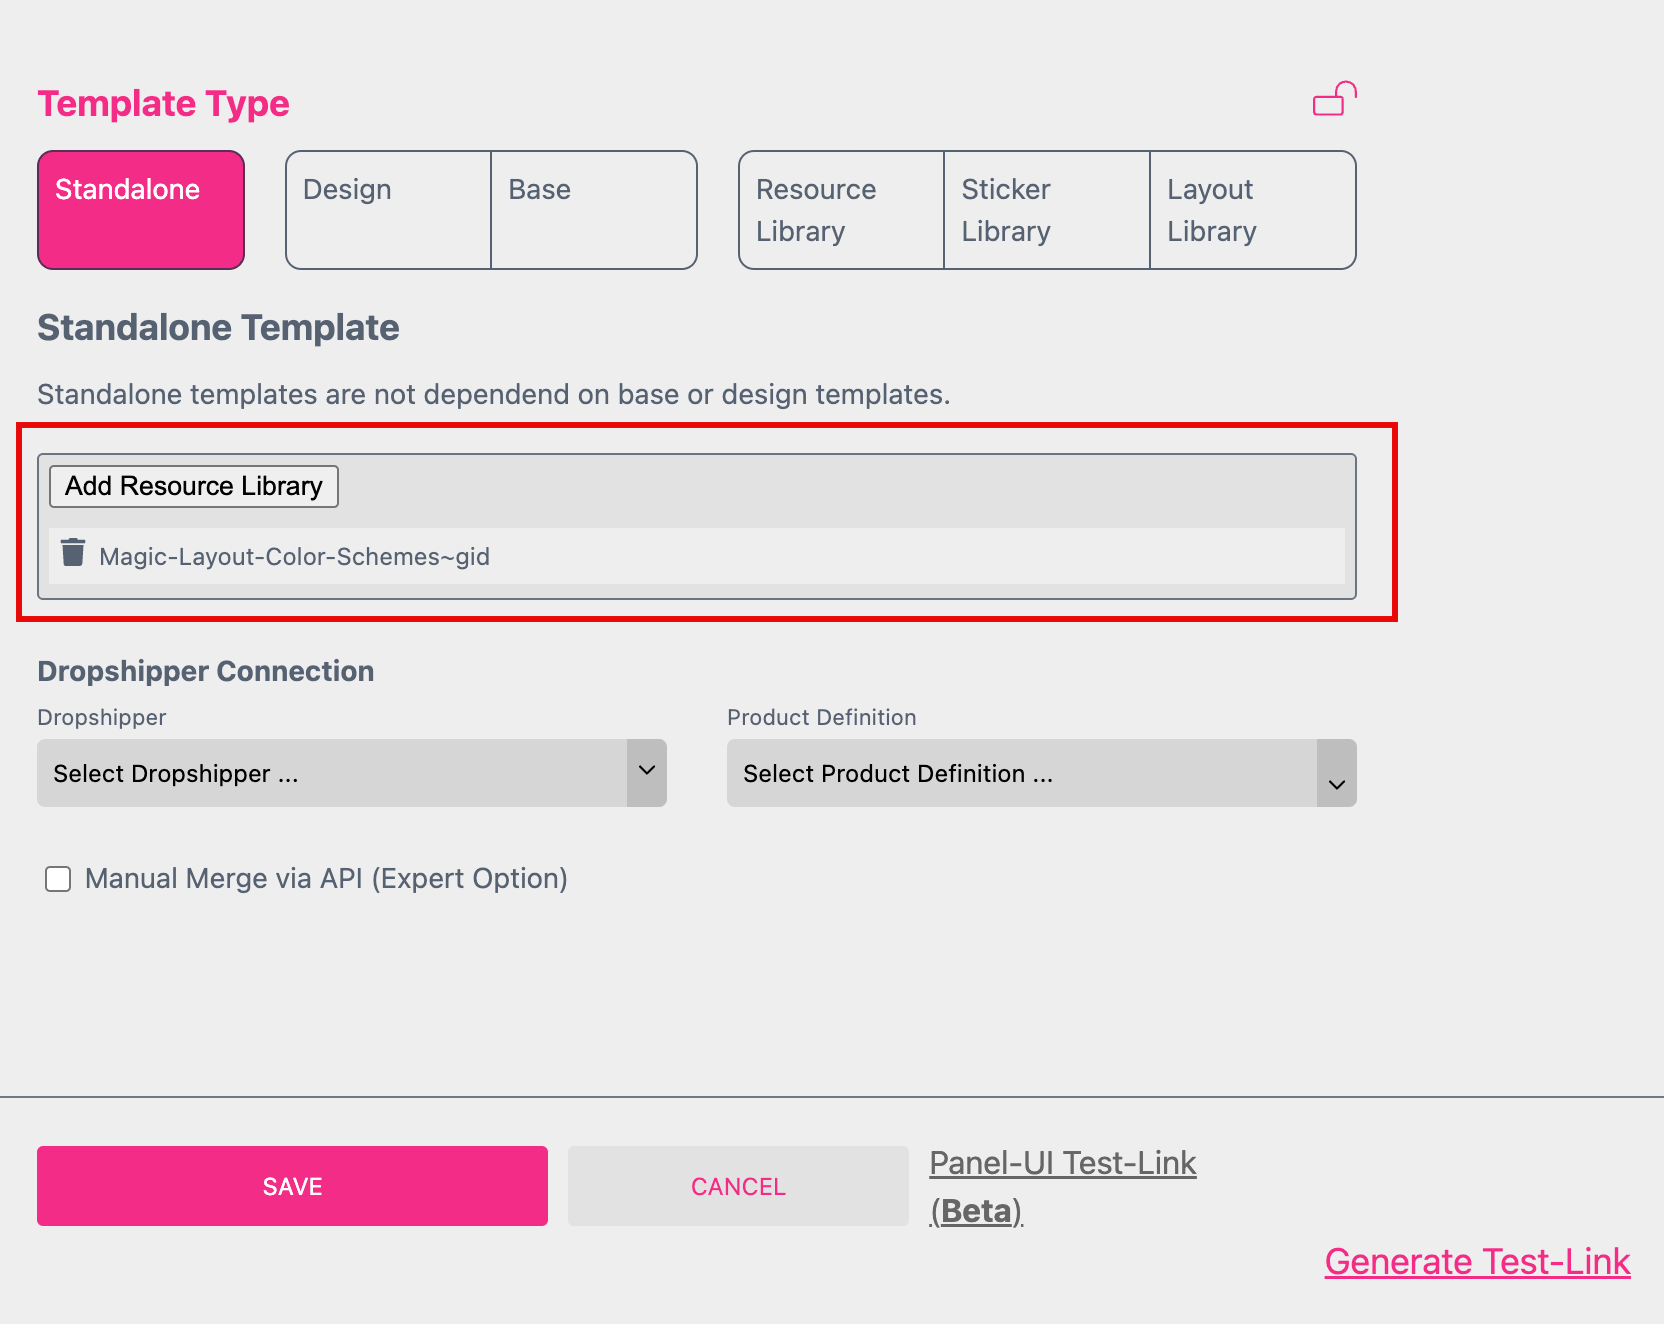
If you are setting up your own Color Schemes you also have to create your own Resource Library to assign it here!
At the Layouts Tab of the Resources Panel you will find the default Layout Library assigned to your Template.

If you create your own Layout Library using your own Tag you have to replace the default Tag here.
To support the Magic Layouts we recommend to use the Layout Snippet Tag “printess-magic-variants” which is assigned by default.
But if you really like to create your own Layout Snippets to be used for the Printess MAKE Wizard you have to set them up in a particular way.
This is why we highly recommend to always use this Printess Template to start with:
Open the Sample Layout Snippet Library here
You find it in the the NEW section at the Design-Tutorials and its named “Magic-Layout-Snippet”.
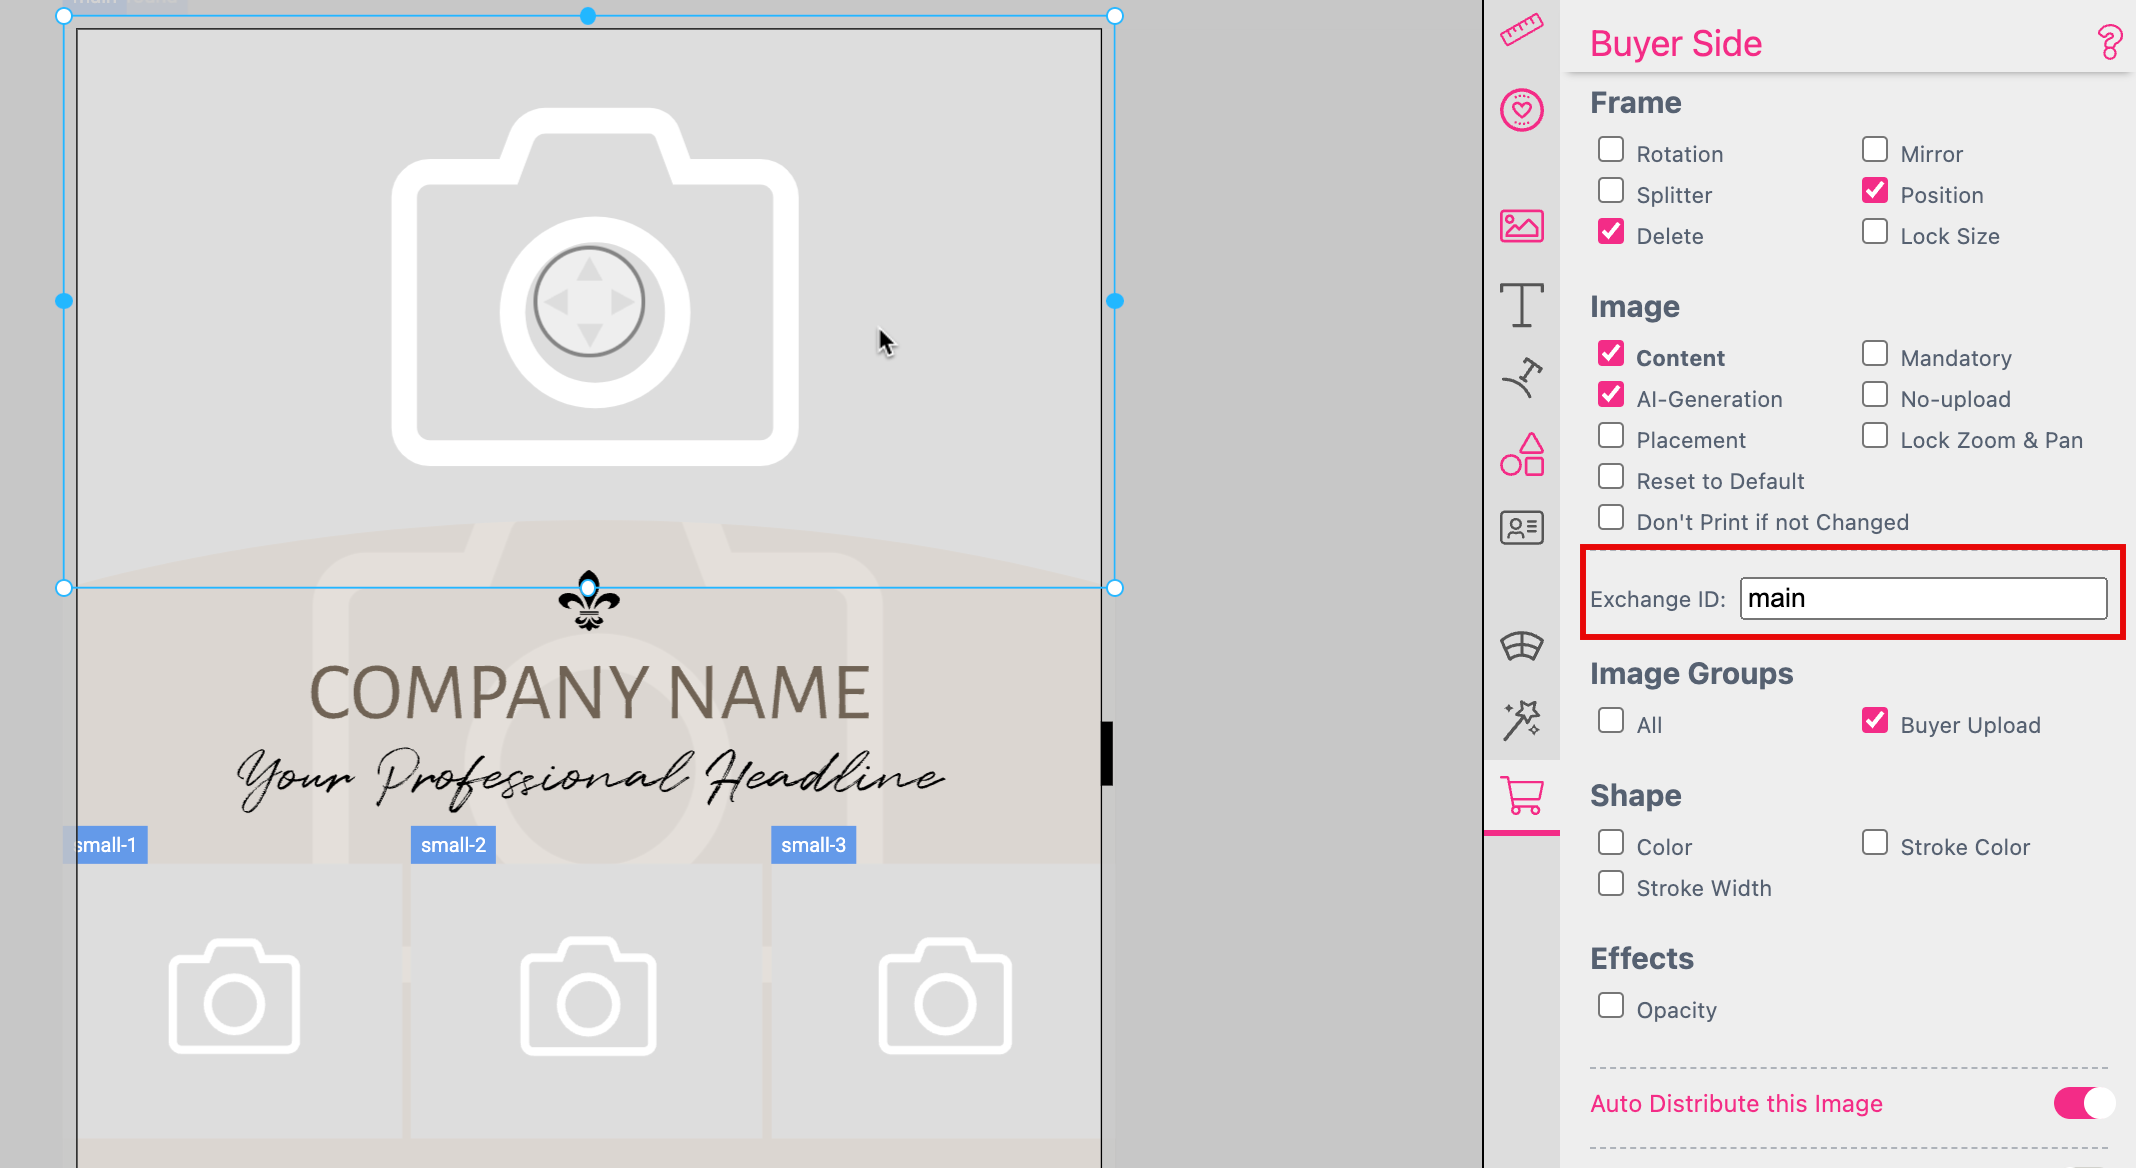
main: For the main image of a layout.
small1, small2, small3 and small4: For up to 4 small images.
background: For the background image.
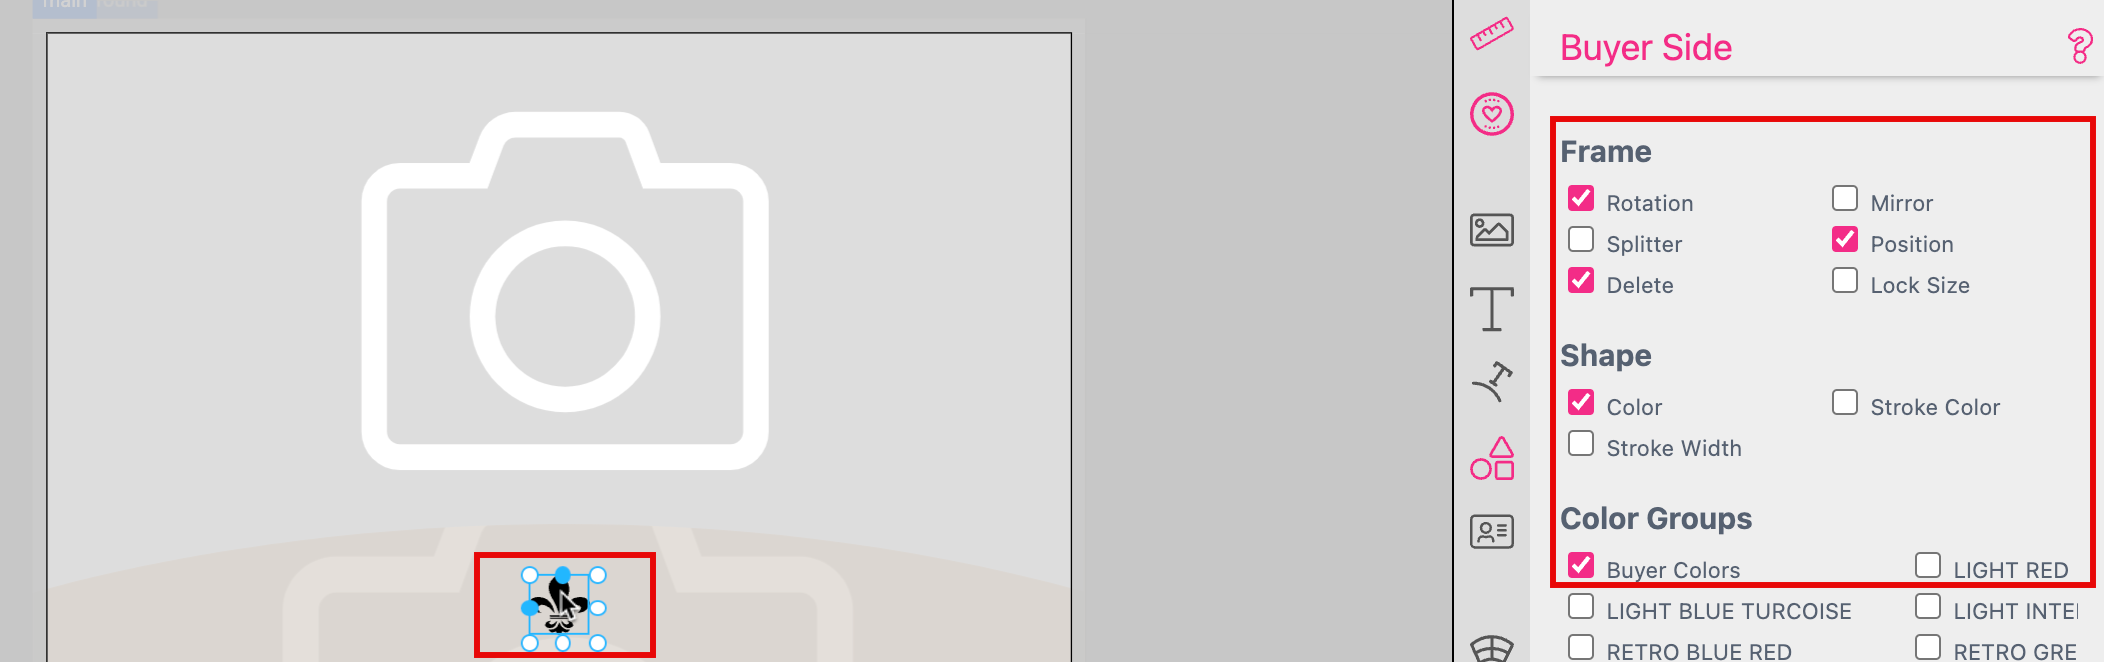
At the Buyer Side Settings Tab you have to activate at least the options Color and the color group Buyer Colors.
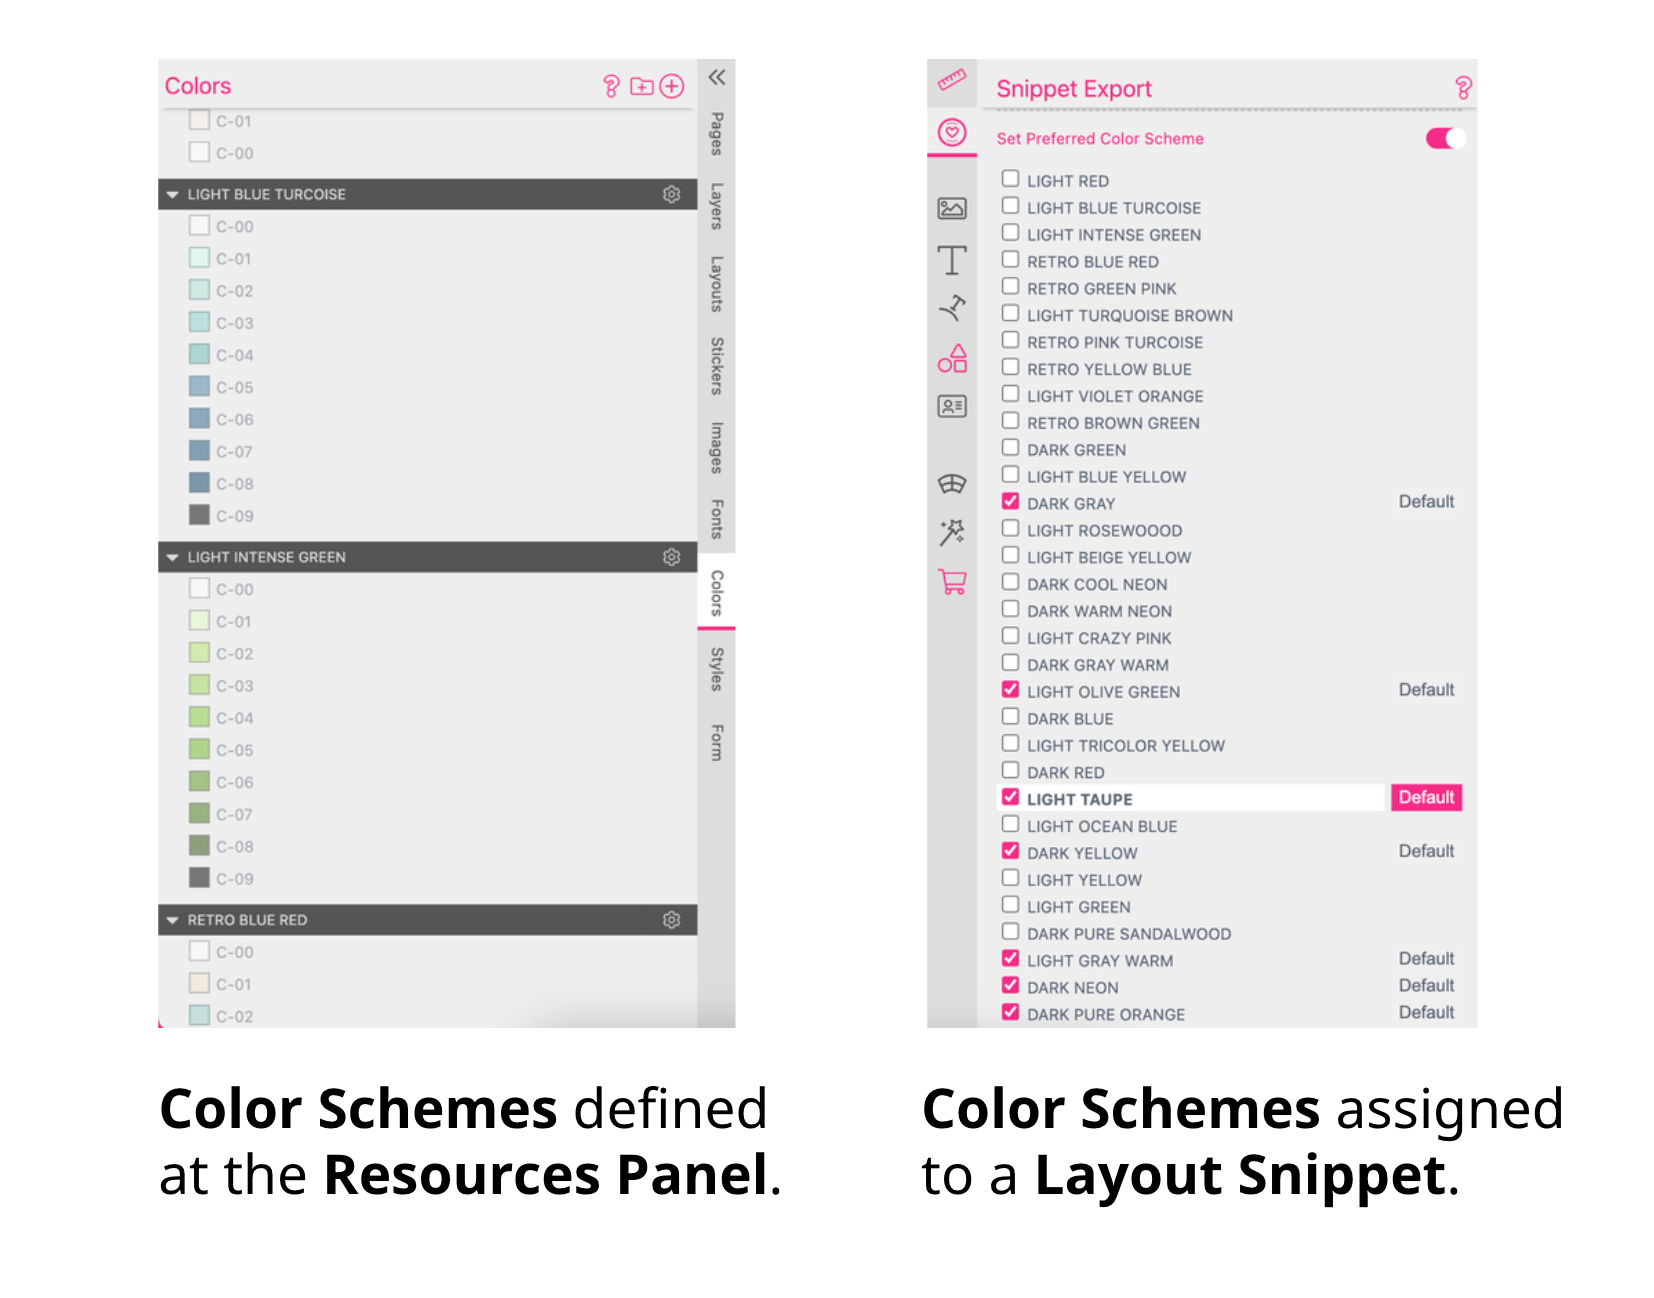
You have to define Color Schemes for each Layout Snippet Library to be used for creating the Layout Snippets. They have to be exactly the same for each Layout Library. If they differ they will overwrite each other. You can copy them from the Printess Sample File to paste them into your Layout Snippet Library. This is necessary to be able to define dedicated Color Schemes for each single Layout Snippet in a next step!
For each single Layout Snippet you have to define a “default” Color Theme and additional ones to choose from at the Buyer Side.
Learn more about Layout Snippet Color Schemes
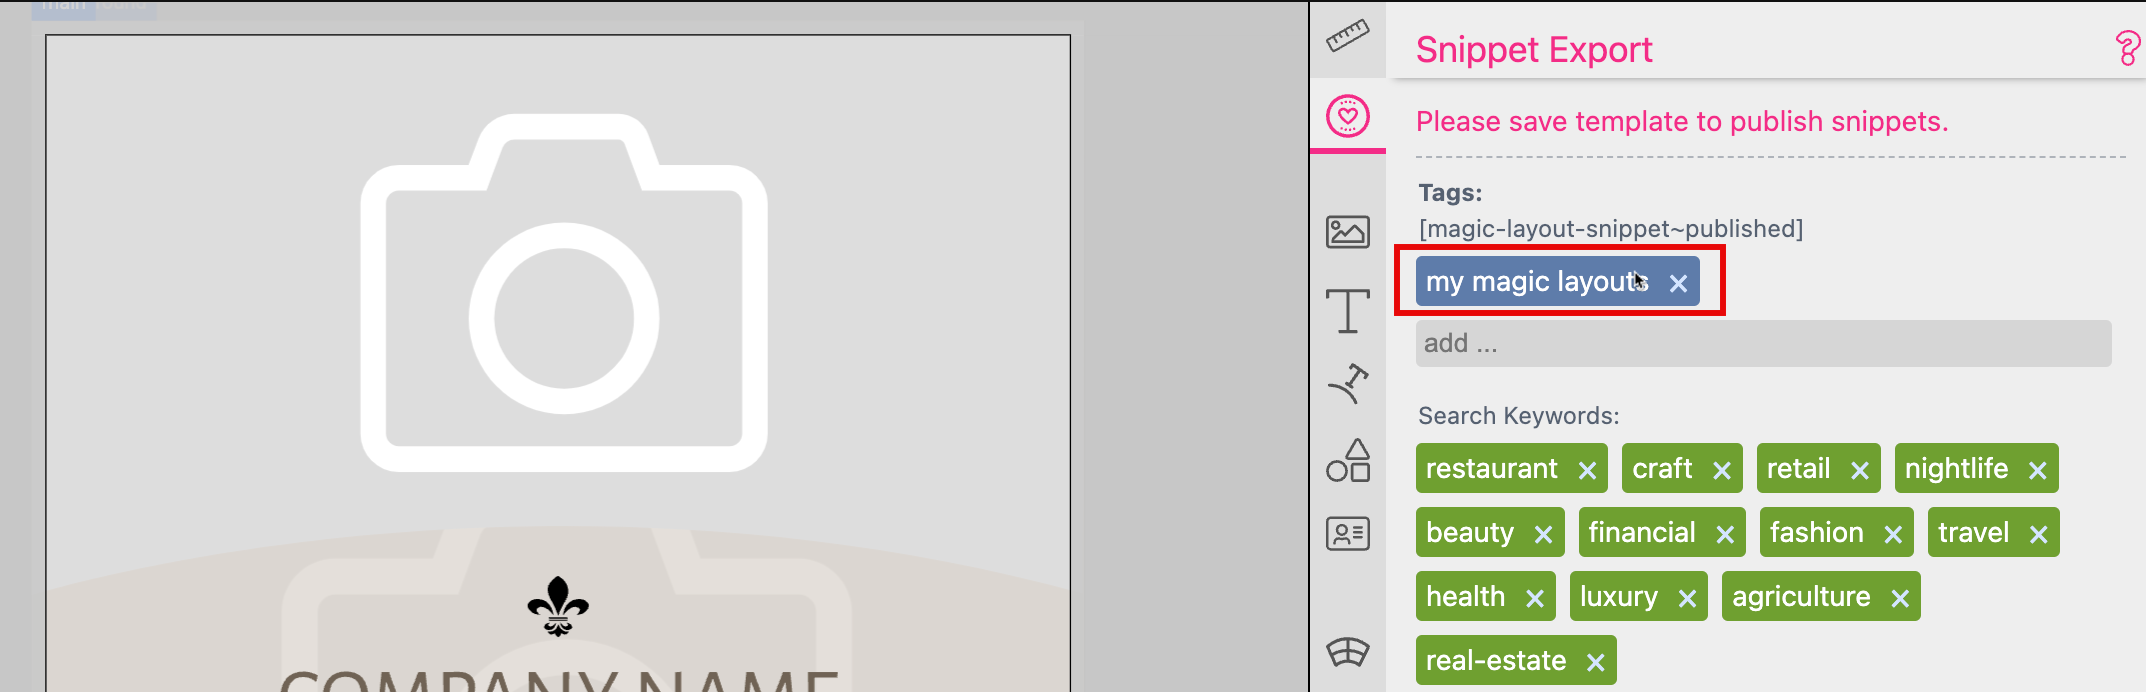
Learn more about Layout Snippet Export
You have to create a Resource Library to copy the Color Schemes into it which you have used for setting up the Layout Snippets. This Resource Library has to be assigned to your Template where the Layout Snippets will be assigned too. The Color Schemes have to be exactly the same like in your Layout Library. If they differ they will overwrite each other.
Therefore you have to:
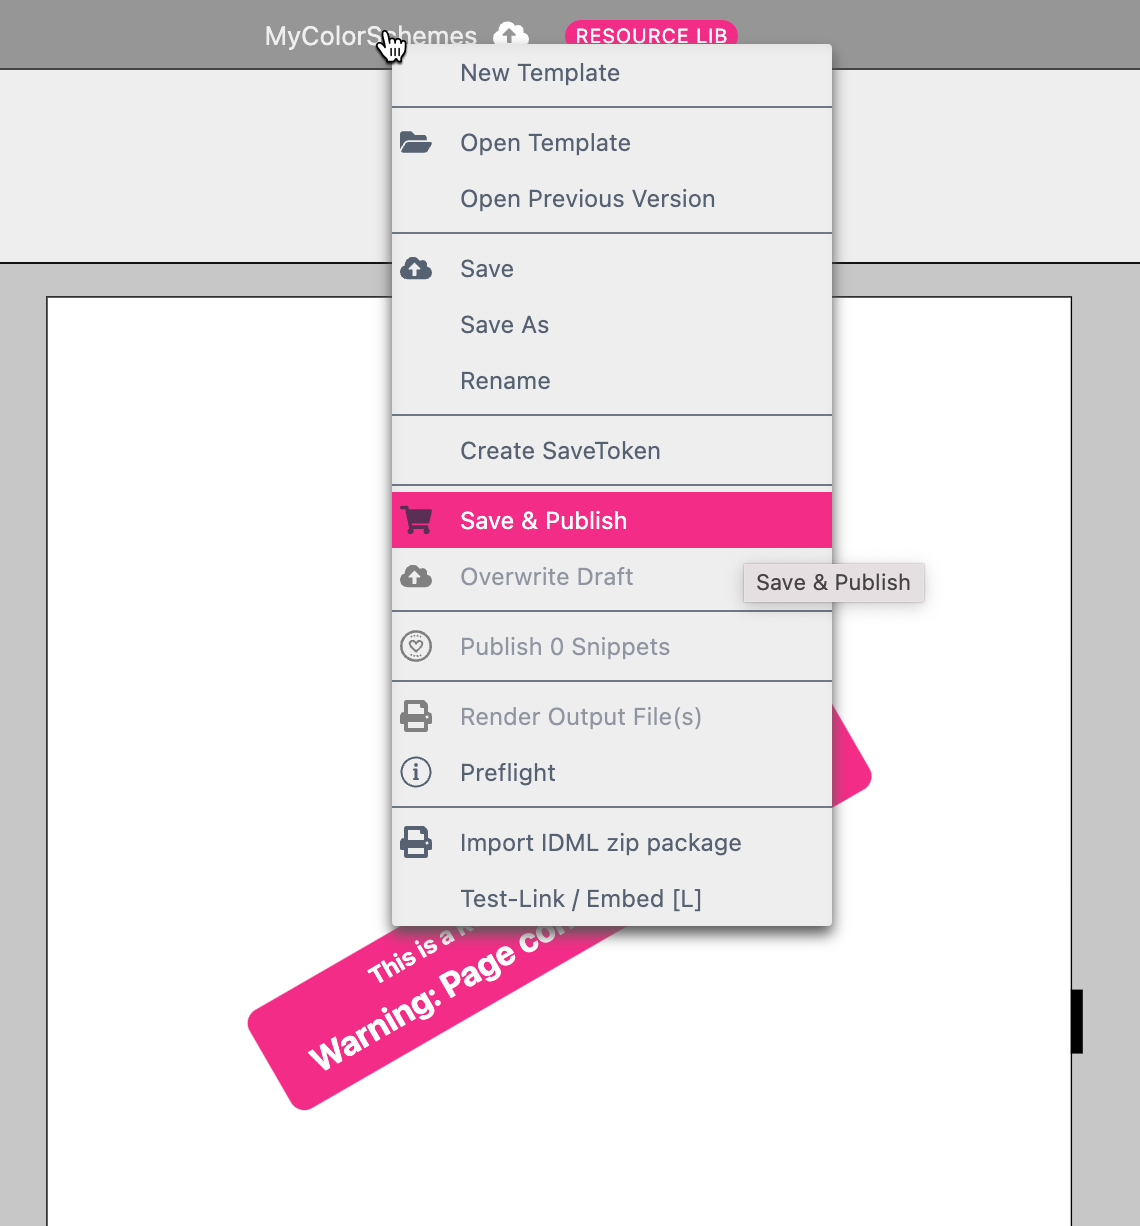
Now assign this Resource Library to your Printess Template like described in the section above: Set up target Template.