
On the left side of the top menu bar, you can Undo/Redo previous operations. This may also be done by keyboard with CTRL-Z for Undo and CTRL-Shift-Z for Redo.
In the center of the Top Menu Bar, Printess displays the name of the currently opened Template (a new Template will be displayed as [Unsaved Template]). If a Template from another user is opened you will see the user of origin in a circle to the left of the Template Name.
If you need to display the Template Name read here.
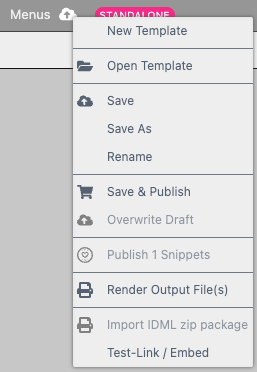
By clicking on the Cloud icon, the Template Context Menu will open as a drop-down. This menu contains the following actions:
Notice: Don’t continue working in this Editor, it is for checking past work and any changes made will be overwritten on save unless the document is saved as a new Template.
Allows you to import Adobe InDesign documents to Printess in IDML format.
We kindly ask for your understanding that Printess supports not all features of Adobe InDesign, as most of the settings are managed directly within Printess. To ensure a smooth import, we recommend keeping your InDesign document as simple as possible.
This feature gives you the option to import Adobe InDesign documents which still are editable afterwards. Therefore you have to export an Adobe InDesign Package which includes the Adobe InDesign IDML. In a second step you have to zip this Adobe Package. Now you choose the option Import IDML zip package to select the file you would like to import. Before the import starts Printess will ask which layers you would like to import.
 .
.
Here you can select each single layer from the Adobe InDesign document for the import. In general you would import all of them.
Layers Printess will always add the layers from the Adobe InDesign document to the Printess Template to name them in the same way you did in Adobe InDesign. These imported layers will be arranged underneath the Printess BASE LAYER. Printess will never place frames of the Adobe InDesign document onto the Printess BASE LAYER.
Fonts If the fonts of your Adobe InDesign document are part of the package you have exported, Printess will import them if the are compatible. Printess supports static Open Type Fonts and True Type Fonts. Variable fonts are not supported yet.
Please double check the Font Folder of your Adobe InDesign package before you zip and import it. Adobe Fonts will not be exported.
Adobe InDesign will only export those fonts which are in use by the Text Frames of your Adobe InDesign document. But Printess will also import any Character- or Paragraph-Style from Adobe InDesign. So if you have Character- or Paragraph-Styles defined in Adobe InDesign which are not used, Printess will show you an error message about missing fonts.

Take extra care with font licenses!
Most fonts you buy come with licenses that do not allow you to use them for web pages, or for more than one designer to use the font to produce documents. So please take extra care to not use such fonts if documents will be published or edited on the Buyer Side.
Printess will load font data from fonts even if they are used for non-editable text. As fonts licenses are treated like software, this may result in expensive penalties or lawsuits.
Please only use fonts where the license explicitly grants you the rights to use them on the web, copy and distribute them, and in the best case allow also for modification (as this is what you do by providing the Printess Editor to end-users). If in doubt, please contact your font vendor to discuss your intended use case and request written notice of allowance.
A good license which grants all of the necessary rights is the current SIL/OFL font license used by many free fonts. A good source of fonts under such a license is the Google Fonts project.
Character and Paragraph Styles Printess will import any Paragraph and Character Style available in your Adobe InDesign document - even if they are not used in any of the text frames within the Adobe InDesign document.
Only the basic Character and Paragraph Style features from Adobe InDesign like Font, FontSize, FontColor are supported in Printess. So we recommend to do a basic set up in Adobe InDesign to fine tune these Style directly in Printess later.
More complex Paragraph- and Character Styles need to be adjusted again in Printess.
Text The Adobe InDesign text flow can be imported into Printess - text wrap not.
Images Only images which are part of your Adobe InDesign package you have exported will be imported by Printess. Printess supports .tif, .png and .jpg formats.
Rotated inner image and masked image frames could not be imported into Printess.
Colors Printess will import all color swatches defined in Adobe InDesign Colors to put them in a separate folder called ROOT COLOR GROUP.

Any additional color - which is not defined as a color swatch - you are using in your Adobe InDesign document will be placed at the Printess default color group.

If you would like to make them accessible for the Buyer you have to move them to the color group Buyer Colors.
Pages Printess do not support Adobe InDesign Multi Page Spreads.
Opens the API-Tokens Dialog. It allows you to get an Embed Code for the current Template or a Buyer Side Test-Link to the current Template for sharing and testing. You can use the short cut “L” as well to open this dialog.
Please save your Template first before you create a test link. Otherwise your changes won’t be part of the test link.
Here you find the option to use three different test links:

Legacy UI:
Will lead you to the Buyer Side of the old Bootstrap UI.
Slim-Ui:
This link will lead you to the Buyer Side of the Slim UI.
You have to save older, existing Template first before you can generate a Slim UI test link.
The Slim UI is optimized for simple, single-page products and integrates directly into the shop’s product page without loading the full Printess Editor. It’s ideal for quick personalizations, such as adding text to a greeting card or uploading an image for a mug. Not all Printess features are supported.
Generate Test-Link
Will lead you to the Buyer Side of the Panel UI.
This option is only visible if Manual Merge mode is NOT active.
Type in a two-digit country code and it will automatically be added to the Test-Link URL. The Buyer Side will switch to that language.
This option is only visible if manual merge mode is NOT active.
You can set values for the Form Fields used through the Test-Link URL. Just click on the option Add Form Field. An alert box will pop up where you can type in the name of the Form Field. It will be then displayed in the Test-Link dialog box where you can now type in the value for this Form Field.

Here you can now remove it again or you can add additional Form Fields. They will be automatically added to the Test-Link URL.
With Printess you can merge different Templates through the API. With the so called Manual Merge you can test it from the Editor using the Test-Link URL. How this works in detail you can Learn more here: Merge Templates Manually
About Template Merge through the API you can read here.
It points your shop to your Printess Account. The Shop Token allows the loading of Templates and Layout- and Sticker Snippets, upload Images and saving / loading the current layout.
The secret Service Token has access to the production API and can render PDFs or PNGs. It will be shown only on accounts with administrative access.
To embed Printess editor simply copy and paste the code below to your HTML page. You can address a Template via its name or simply send a received Save-Token instead.

The Settings Menu (located on the right of the top menu bar) gives you control over various important Template-wide settings:
Show Smart Guides: Enables or disables the Smart Guide positioning aid. This useful aid can snap frames to edges or maintain a user-set distance to other frames as you move them around.
Show Grid Lines: This displays a grid onto which all frame positions and sizes will snap whenever you move or scale frames.
Grid Gap-Size (actual): Sets the size of the grid.
Show Layer Matrix: This opens the Layer Matrix settings on the bottom of the window. Learn more about Layer Matrix here.
Show Database: This opens the Add Database option at the bottom of the window. Here you can load data from a Google Sheets Share-Link.
Show Animation Timeline: Displays the Animation Timeline at the bottom of the Designer Side. Learn more about Animation
Show Styles: This activates small label tags for all frames that have a Style. Multi Line texts will also show labels for paragraph and character Styles.
Show Exchange IDs: Shows labels for Exchange IDs (used for content persistence when changing layout Snippets).
Show Paragraphs Shows Paragraphs and forced Line Breaks in Multi Line Text Frames
Show UI Hints: This enables or disables UI hints.
Search in Global Snippets: This is a useful feature for multi-user scenarios where a separate global account is used to publish all Templates and Snippets stored within the user’s eCommerce/Shop system. To see all published Snippets in this type of global account while not logged in, enable this option.
Buyer View Appearance: Opens the Buyer View Appearance settings menu which lets you fine-tune various Buyer Side UI elements with powerful customization options.
Template Type (__): Shows the current Template Type. Selecting this will open the Template Type menu where you can merge Resource Libraries, add Dropshipper info, or change between Design, Library,and Base Templates.
If you click on the gear icon on the upper right the Template Settings Menu will open (A). Select Template Preferences to open the Template Preferences Dialog (B).

Here you can enable/ disable the following Settings:
This enables or disables the creation of Document Thumbnails for the Template. These Thumbnails will be created anytime you save the Template - So for working on large Templates it can save time to disable this option.
If switched on, all frames will have visible borders on the Design Side. This is especially helpful for adjusting text frame layouts where the border is normally not visible.
This feature is activated by default.

So if you take a Shape frame to set the Shape Color to “None” the frame becomes invisible.

But now you can use the edges and its center as vertical and horizontal snap lines at the Buyer Side.
These red snap lines appear as soon as the edge of the moved frame will touch them. That enables the Buyer to place the frame precisely.

This option is activated by default. It enables the execution of some Form Field actions like script execution or write-to-second-form-field. These action are meant for the Buyer Side and won’t be executed at the Designer Side if you disable this option.
Here you can assign a dedicated Product Type of your Layout Snippets to your Template. So if you have defined Product Types for you Layout Snippets you can filter them here so that only the matching Layout Snippets will be shown at the Buyer Side.
Learn more about Layout Snippet Product Type here
Here you can define a Hyphenation Language for the entire Printess Template. Even though you can define a different language for a dedicated Multi Line Text Frame.
Learn how to define a Hyphenation Language for a dedicated Multi Line Text Frame
If a Hyphenation Language is active you can restrict it to justified paragraphs only.
This function is executed in the Production Document only! It is intended for pages that are added to the product during Production but are neither editable by the Buyer nor shown in the preview — for example, in a book.
To make this feature work, only one Image Frame can have the face-swap Assign Action enabled for the Buyer Side. When the Buyer now uploads an image to this frame, the image is automatically distributed to all other Image Frames of the Printess Template that also have the face-swap Assign Action enabled. — the Buyer Side Setting “Content” does not need to be enabled for those Image Frames.
Learn about the Assign Action “face-swap”
Will execute the option Write content to second Form Field when the Form Fields are send over during the production/produce api call. Therefore this setting has to be activated for the Form Fields.