By using the Translation Table you can change the language of the Printess UI and your text content. It will then automatically change corresponding to the browser language. In addition you got two ther options to change the language of the UI and your content:
The browser language can be set trough the API using the “translationKey”. Learn more about the translationKey here.
You can add a Select List Form Field to enable the Buyer to choose a language. How this works is explained here.
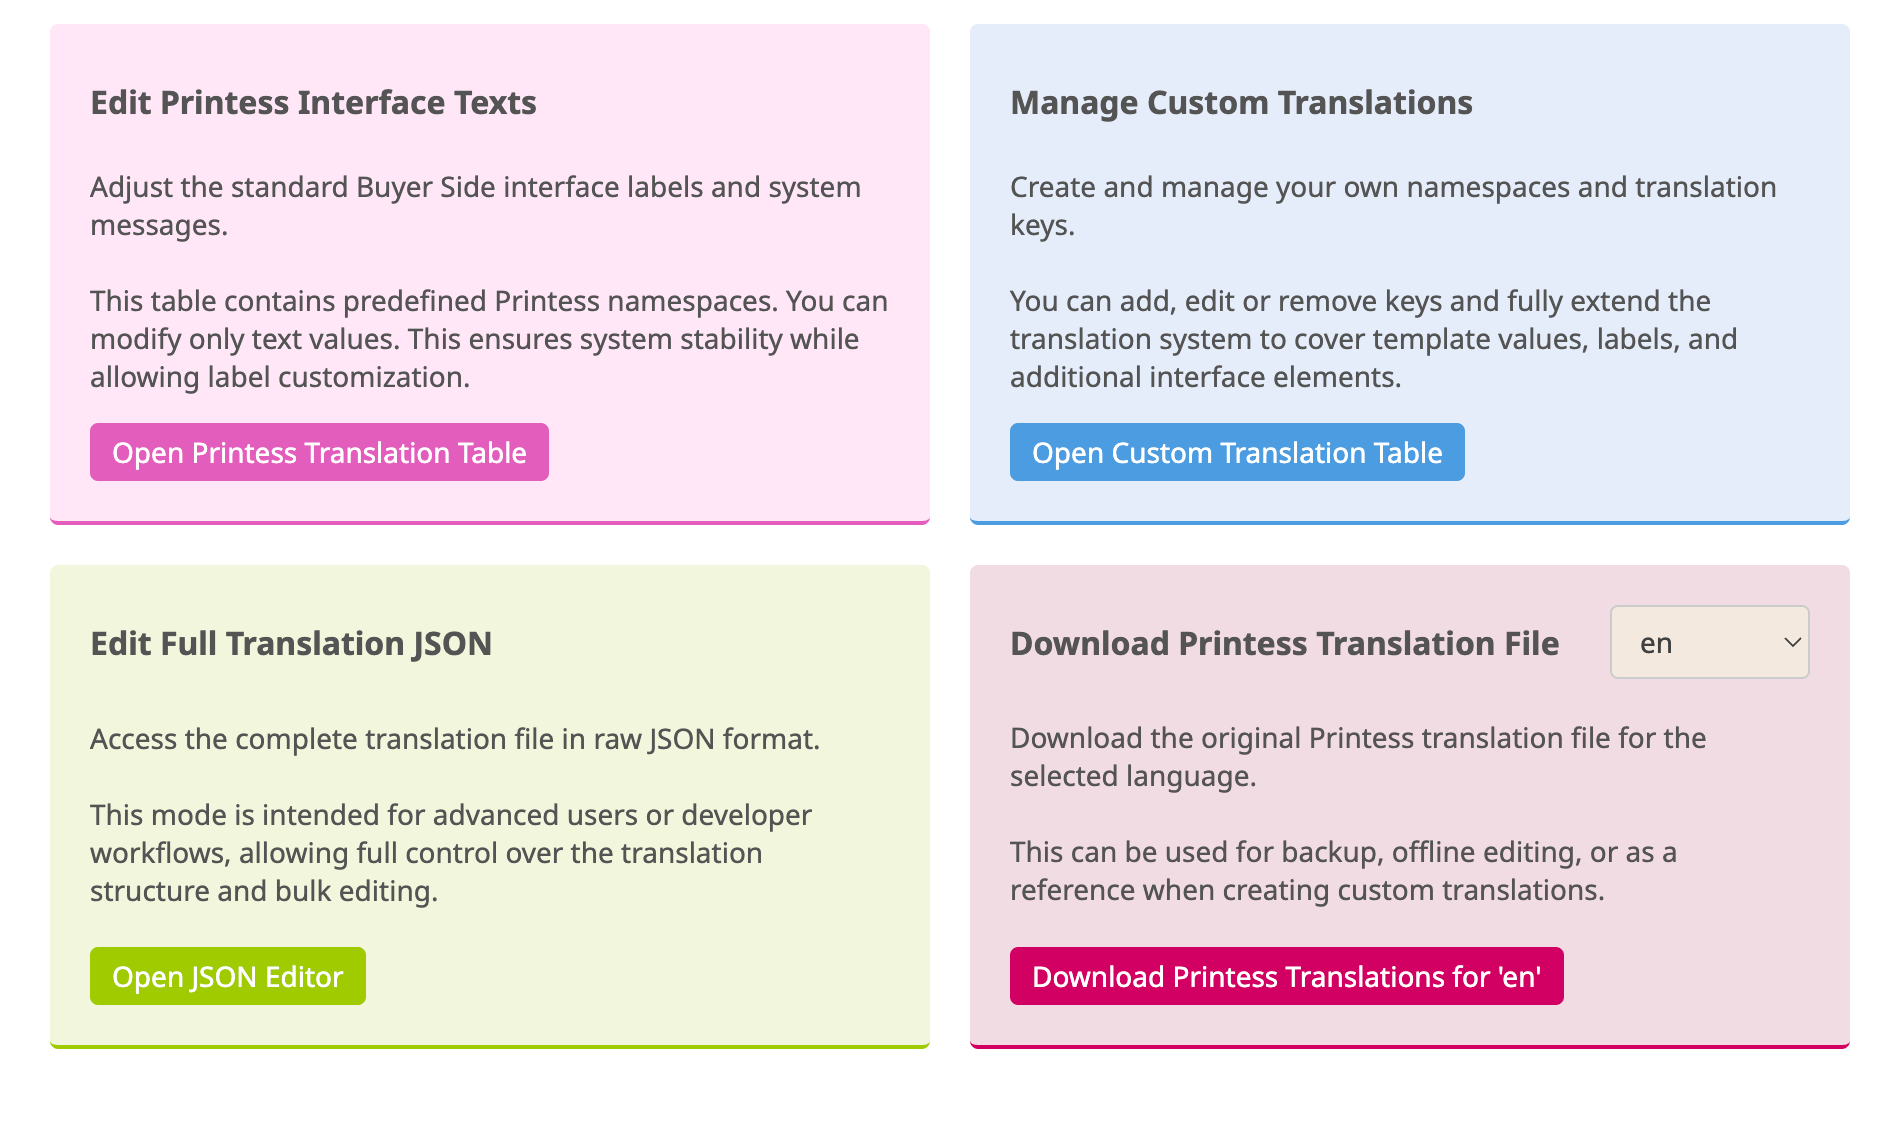
This section allows you to manage all Buyer Side translations in one place. You can adjust default interface labels, add your own translations for Keyword Menus, Photobook Themes, Form Field Labels or Text Frame content, or manage complete language files.
Here you can choose how you want to manage your Translations. Each Translation has its own Key. The Keys are collected in different namespaces to avoid name collisions.

You can adjust standard Printess Interface texts of the namespace “ui”, “alert” and “error”. But you can not add any Key to these Printess namespaces.
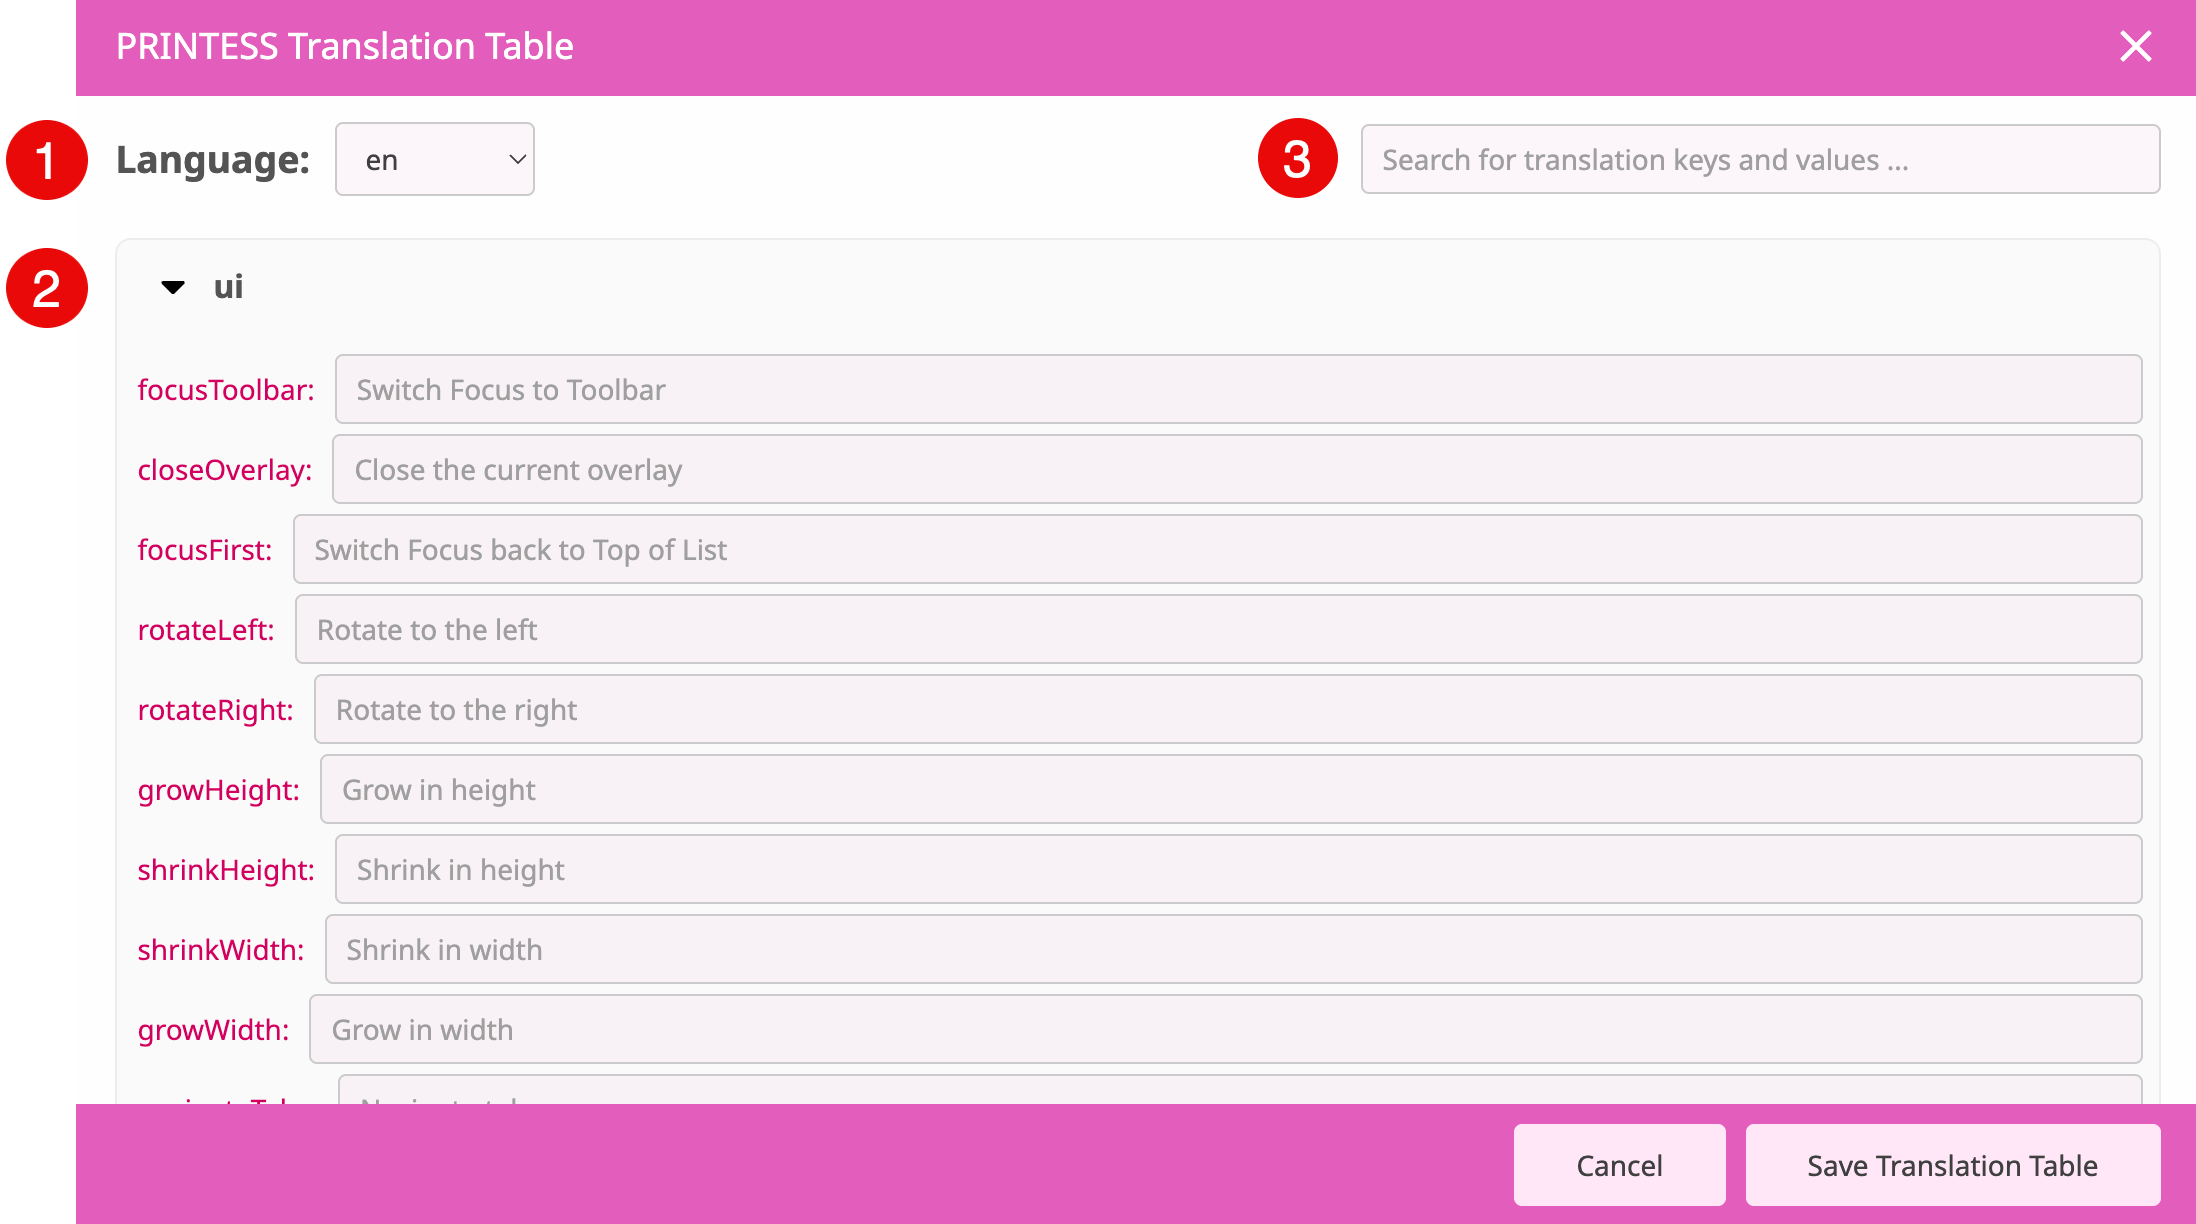
The default Translations are displayed with a red Keys and a grey text. As soon as you customize a Translation the Keys and the text are turning black.
If you would like to set back a Translation to the default one you just have to click the bin icon.

Here And you can create your own namespaces and Key. And you can adjust Printess Translations AND add Keys to the following Printess namespaces:
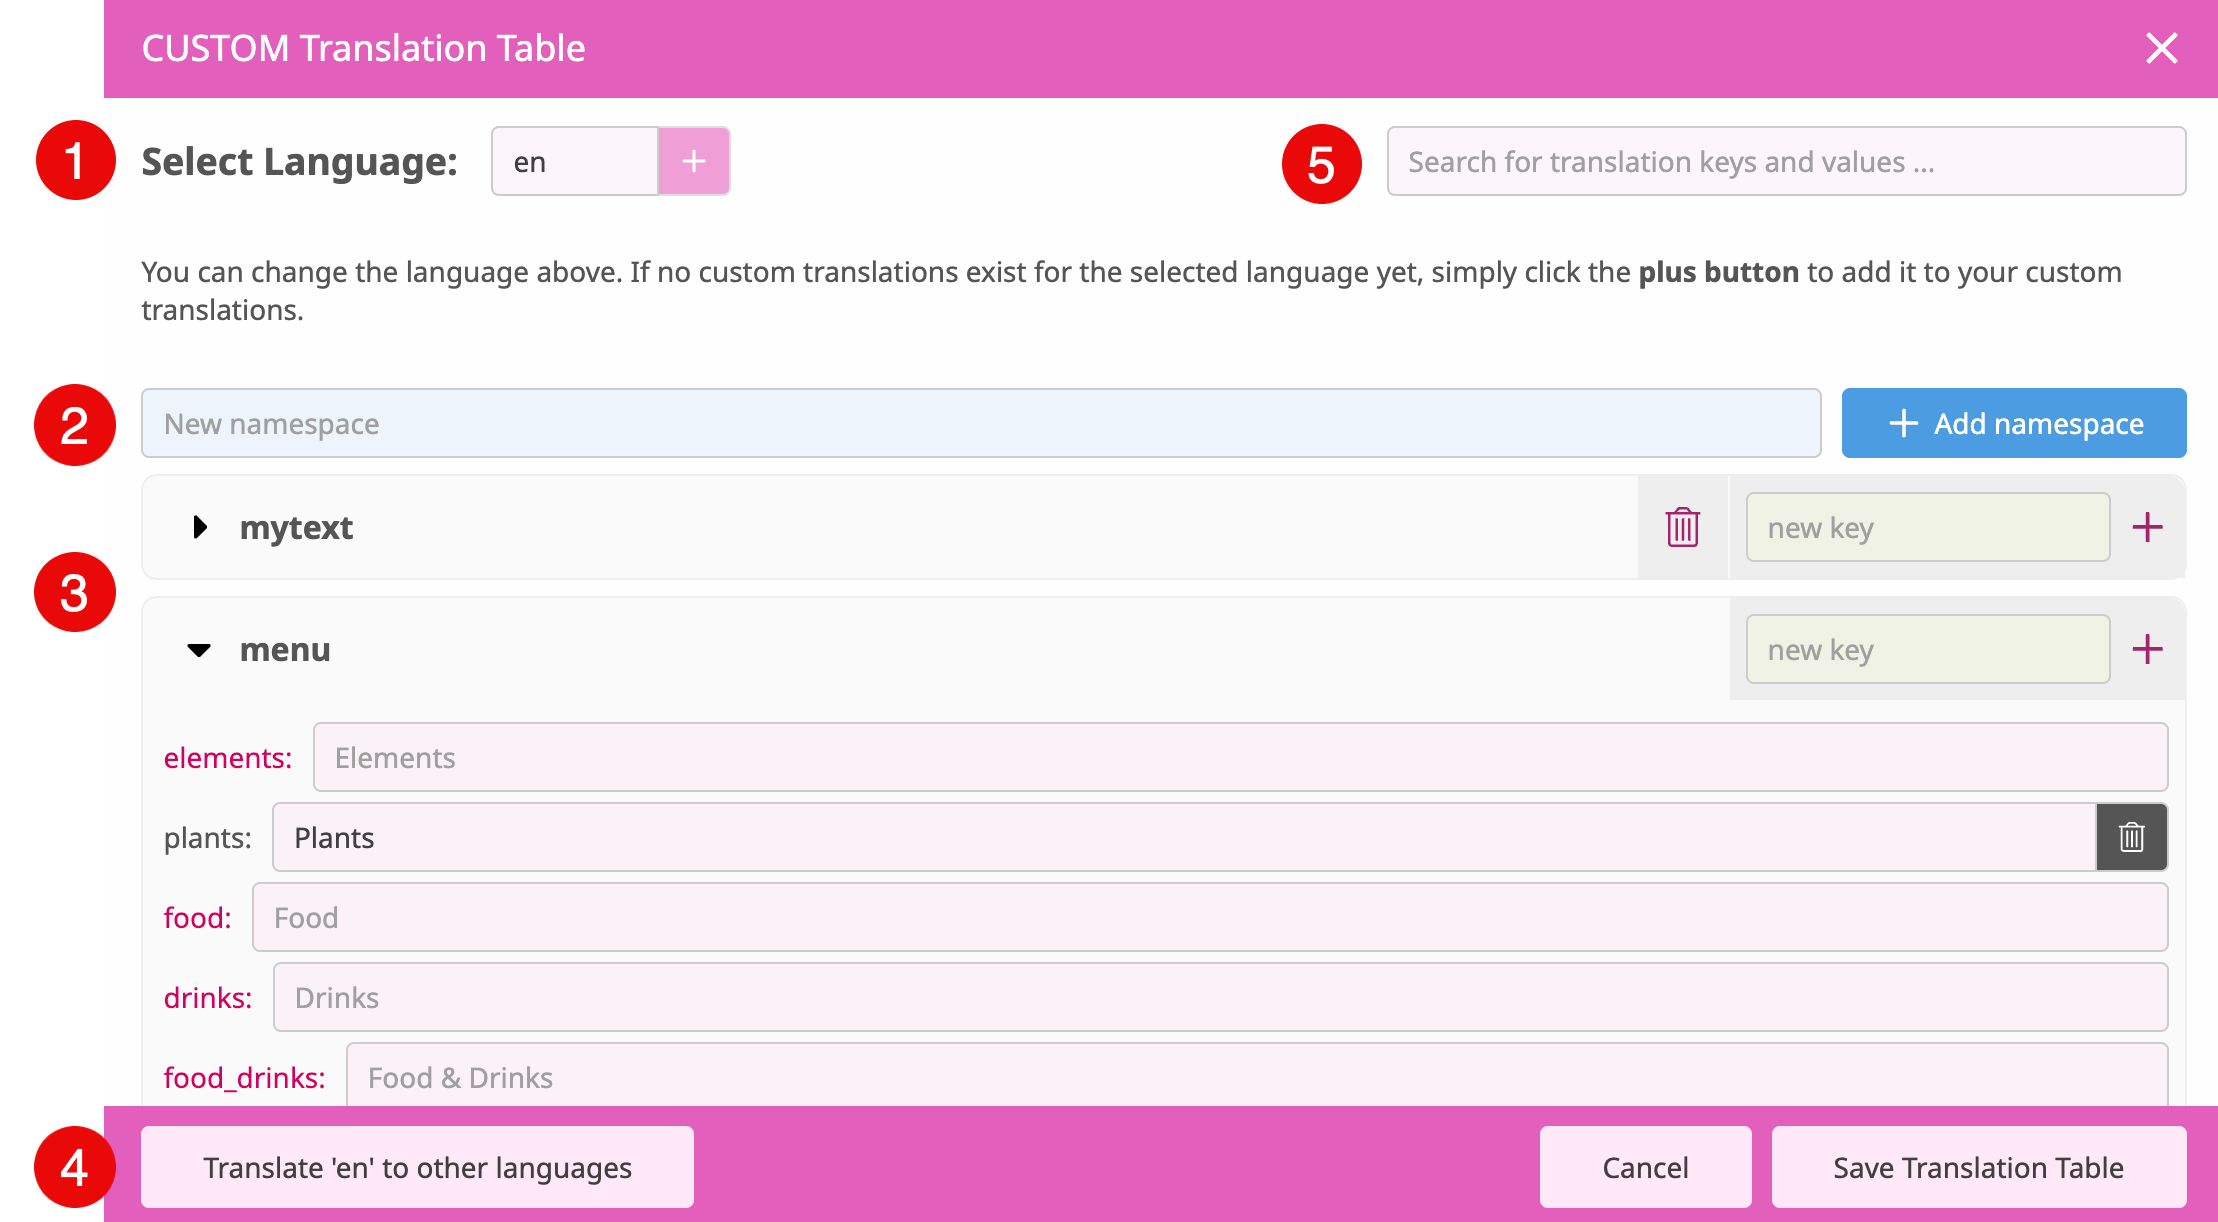
By default english is the selected language. You can switch to another language by choosing it in the drop down menu. If you would like to add a language to your Translation Table press the “Add Language”.
Type in a name of a new namespace and press the blue button “add namespace” to add it to the Translation Table.
The list shows you the existing Printess namespaces - like “menu” and your own - like “mytext”. On the right you can add Keys to these namespaces and by clicking the bin icon you can remove your own namespaces.
The Printess Keys are displayed in red and you can not remove them. Your own Key are displayed in black. By pressing the bin icon on the right you can remove them.
If you like to add any new namespace or Key always start with english or german - “en” or “de”. Because any other language could than be translated automatically.
This button only exists in english and german Language Tables. If you add a new namespace or Key you should always start with one of these languages because this button than automatically translates it to any other language available in your Translation Table. Therefore it automatically adds the namespaces and/ or Keys to the other languages. But please make sure that you have saved your changes before you press this button!
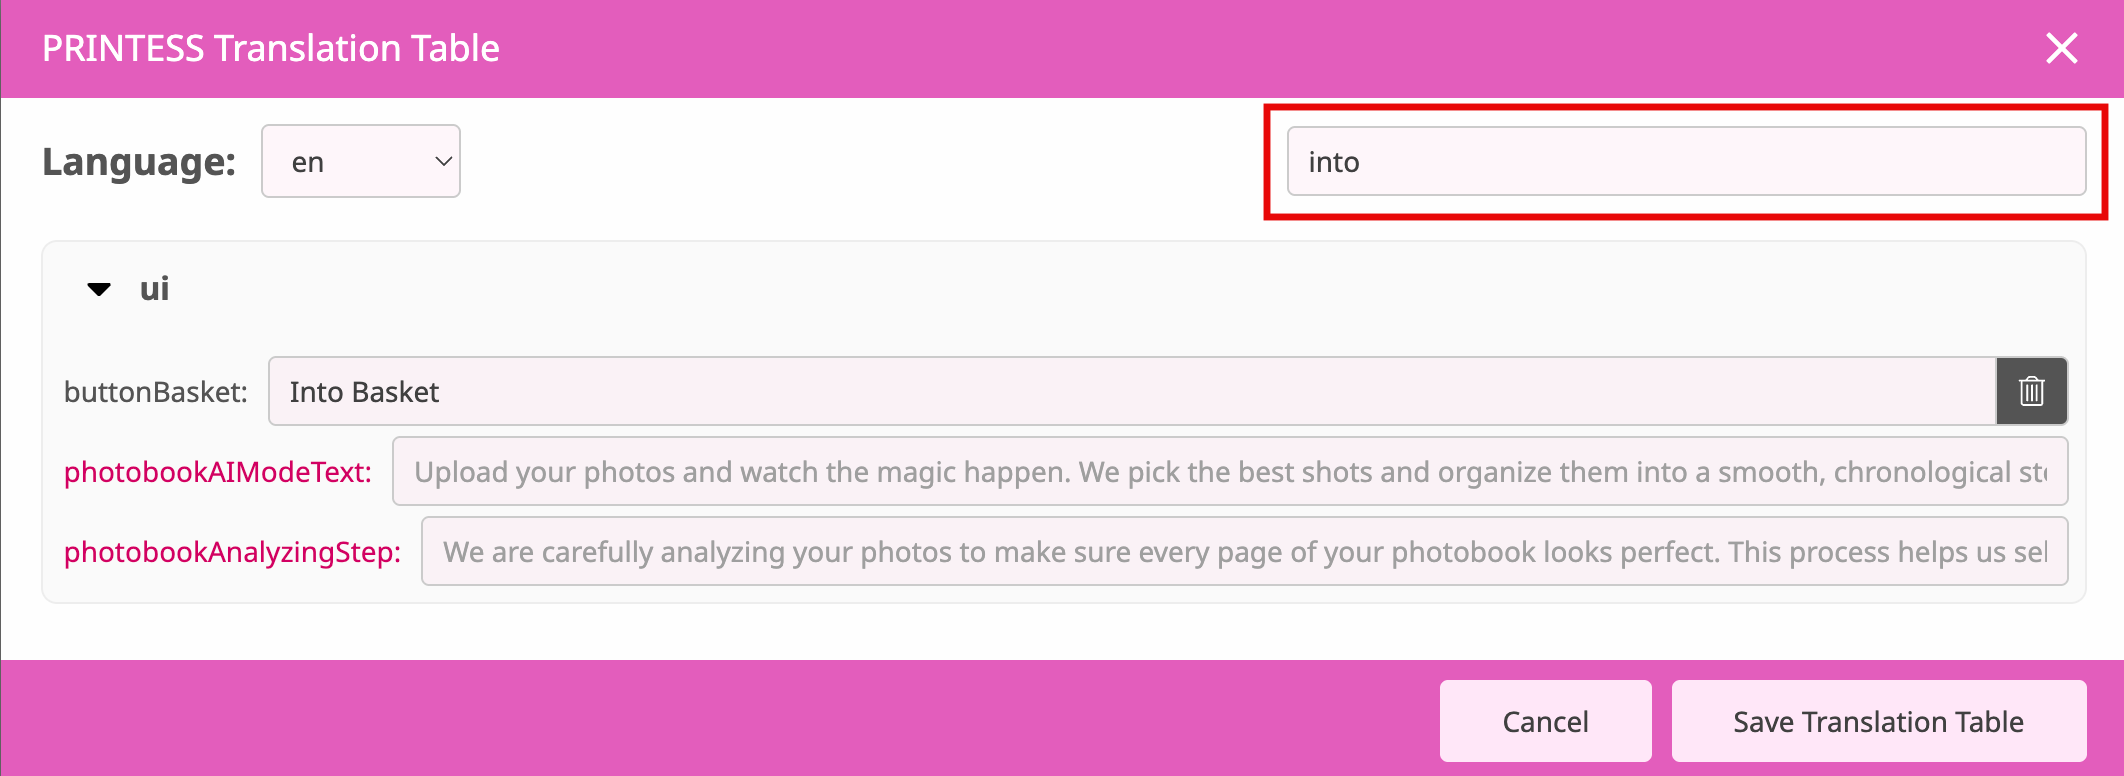
Search for any existing translation here if you do not know the namespace or Key of it.

This feature is only for people who feel comfortable with JSON coding. You can directly access the JSON files to edit the Translation of any language and to add new ones.
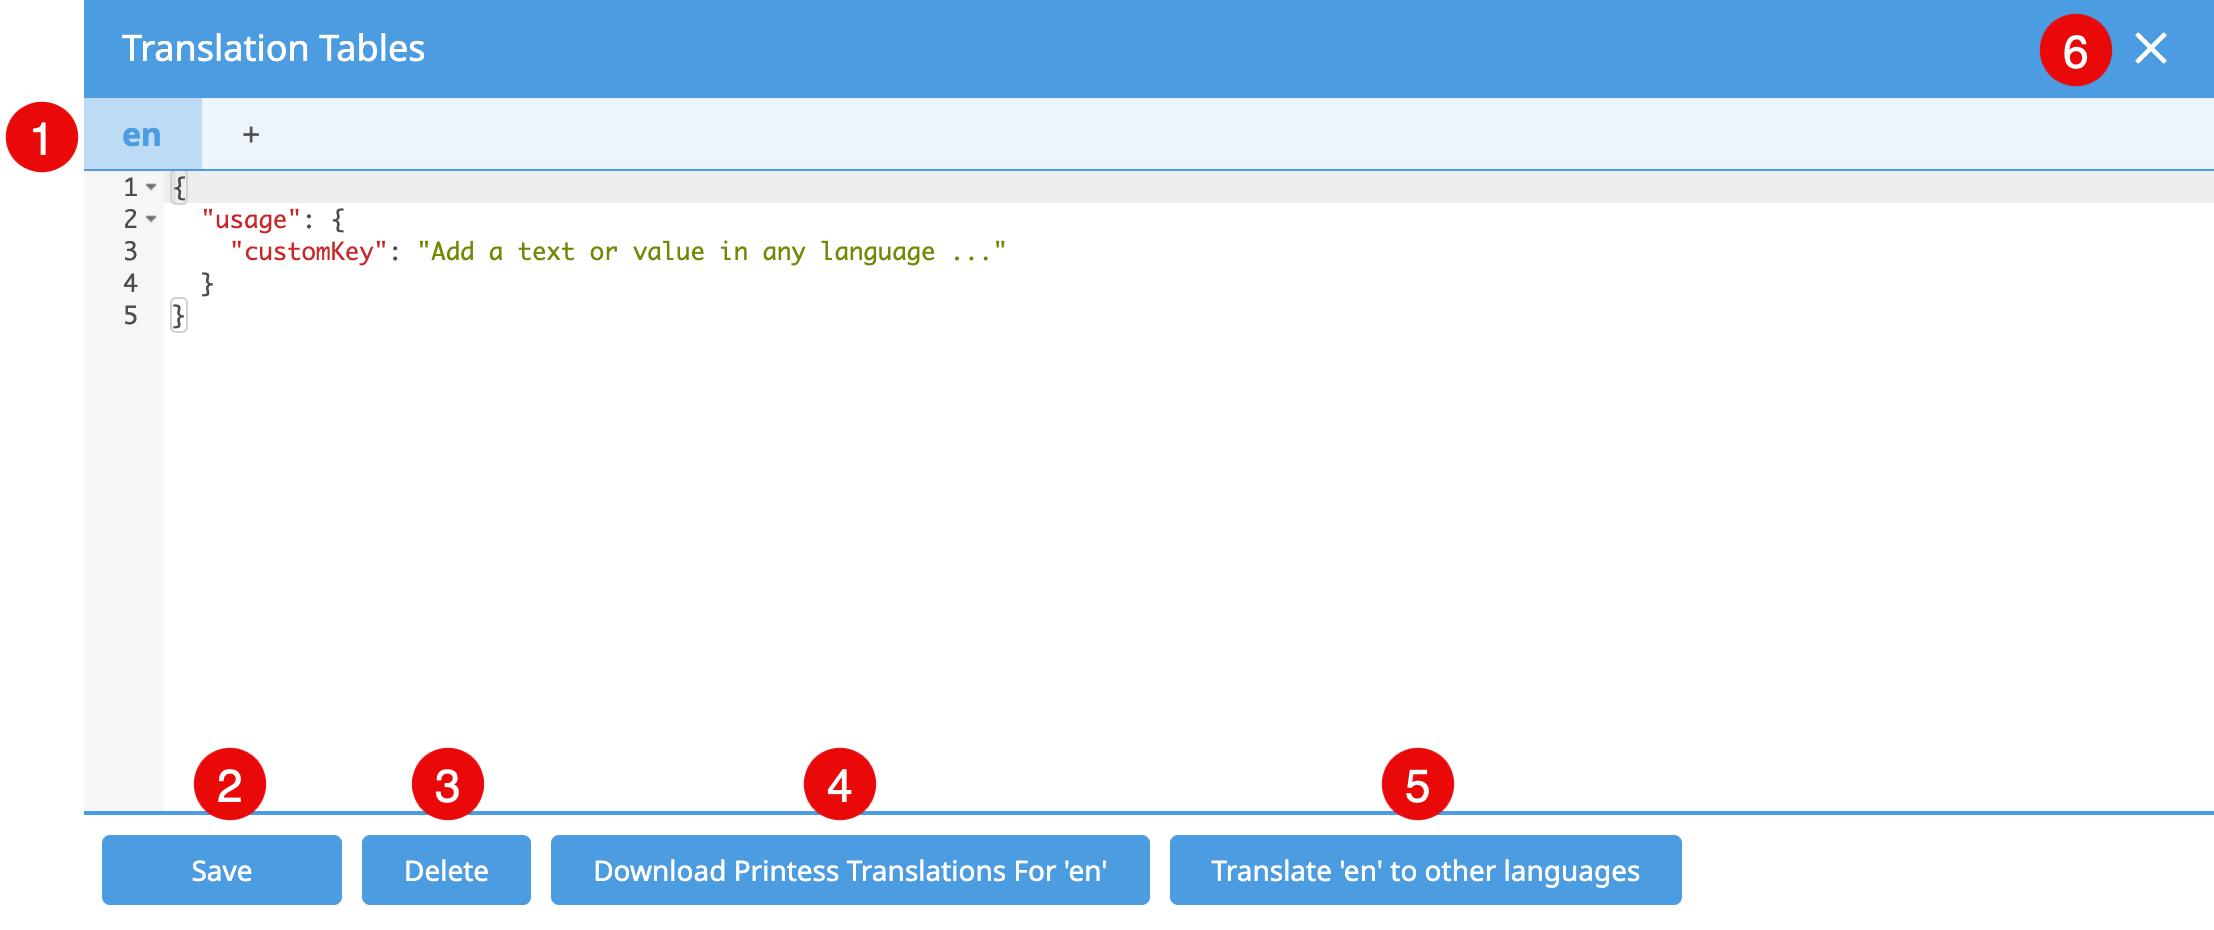
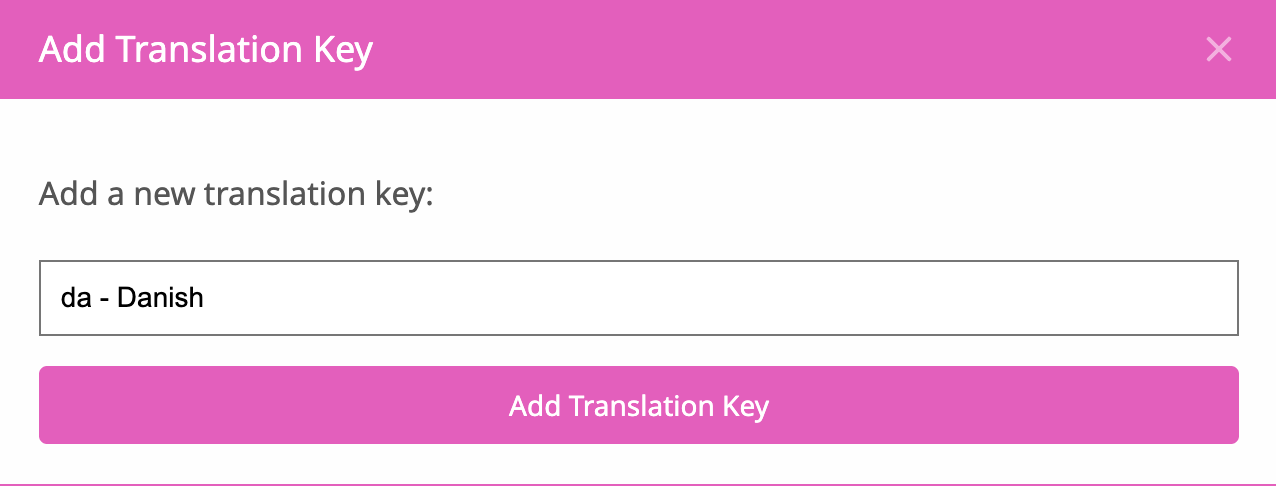
If you would like to add a language press the plus icon next to “en”. Another dialog will open where you can select the language from a drop down menu to press “Add Translation Key”.
After that window closed press the blue “Save” button of the Translation Table first!
Press to save any changes before you take any other action.
Pressing this button deletes the language currently displayed.
Here you can download the entire Translation of the current language displayed as a JSON file.
This button only exists in english and german Language Tables. If you add a new namespace or Key you should always start with one of these languages because this button than automatically translates it to any other language available in your Translation Table. Therefore it automatically adds the namespaces and/ or Keys to the other languages. But please make sure that you have saved your changes before you press this button!
Close the Translation Table here.

You can download the original Printess translation JSON file of the selected language - in the drop down menu to the right. This can be used for backup, offline editing, or as a reference when creating custom translations.
In addition to change the Translations in the Printess UI you can assign any Key to Form Fields, Single Line Text frames, Multi Line Text frames etc. Below you will find an overview of where Translations can be used.
The namespace “menu” is meant to translate the content of your Keyword Menu. So if you set up a new one a translation does not exist. So even if you work with a single language only you have to add Translations of all the terms used to your Translation Table. A missing Translation is indicated at the Buyer Side by a term which starts with “menu.”
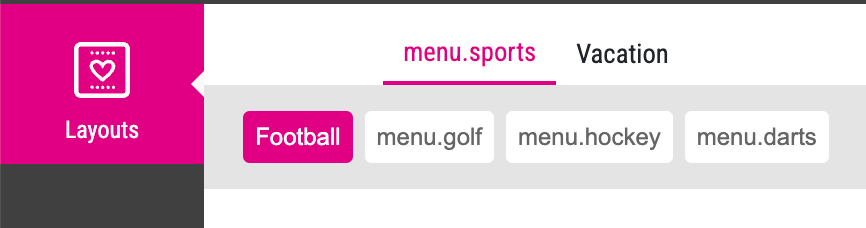
So if your Keyword Menu looks like this at the Buyer Side it indicates that there are two Translations already do exist in your Translation Table: “Football” and “Vacation”. All the other Categories and Topics are missing. This is why they displayed starting with “menu.” So press the button “Open Custom Translation Table” to add the terms of your Keyword Menu to the namespace “menu”.
The namespace “theme” is meant to translate the names of your Photobook Themes. So if you set up a new one a translation does not exist. So even if you work with a single language only you have to add Translations of all the Photobook Theme names used to your Translation Table. A missing Translation is indicated at the Buyer Side by a term which starts with “menu.”
So if your Keyword Menu looks like this at the Buyer Side it indicates that there are two Translations already do exist in your Translation Table: “Football” and “Vacation”. All the other terms are missing. This is why they displayed starting with “menu.” So press the button “Open Custom Translation Table” to add the terms of your Keyword Menu to the namespace “menu”.
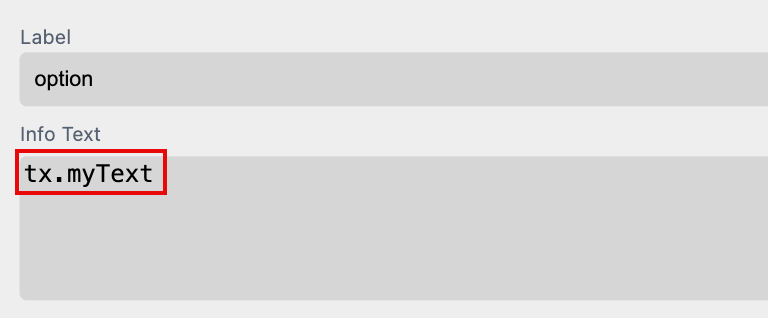
You can assign text from the Translation Table to the Info Text and the Label of a Form Field.
To make this work you have to enter the text for the respective language in the Translation Table first. This example is using the “Key” myText in the “namespace” “tx”:. In the example it is set up for two languages: “de” and “en”.
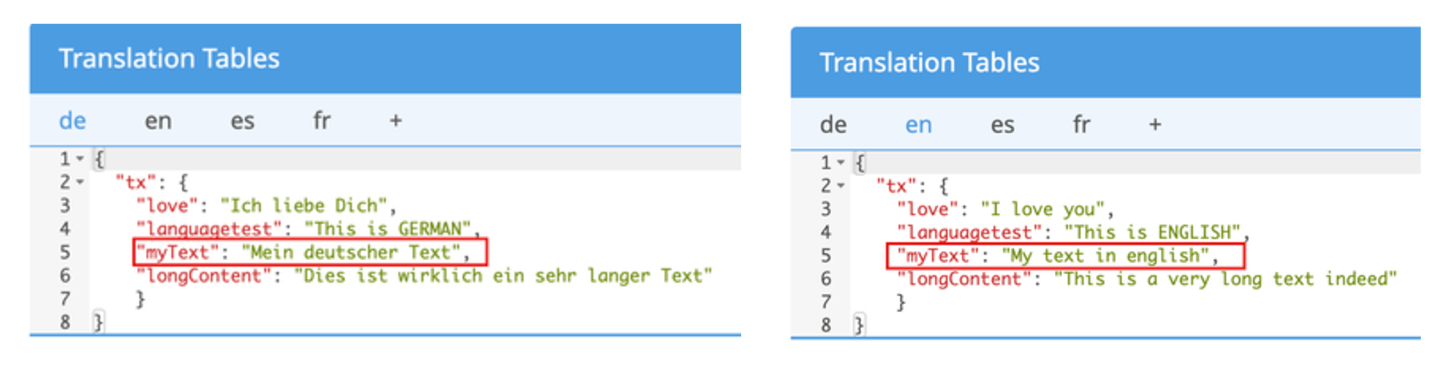
To assign the “Key” myText of the “namespace” “tx”: to the Info Text or Label of the Form Field use the following syntax:
tx.myText
Just write it into the Info Text for example. When you switch to the Buyer Side the text will be displayed depending on the language set for the Buyer Side.
For testing you can now change the language of the Editor and the Buyer Side by adding"?lang=en" to the URL for example. So the entire URL will look like: “https://editor.printess.com/?lang=en”. And the text will be translated into German in this case.
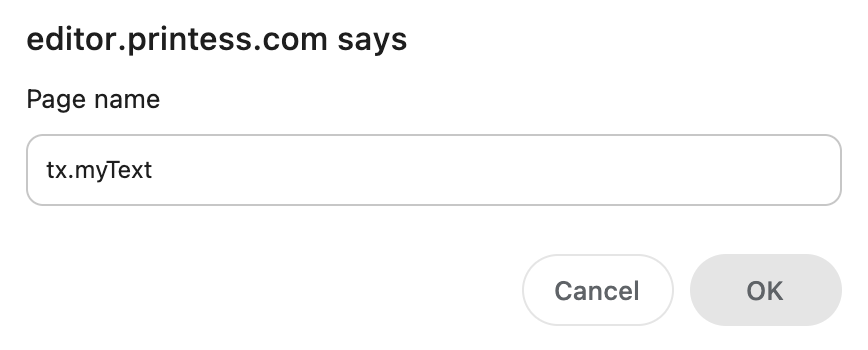
To translate the Page Name you have to enter the text for the respective language in the Translation Table first. This example is using the “Key” myText in the “namespace” “tx”:. In the example it is set up for two languages: “de” and “en”.
To assign the “Key” myText of the “namespace” “tx”: to the Info Text or Label of the Form Field use the following syntax:
tx.myText
Just write it into the Change Name Text Input Field. When you switch to the Buyer Side the text will be displayed depending on the language set for the Editor.
For testing you can now change the language of the Editor and the Buyer Side by adding"?lang=en" to the URL for example. So the entire URL will look like: “https://editor.printess.com/?lang=en”. And the text will be translated into English in this case.
To make this work you have to enter the text for the respective language in the Translation Table first. This example is using the “Key” longContent in the “namespace” “tx”:. In the example it is set up for four languages: “de”, “en”, “es” and “fr”.
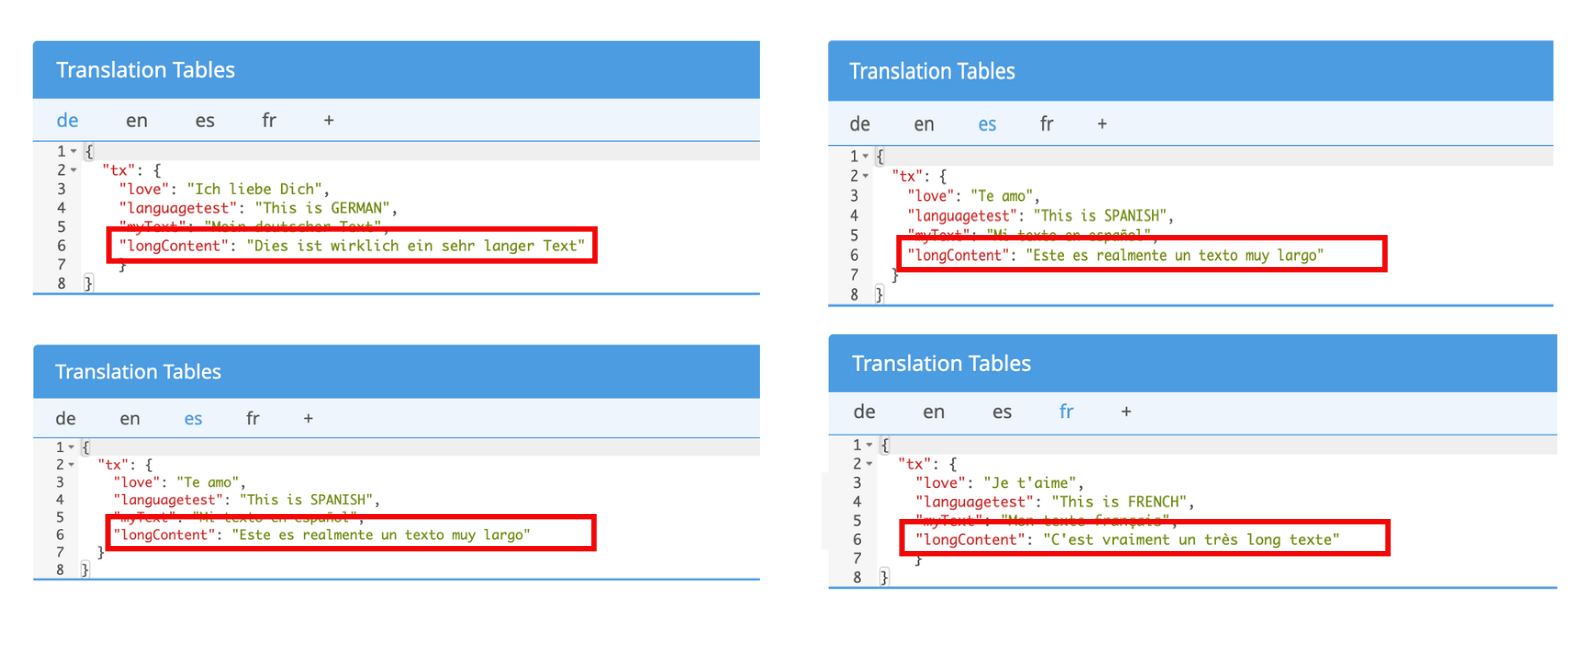
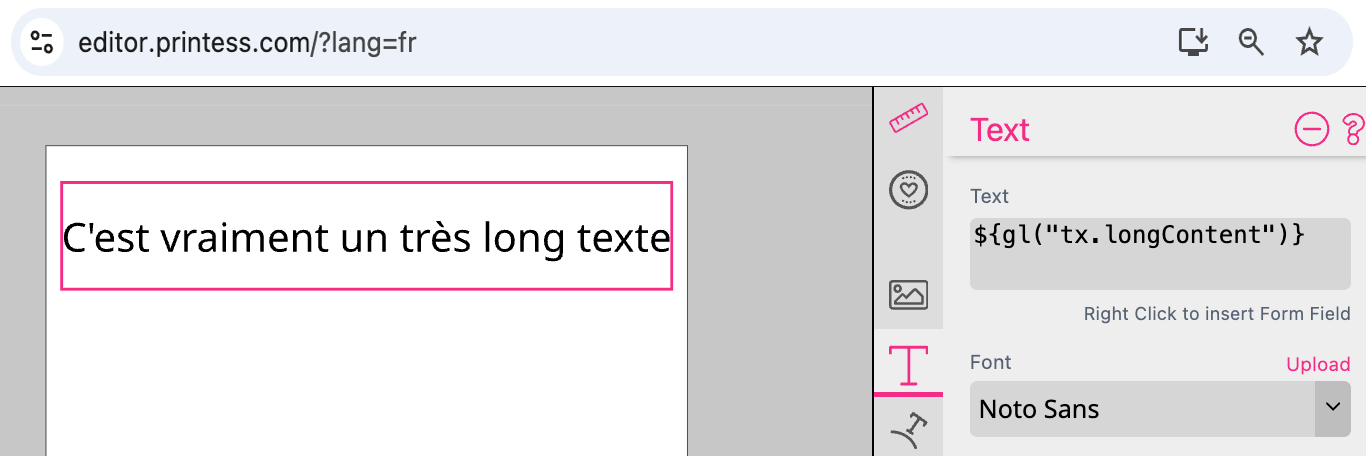
To assign the “Key” longContent of the “namespace” “tx”: to a Single Line Text Frame you have to use the following syntax:
${gl("tx.longContent")}
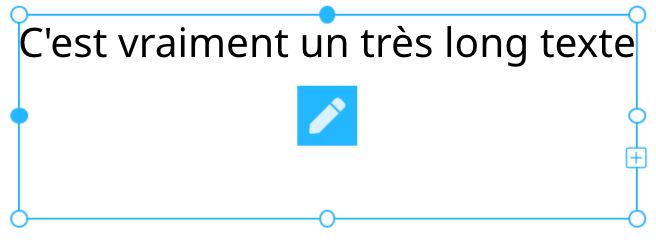
Just write it into the Text Field of the frame at the Text Tab at the Feature Panel. The text from the Translation Table will immediately be displayed in the Single Line Text Frame. Depending on the language set for the Editor.
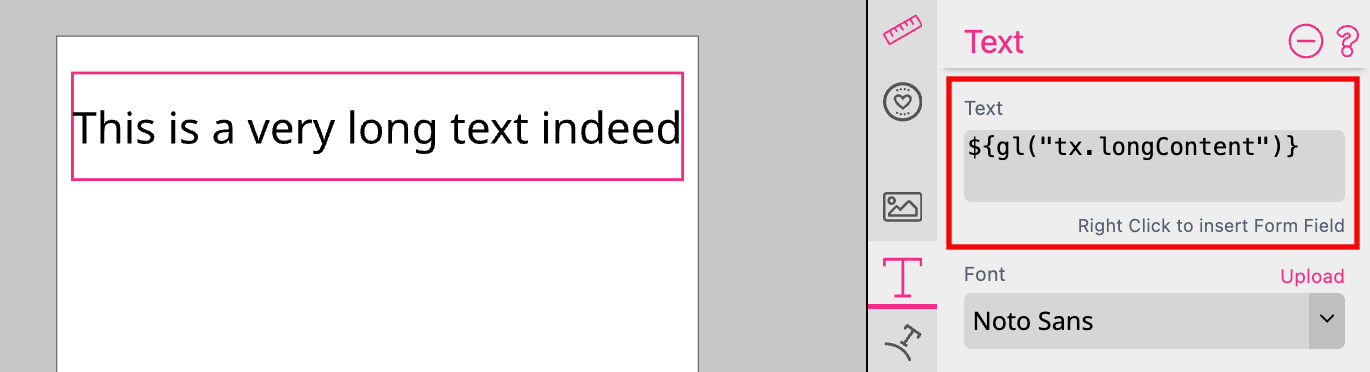
For testing you can now change the language of the Editor and the Buyer Side by adding"?lang=fr" to the URL for example. So the entire URL will look like: “https://editor.printess.com/?lang=fr”. And the text will be translated into French in this case.
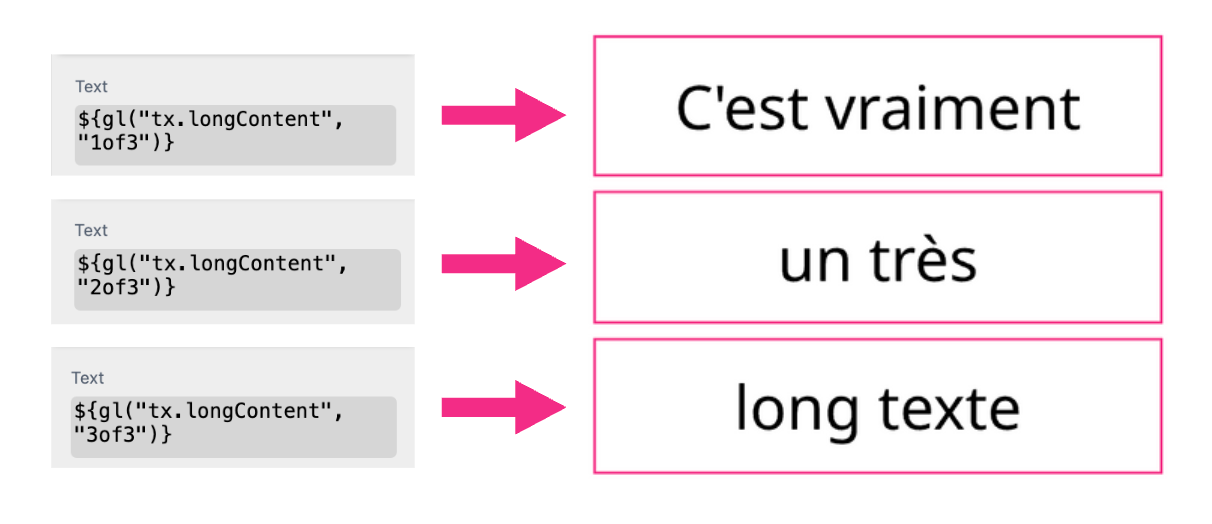
Longer texts can be distributed over up to nine individual Single Line Text Frames. The syntax must be supplemented for this.
In this example we want to distribute the text over three frames. So we define:
${gl("tx.longContent", "1of3")}
${gl("tx.longContent", "2of3")}
${gl("tx.longContent", "3of3")}
Click here to open an example document
This example is taking an UI message from the Translation Table to split into in several Single Line Text Frames.
Watch the video tutorial based on a Single line Text frame here
To make this work you have to enter the text for the respective language in the Translation Table first. This example is using the “Key” longContent in the “namespace” “tx”:. In the example it is set up for four languages: “de”, “en”, “es” and “fr”.
To assign the “Key” longContent of the “namespace” “tx”: to a Multi Line Text Frame you have to use the following syntax:
${gl("tx.longContent")}
Just write it into the Text Frame. The text from the Translation Table will be displayed in the Multi Line Text Frame as soon as you close the Edit Mode. Depending on the language set for the Editor.
For testing you can now change the language of the Editor and the Buyer Side by adding"?lang=fr" to the URL for example. So the entire URL will look like: “https://editor.printess.com/?lang=fr”. And the text will be translated into French in this case.
For Layout Snippets and Sticker Snippets you can define language filters so that will be displayed only if their language is matching the browser’s language.
Learn how to define a language filter for a Sticker Snippet here.
Learn how to define a language filter for a Layout Snippet here.